Has the earpiece speaker of your Samsung Galaxy S20 stopped working? Are you struggling to hear calls clearly or missing out on important notifications? There is nothing to worry about! Learn how to replace the earpiece speaker in your Samsung Galaxy S20 with our easy step-by-step guide, so you can enjoy clear sound once again.
The Samsung Galaxy S20 may experience earpiece speaker issues such as low or distorted sound, no sound at all, or inconsistent audio during phone calls. If you encounter these issues, it is recommended to check the volume settings and try restarting the device. If the problem persists, it may require an Earpiece Speaker Replacement.
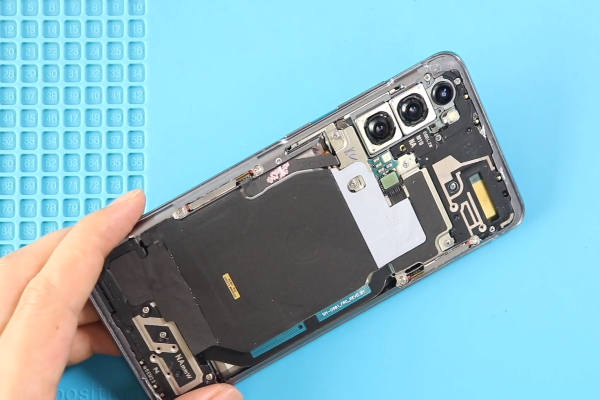
Here is a simple guide to Samsung Galaxy S20 Earpiece Speaker Replacement.
Step 1 Gather Necessary Equipment
To replace the earpiece speaker in a Samsung Galaxy S20, you will need the following tools:
- Screwdriver Set: This will include various small-sized screwdrivers to remove screws holding the device together.
- Plastic Opening Tools: These tools help in prying open the phone’s internal components without causing damage.
- Tweezers: Fine-tip tweezers are useful for handling small components and connectors.
- Suction Cup: A suction cup can be used to lift the back cover of the phone.
- A spudger or pry tool: This tool helps in disconnecting delicate connectors and cables without causing damage.
- Adhesive strips or adhesive glue: These are necessary to reattach components securely.
- Replacement earpiece speaker: Make sure to obtain a compatible replacement speaker specifically designed for the Samsung Galaxy S20
Step 2 Power Off The Phone


- The Samsung Galaxy S20’s power button is located on the right side.
- For a few seconds, Press and hold it until a menu appears.
- Select the “Power off” option.
Step 3 Eject The SIM Card


- Find the small hole on the top of your phone near the SIM card slot.
- Hold the SIM ejecting tool or a small pin and insert it into the hole.
- Push the tool or pin into the hole until you feel a slight resistance.
- Apply a little pressure and the SIM tray should pop out partially or fully from the phone.
- Carefully pull out the SIM tray from the phone using your fingers.
Step 4 Heat The Phone Edges

- Use a heat gun or hair dryer to heat the back four edges of the smartphone for at least 3 minutes, as it makes the adhesives soft all around the four edges.
- It becomes to cut the adhesives after heating.
- Keep in mind, too much heat can damage your Samsung S20.
Step 5 Remove Adhesive Glue At The Bottom Side


- Place a suction cup on the lower side of the phone and pull it slowly. A gap will appear between the back cover and the phone frame.
- Quickly insert a plastic pick of 5 mm size into the gap.
- Then slide the plastic pick from one lower corner to the other. This movement will cut adhesives on the lower side.
Step 6 Heat And Remove Left Side Adhesives


- Begin from the lower left corner of the phone.
- Take a thin pick and carefully insert it between the back frame and the phone’s body.
- Move the pick from the lower left corner to the upper left corner, applying gentle pressure. Keep in mind the rear cameras are in the top left corner, so do not apply too much force in the top left corner.
- Repeat this motion back and forth 3 to 4 times, ensuring the pick separates the adhesive as you go.
Step 7 Cut The Upper Edge Adhesives


- Start from the upper left corner of the phone.
- Gently slide it between the back frame and the phone’s body.
- Move the pick from the upper left corner to the upper right corner, maintaining a steady but gentle pressure.
- Repeat this sliding motion with the pick 3 times, ensuring it effectively cuts through the adhesive glues.
Step 8 Slice Adhesives On The Right Side


- Continue the sliding movement from the upper right corner of the phone to the lower right corner.
- Repeat this sliding motion along the right side of the phone until the adhesive glue is removed.
- If you encounter difficulty in cutting the adhesive, you can apply heat to the device again for 2 to 3 minutes.
Step 9 Take Off The Back Cover


- Gently grip the edges of the back cover of your Samsung Galaxy s20 with your fingers.
- Slowly and carefully pull the back cover upward, away from the frame of the phone.
- As you pull, you will feel the back cover separating from the phone’s frame.
- Once the back cover is completely separated, set it aside in a safe place.
Step 10 Unfasten The Motherboard Bracket


- Grab a Phillips screwdriver that fits the size of the screws.
- Use the screwdriver to carefully unscrew and remove the five screws 4 mm long that secure the Motherboard Bracket to the phone frame.
- As you remove each screw, make sure to keep them in a safe place so you don’t lose them.
Step 11 Disconnect The Wireless Charging Coil


- Locate the wireless charging coil, which is usually positioned inside the left side of the Samsung Galaxy s20.
- Take a plastic tool or spudger and gently lift the wireless charging coil by applying light upward pressure.
- Use moderate force to unclip the wireless charging coil from its connectors.
Step 12 Remove The Wireless Charging Coil


- Use a pair of tweezers or your fingers to grip the wireless charging coil firmly but gently.
- Slowly and carefully pull up the wireless charging coil, applying gentle and even pressure to peel it off.
Step 13 Disconnect The Battery


- Locate the battery press connector.
- Take a spudger with a pointed edge and carefully insert it under the battery connector press.
- Gently lift the spudger to unclip the battery connector press.
Step 14 Unclip The Flex Cables


- Insert the pointed or flat edge of the spudger under the flex cables. Apply light upward pressure to pull up and disconnect the flex cables from their connectors.
Step 15 Disconnect The Display cable


- Softly grip the sides of the connector with your fingers, or use a spudger to carefully lift the connector of the display cable to unclip it.
Step 16 Unfasten And Remove The Upper Mid-Frame


- Unscrew the four 4 mm-long screws of the upper mid-frame of the Samsung Galaxy S20 with a Phillips screwdriver.
- Once all the screws are removed or clips unfastened, carefully lift and remove the upper frame from the rest of the phone.
Step 17 Disconnect The Side Cable


- Take a spudger, which is a tool with a flat or pointed end.
- Gently insert the spudger under the side button flex cable.
- Carefully pry up the flex cable to disconnect it from the motherboard.
Step 18 Disconnect The Front Camera


- With the help of a spudger pry up and disconnect the front camera.
- Then remove it from the frame and keep it aside at a safe place.
Step 19 Disconnect The Front Facing Sensor Array


- The Front facing sensor is placed near the front camera. Use a pry tool to push up and unclip it.
Step 20 Remove The Motherboard Assembly


- Two screws of different sizes have secured the Samsung S20 motherboard.
- One screw is 3 mm long and the other is 4 mm long. Unscrew these with the help of a screwdriver.
- With the help of a blunt nose tweezers or fingers, push up the motherboard assembly and separate it from the phone.
Step 21 Remove The Faulty Earpiece Speaker


Take the help of a pair of tweezers to pull up the Earpiece Speaker of the Samsung S20 from its recess. Remove the faulty earpiece speaker. Replace it with a new and perfectly working earpiece speaker. Once the new speaker is in place, it’s time to put your phone back together. Follow the steps in reverse order, starting with reattaching the rear housing and tightening the screws. Apply high-quality adhesives all around the four corners of the back cover. Then, snap the rear cover back onto the phone until it clicks into place.
Power on your Samsung Galaxy S20 and make a test call to ensure the earpiece speaker is functioning properly. Adjust the volume to a comfortable level and listen for clear sound. Congratulations! You have successfully replaced the earpiece speaker in your Samsung Galaxy S20. Now, you can enjoy uninterrupted phone calls and notifications without any sound issues.
Admin


