With our easy-to-follow guide for Samsung Galaxy S21 Charging Port And USB-C Port Replacement, you can replace your damaged Samsung Galaxy S21 Charging Port. We will provide easy step-by-step instructions with images so that even a person with minimum technical skills can replace Samsung Galaxy S21 USB-C Port.
Besides the convenience of using the Samsung Galaxy S21, your Samsung Galaxy S21 charging port may not work properly. If you find yourself in such a terrible situation, don’t panic. Grab the necessary tools and replace your S21 USB charging port by yourself easily in just one hour with our proper guide to Samsung Galaxy S21 charging port and USB-C port replacement
Explore the best solution for your damaged Samsung Galaxy S21 Charging Port And USB-C Port with us.
Reasons Why Your Samsung Galaxy S21 Charging Port Is Not Working
Your Samsung Galaxy S21 is most likely not charging because of these possible reasons:
- The software on your phone is preventing it from charging.
- The damaged Charger or Lightning Cable.
- The broken adapter.
- Your charging port is damaged or has anything blocking the connection.
What To Do Before Samsung Galaxy S21 Charging Port Replacement
Your Samsung S21 charging port is not working properly. What can you do in this situation? There are a few things you should attempt before repairing the charging port.
- Clean the Charging Port
A small amount of dust might cause a significant issue. First, ensure that your port is clean.
- Restart Your S21
Sometimes your charging problems are caused by software issues. Most of these issues can be fixed by restarting your phone.
Step-by-step Guide For Samsung Galaxy S21 Charging Port Replacement
Even after trying everything, your Samsung Galaxy S21 charging port is still not working. Then it’s a sign that you need to replace it. Our step-by-step guide provides you with detailed instructions to perform Samsung Galaxy S21 charging port replacement.
Step 1 – Gather The Required Tools And Supplies
The first step is to gather the necessary tools and supplies. Here are the tools for the Samsung Galaxy S21 charging port replacement.
- Hair dryer or heat gun
- Phillips screwdriver
- A plastic pick
- Spudger
- Tweezers
- Suction cup
- SIM Ejecting pin
- Adhesive glue
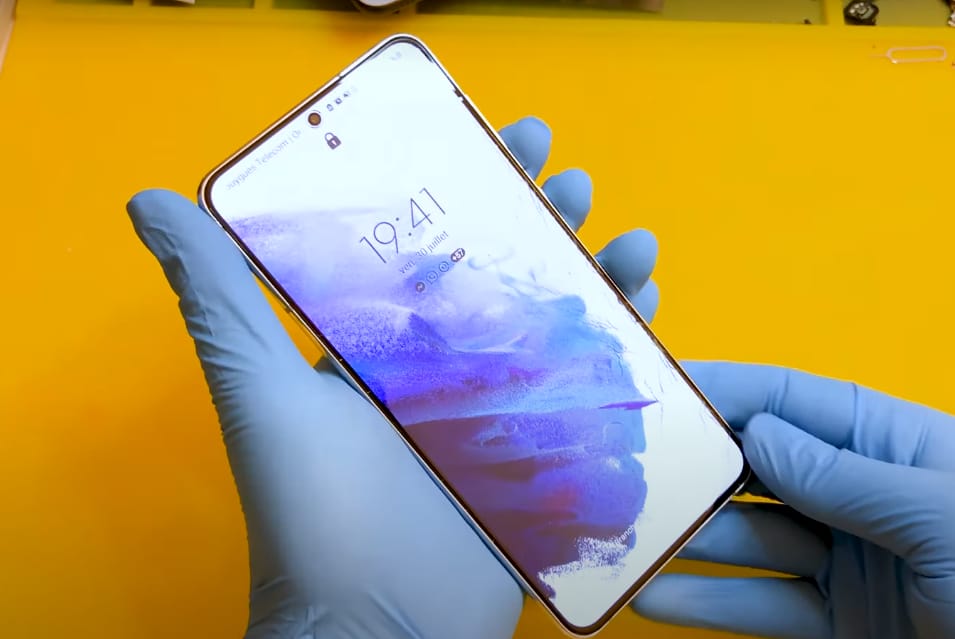
Step 2 – Switch Off The S21
- Press and hold the side button to power off the phone. A menu will appear on the screen. Select the power off option to proceed.
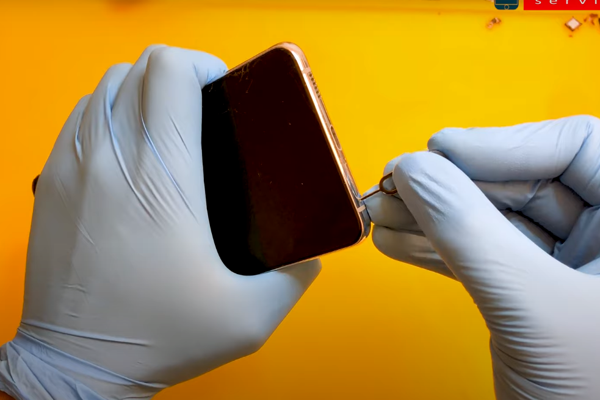
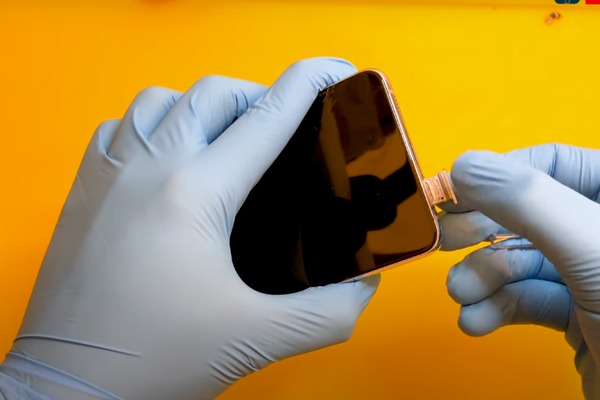
Step 3 – Eject SIM Tray
- Insert the SIM ejecting tool into the hole located near the SIM tray.
- Once the SIM tray is out of the phone’s frame, use your fingers to remove the SIM Tray.
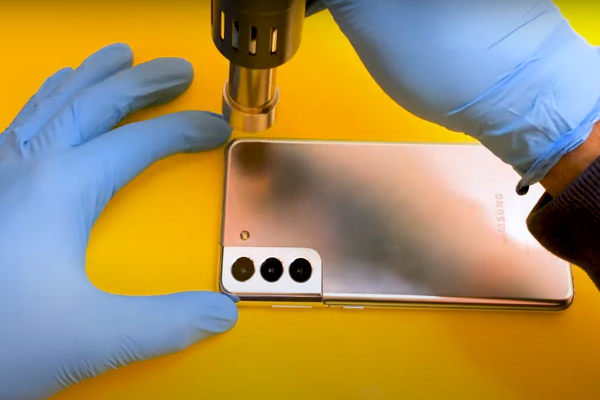
Step 4 – Heat The Samsung S21 Corners
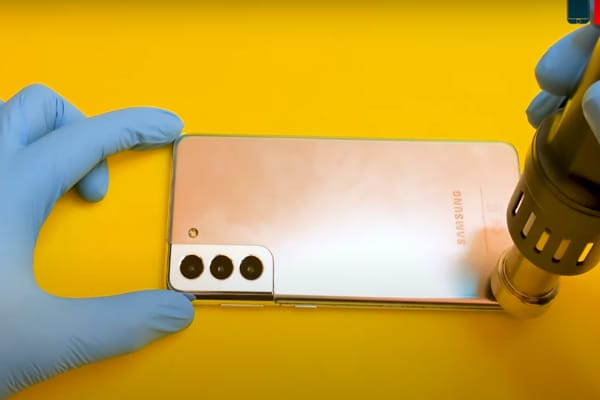
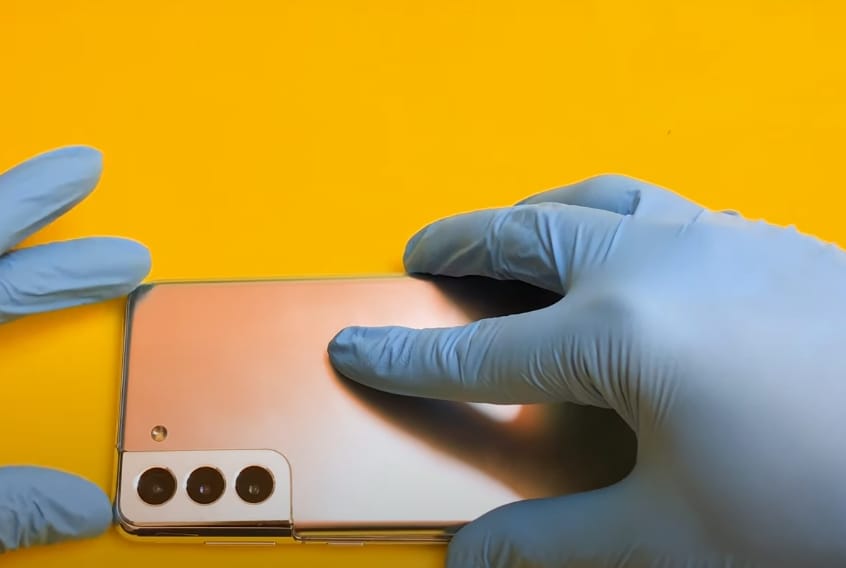
- There is strong adhesive glue all around the four edges of the backside. If your S21 is never exposed to any repair, then you have to heat the phone corners for at least 3 to 5 minutes.
- Heat the edges to soften the glue. When the glue is soft, you can easily cut it off from all four sides.
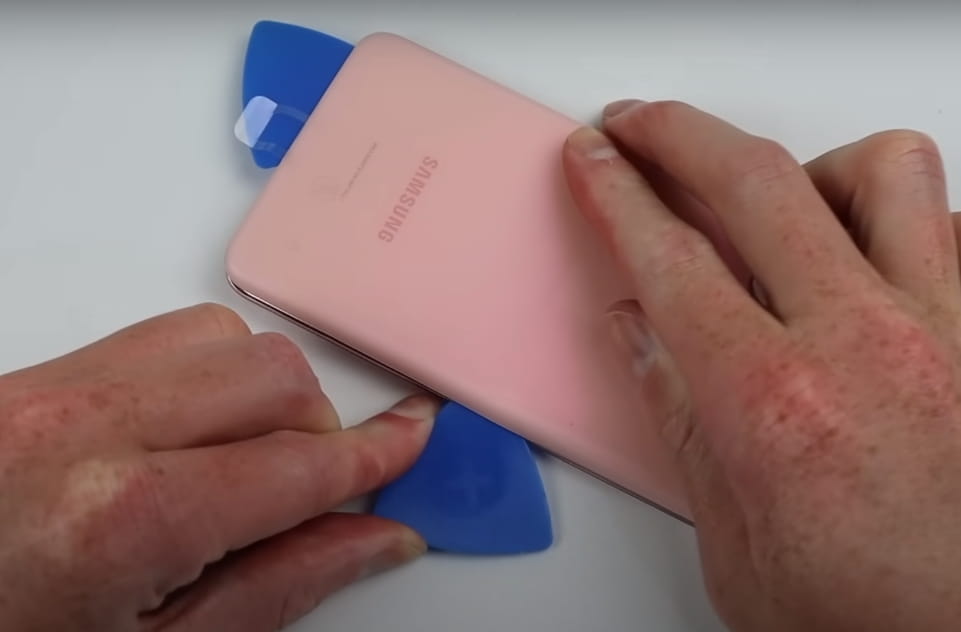
Step 5 – Separate The Bottom Of the S21 Back Cover
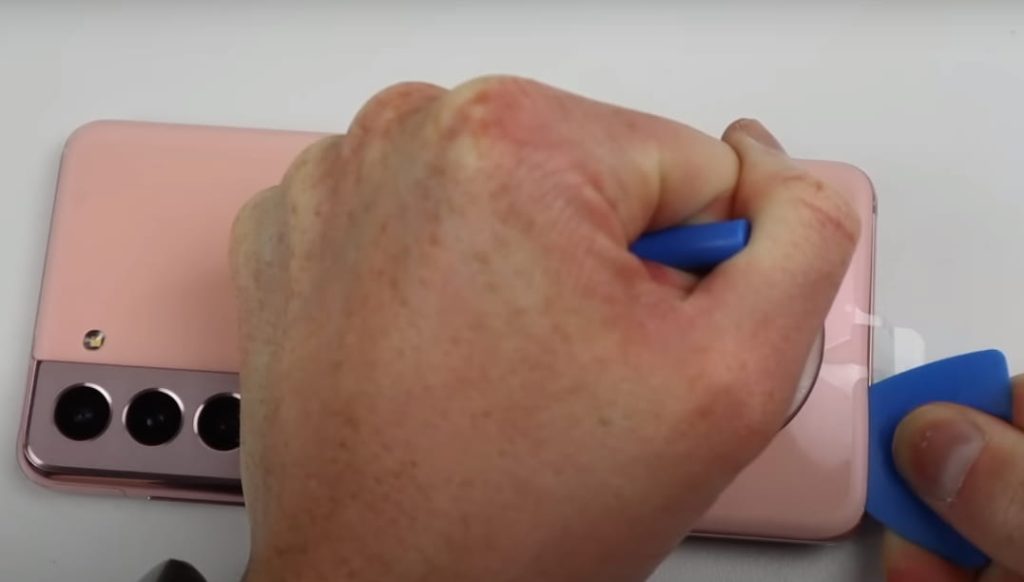
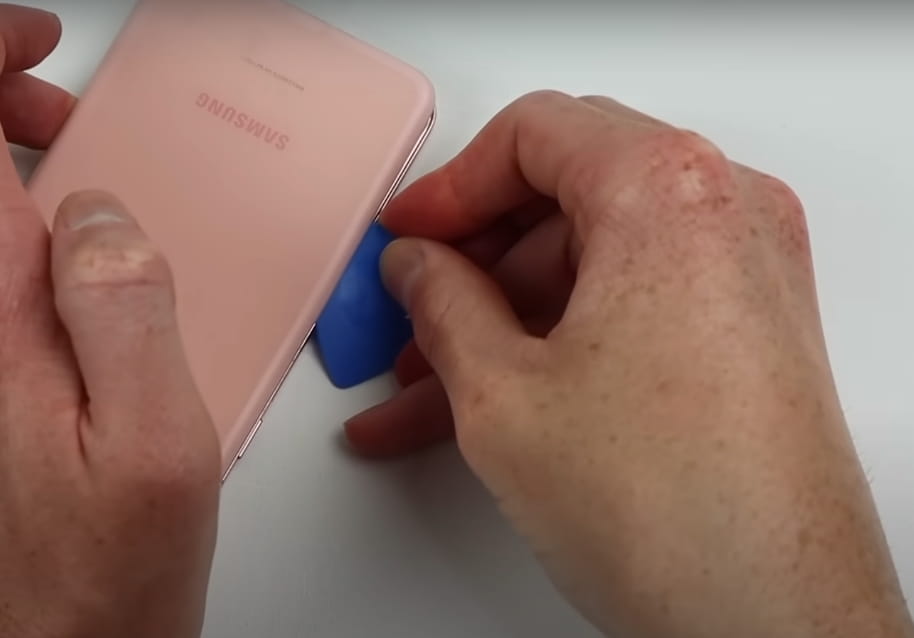
- Begin by using a suction cup to gently pull the back cover away from the phone frame, creating a gap between the two components.
- Take a plastic pick with a size of 5 mm and carefully insert it into the gap that has been formed.
- Gradually slide the plastic pick from one lower corner of the phone to the opposite lower corner, using it to cut through the adhesives that are securing the back cover in place.
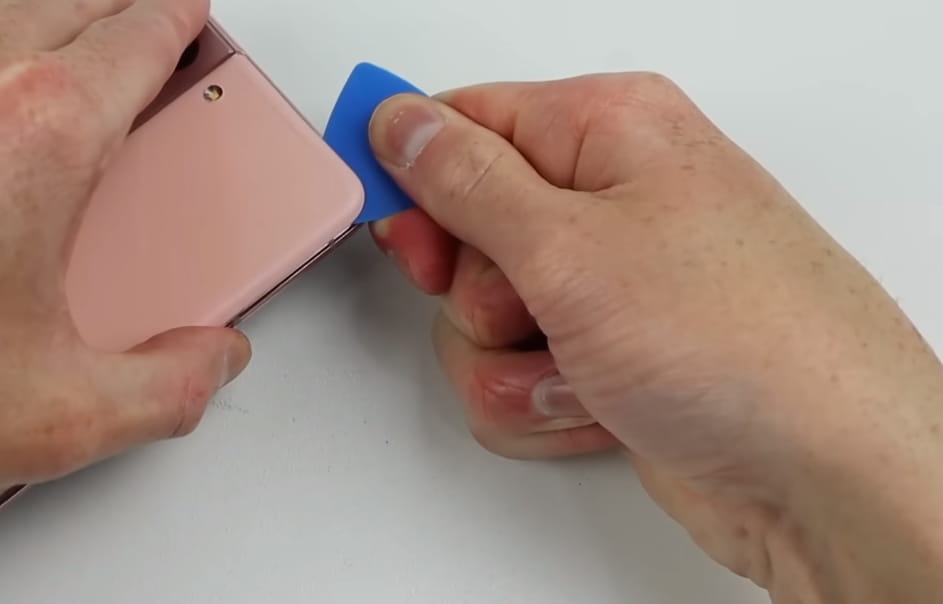
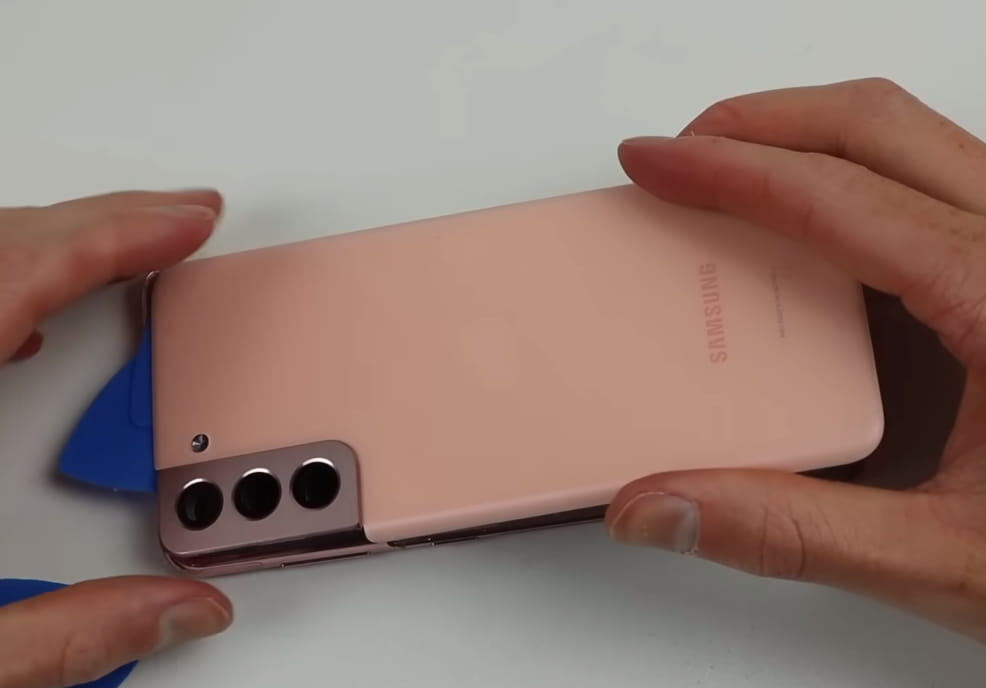
Step 6 – Slice Left Side Glue
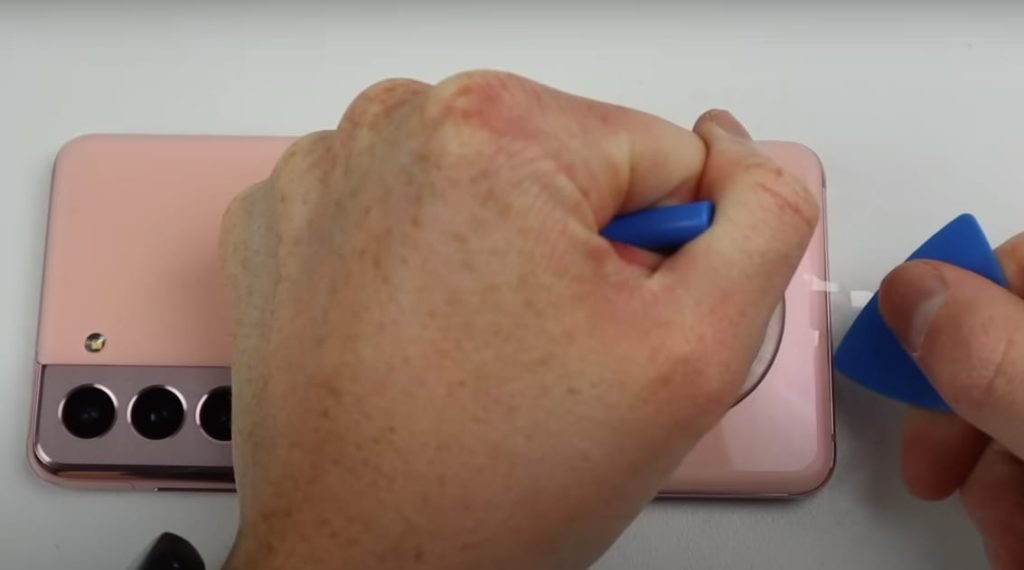
- Starting from the lower left corner, take the plastic pick and gently move it towards the upper left corner, repeating this motion a total of 3 to 4 times.
- By doing so, you will effectively remove all the adhesives present on the left side, loosening the grip of the back cover.
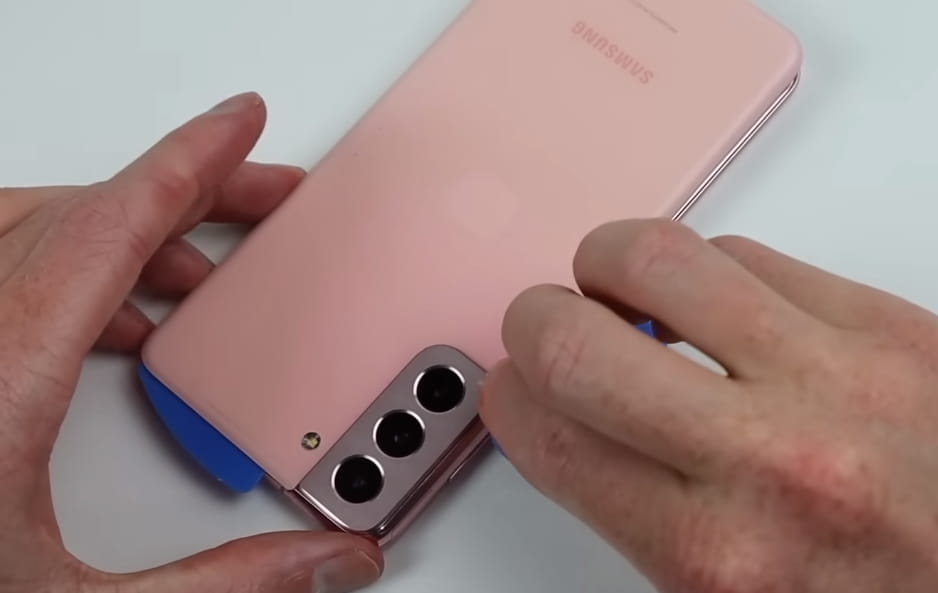
Step 7 – Remove The Upper Side Glue
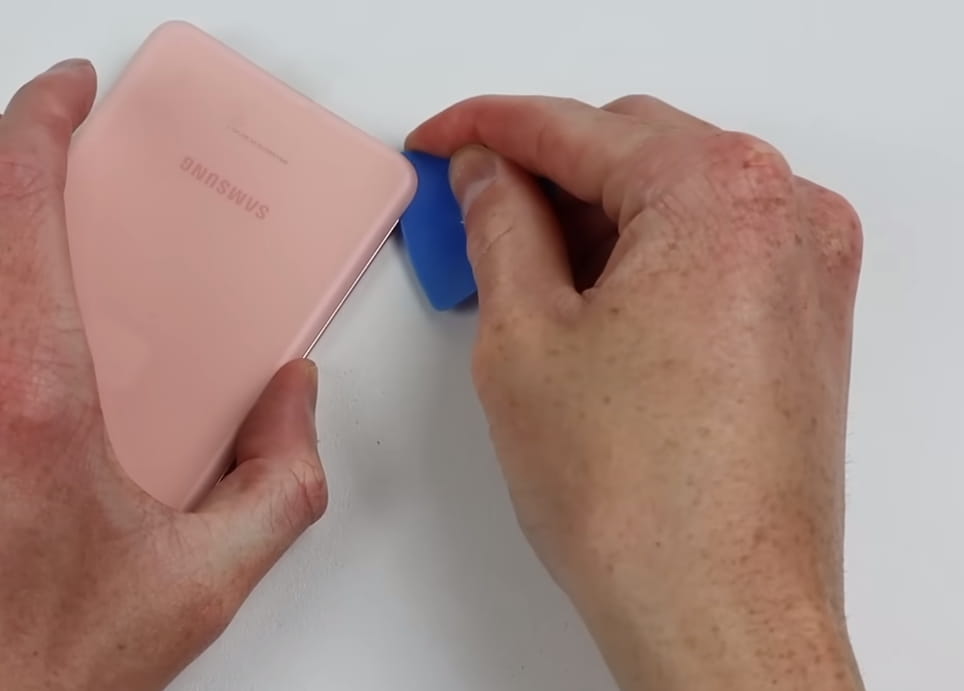
- To detach the adhesive glues from the upper corner, slide the plastic pick from the upper left corner towards the upper right corner.
- Repeat this sliding motion with the pick a total of 3 times.
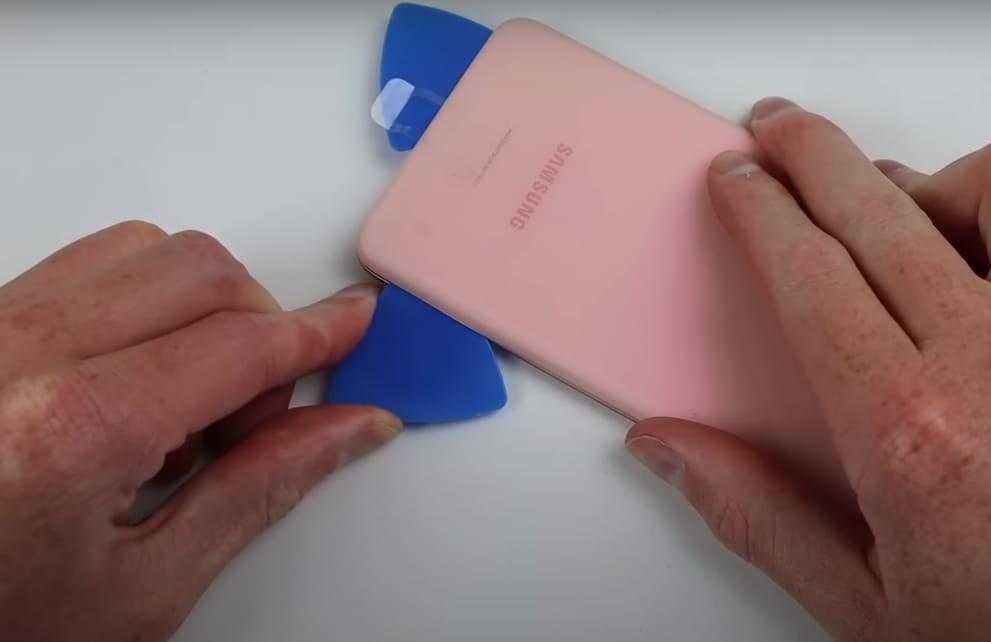
Step 8 – Cut Off Right Side Adhesive
- Continuously slide the plastic pick from the upper right corner toward the lower right corner of the phone.
- This sliding motion helps to remove the glue from all four sides of the phone.
- If you encounter difficulty in cutting through the glue, it is advisable to heat the device once again for a duration of 2 to 3 minutes.
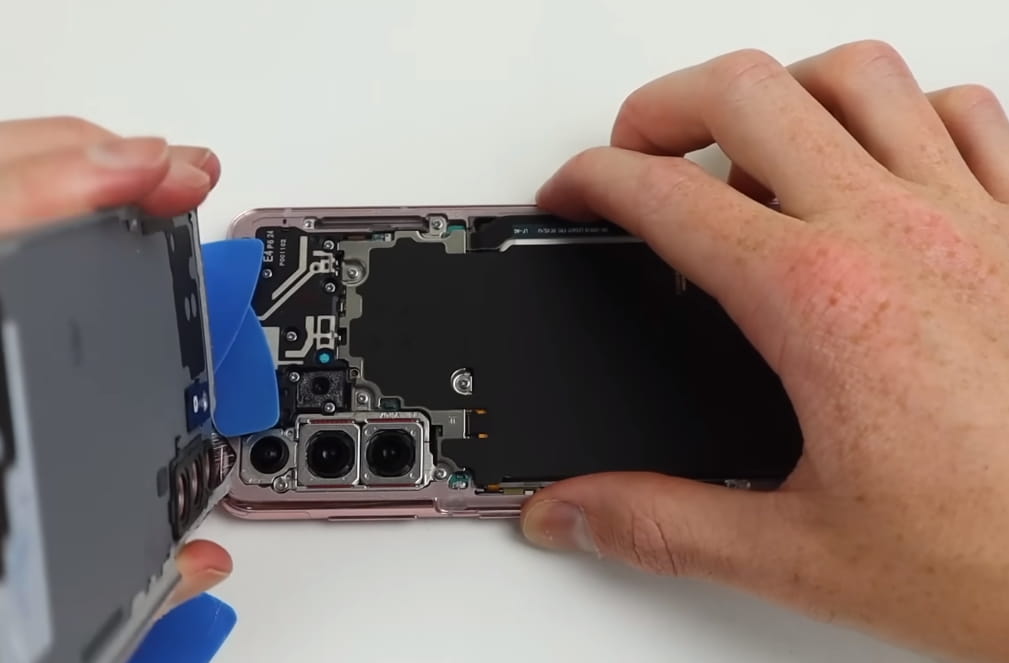
Step 9 – Remove Samsung Galaxy S21 Back Lid
- Once the glue has been cut from all sides of the Samsung Galaxy S21, carefully use your fingers to gently pull the back cover upwards.
- As you pull, you will notice that the back cover starts to separate from the frame of the phone.
- Once the back cover is fully separated, make sure to keep it in a safe place to avoid any damage or loss.
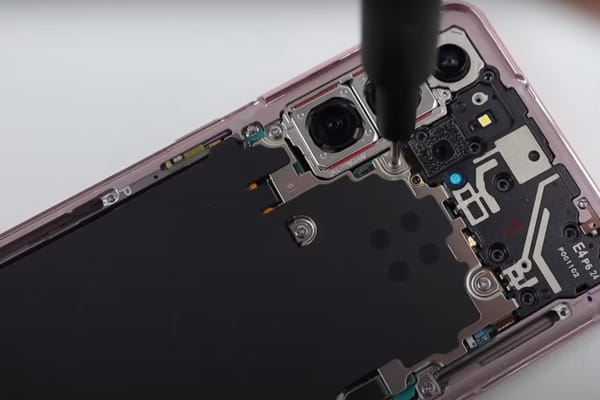
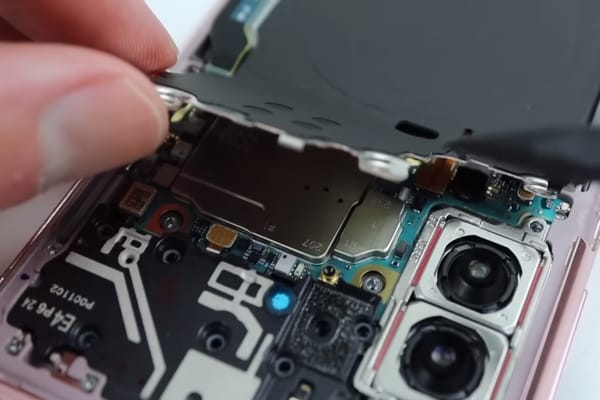
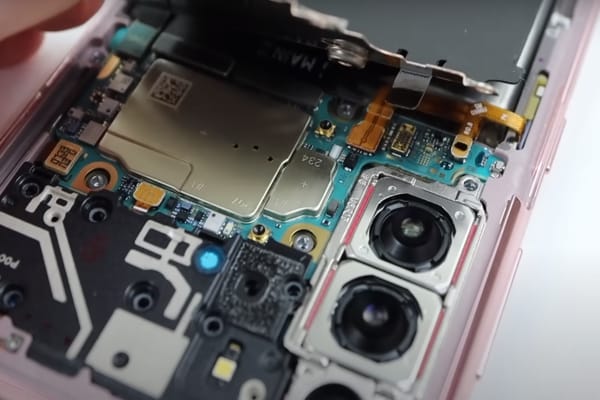
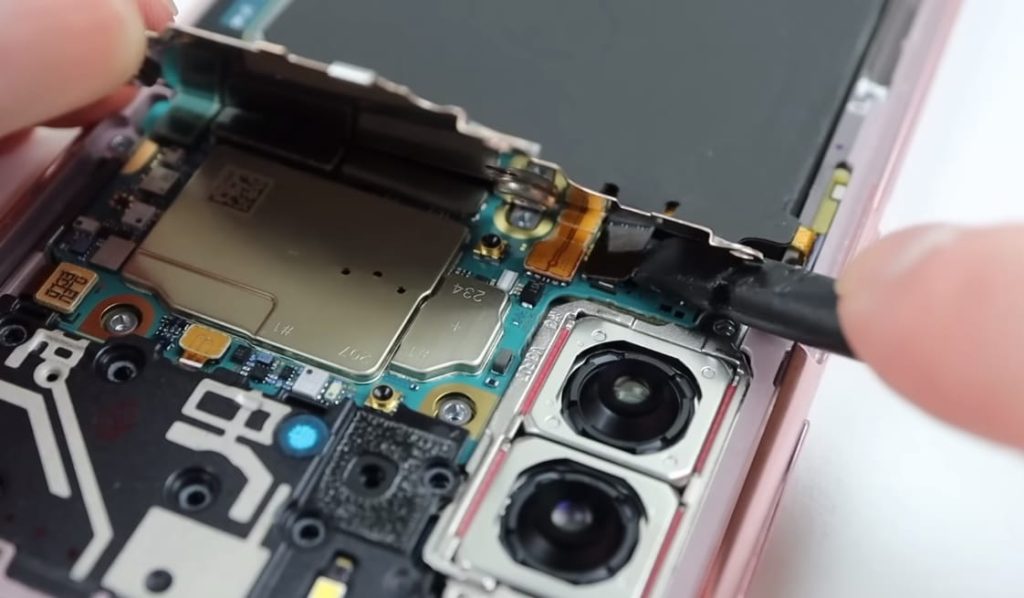
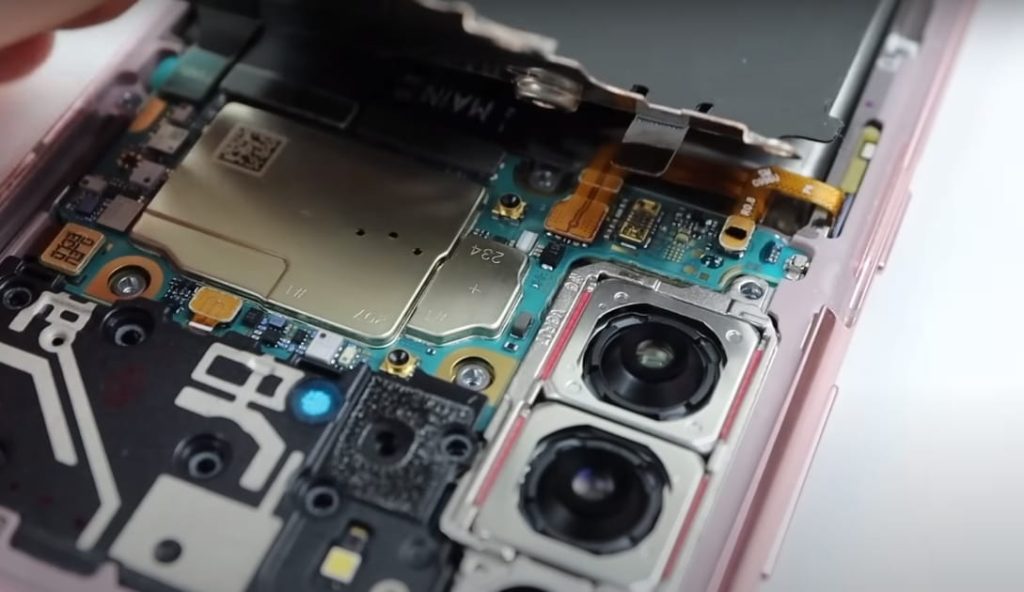
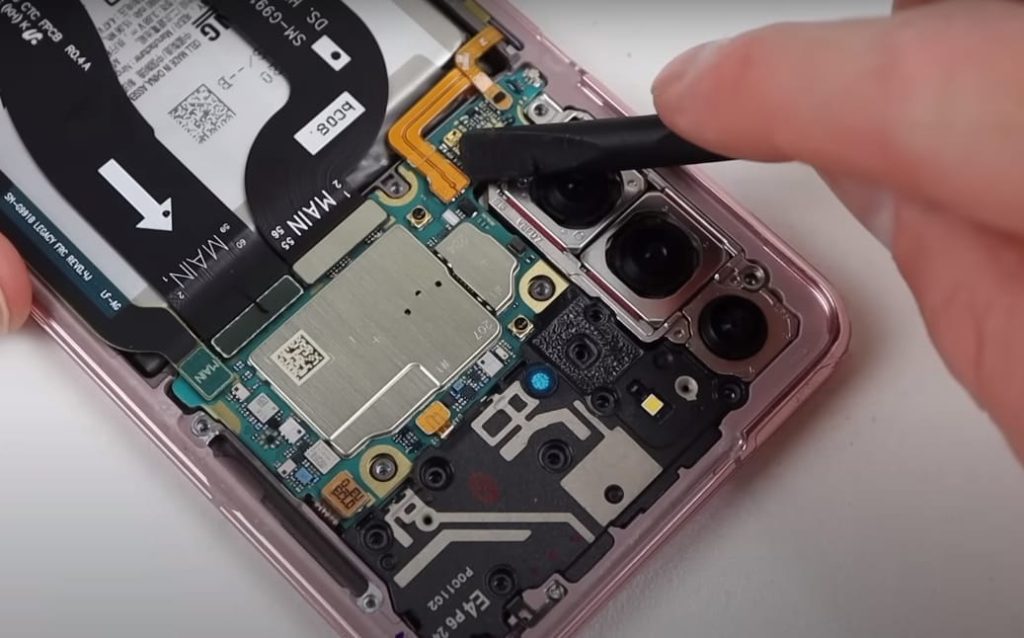
Step 10 – Unscrew and unclip The S21 Motherboard Bracket
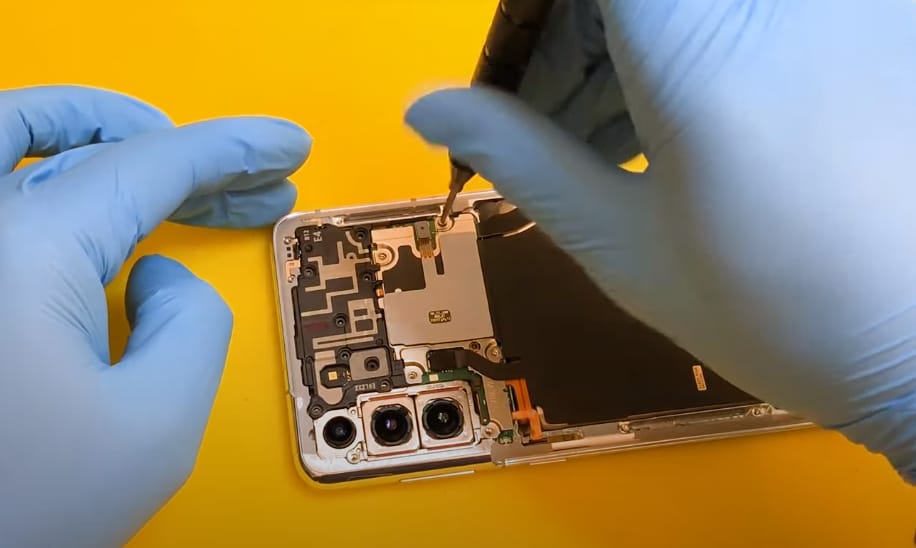
- Grab a Phillips screwdriver and locate the five screws that are holding the S21 Motherboard bracket in place. These screws are typically 4 mm in length.
- Hold the motherboard bracket in your fingers or tweezers.
- With a gentle pulling motion, apply slight pressure to release the clips securing the motherboard bracket to the frame.
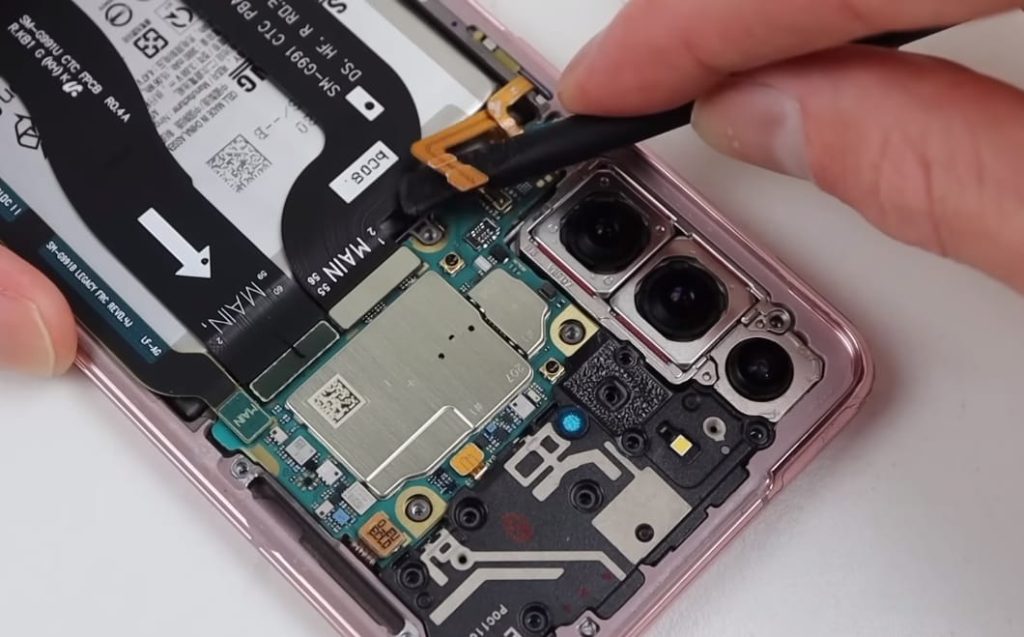
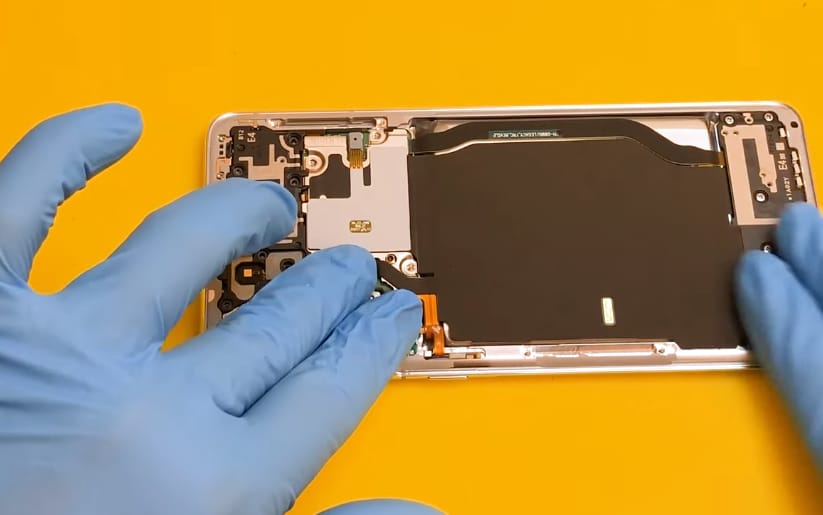
Step 11 – Disconnect The Wireless Charging Coil
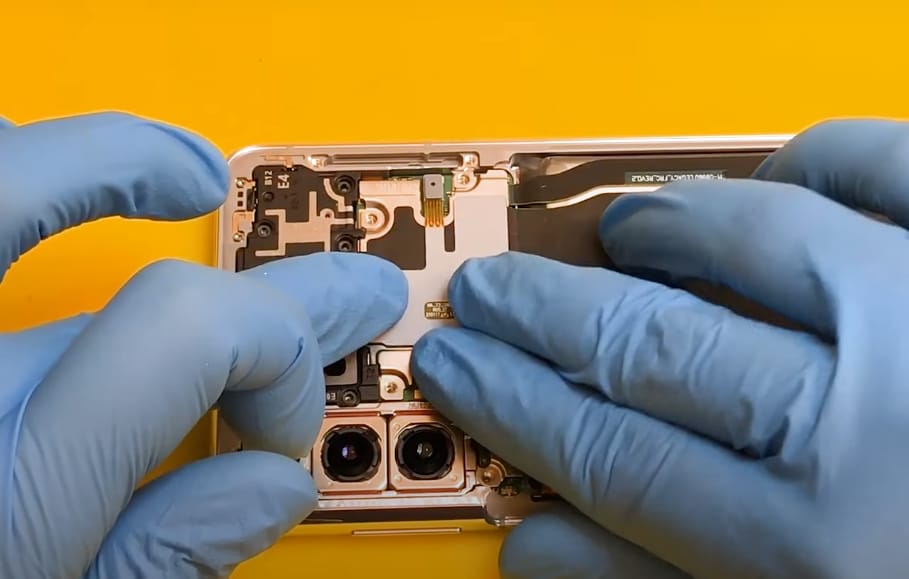
- Gently pull up the motherboard bracket. Use a spudger to pry up and disconnect the press connector of the Samsung S21 wireless charging coil.
Step 12 – Disconnect The Battery Connector
- Lift the motherboard bracket with the help of your fingers or a pair of tweezers.
- While holding up, take a spudger and carefully insert it under the battery press connector.
- Apply gentle pressure with the spudger to pry up the battery press connector.
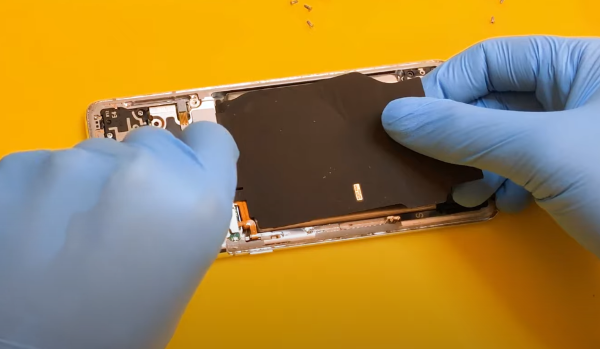
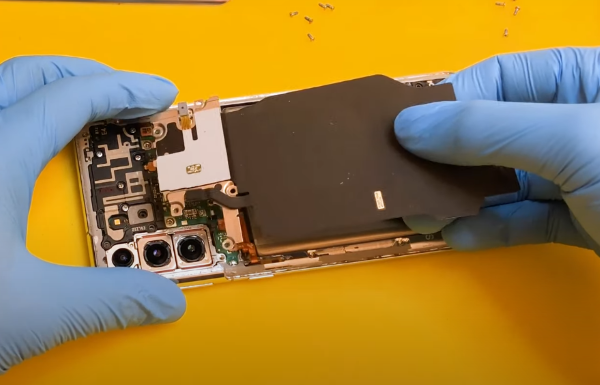
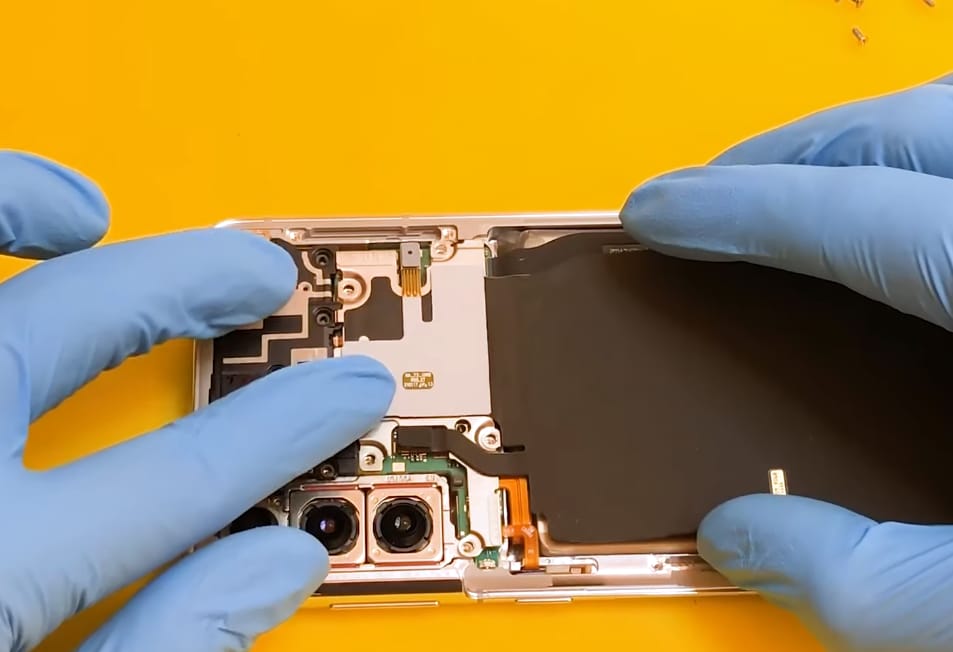
Step 13 – Remove the Wireless Charging Coil
- Remove the wireless charging coil by peeling it off gently with your fingers or tweezers.
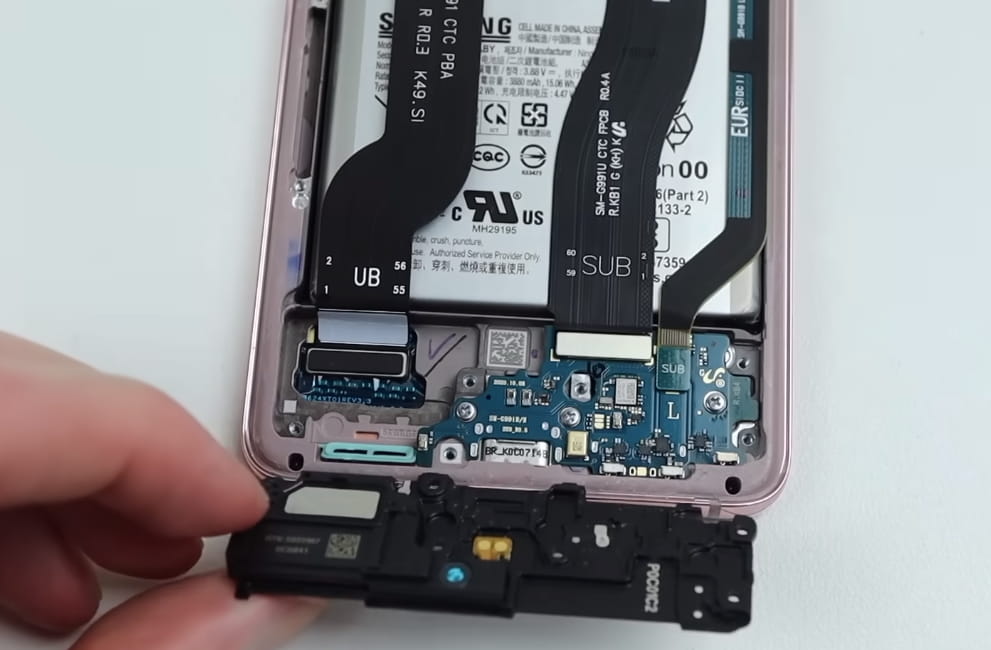
- Now use the pointed edge of a spudger to pull up and separate the loudspeaker.
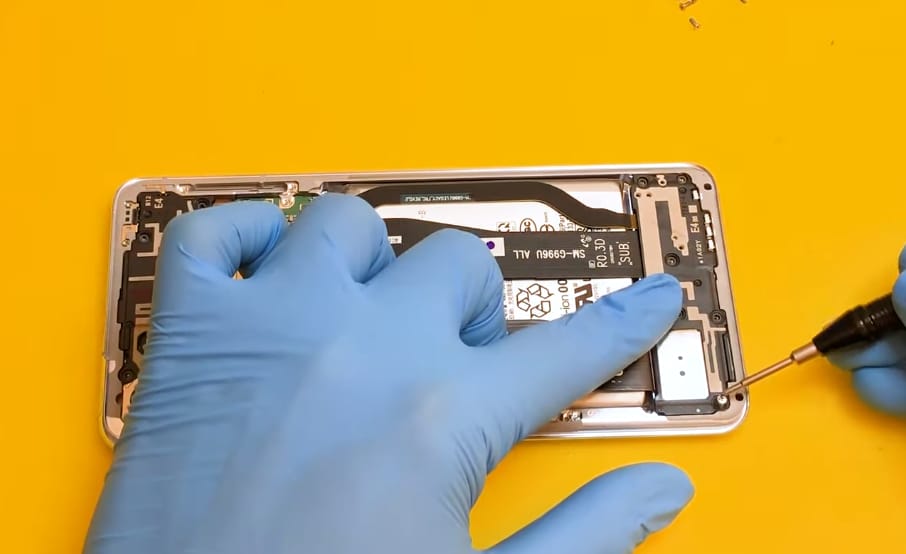
Step 14 – Unscrew And Remove The Loudspeaker
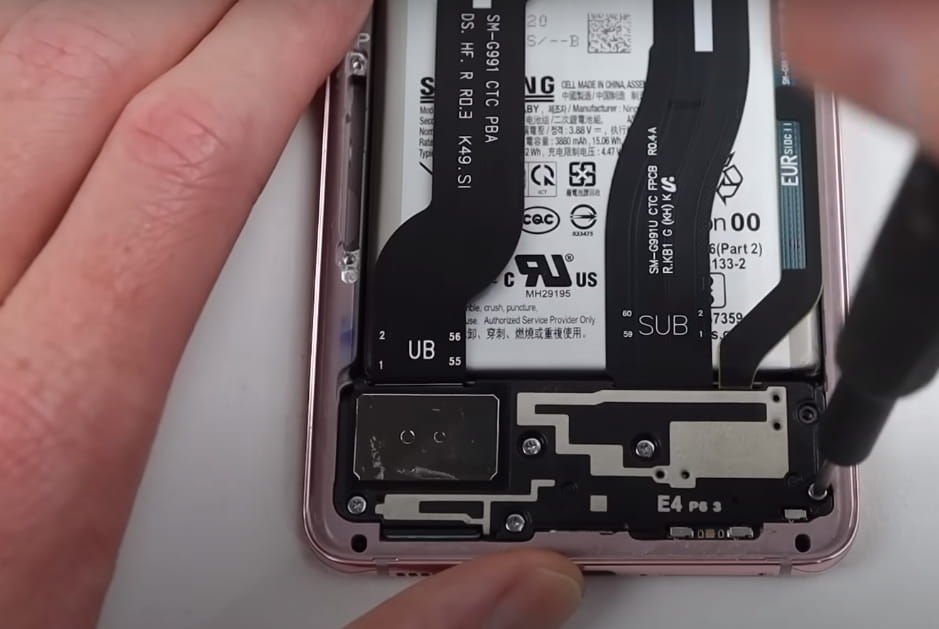
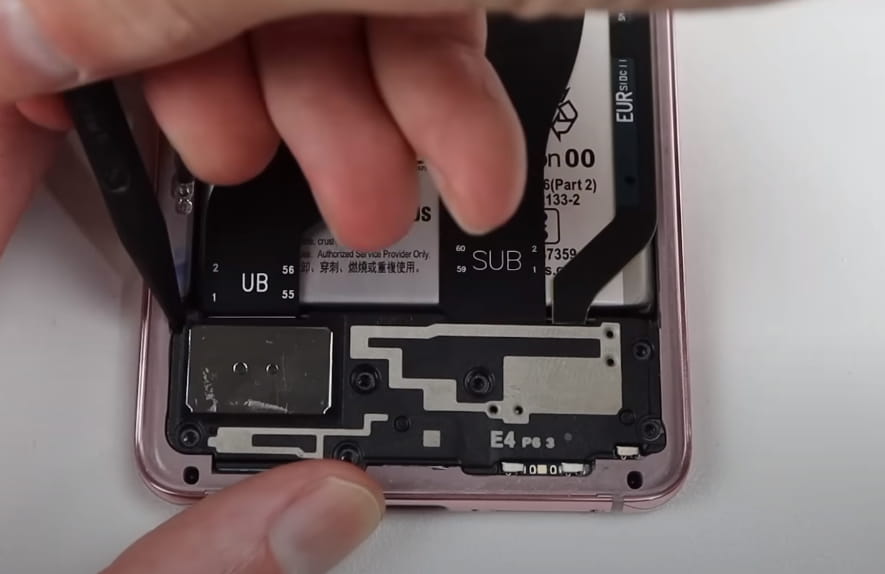
- Six screws are securing the loudspeaker of S21 to the frame. These screws are typically 4 mm in length and require a Phillips screwdriver for removal.
- Using the Phillips screwdriver, carefully unscrew and remove each of the six screws.
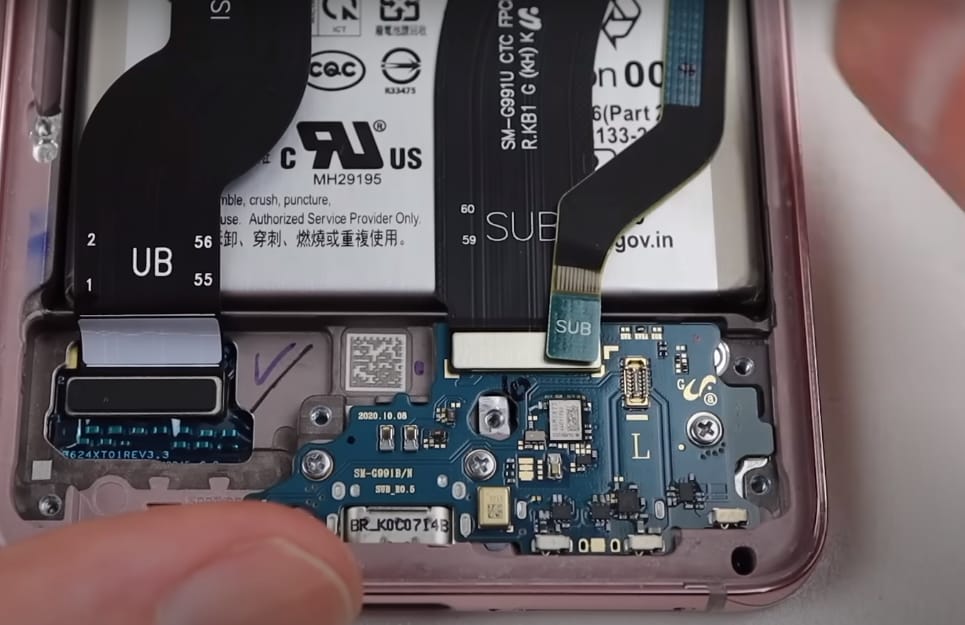
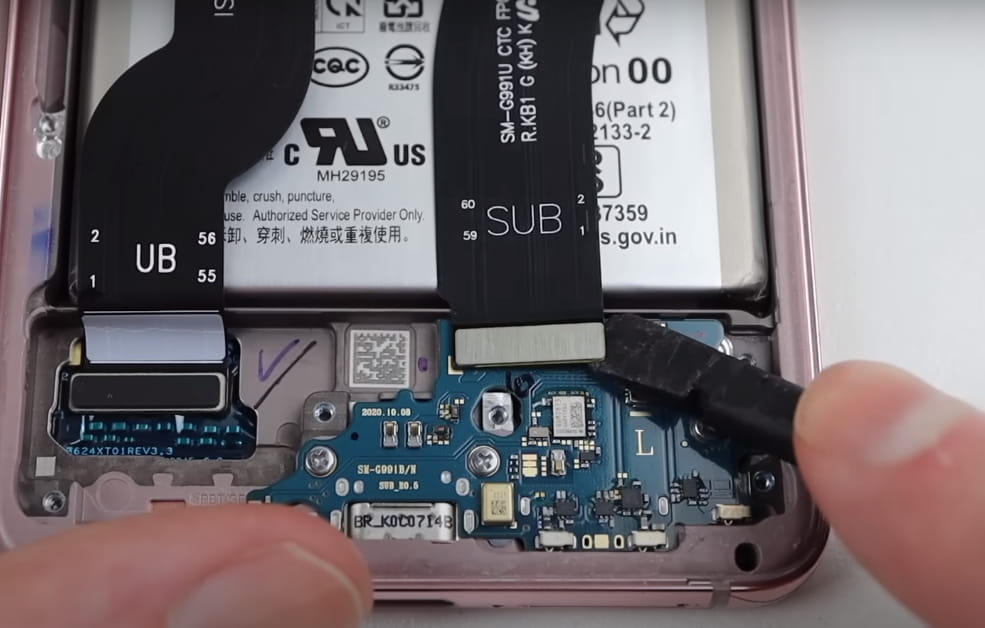
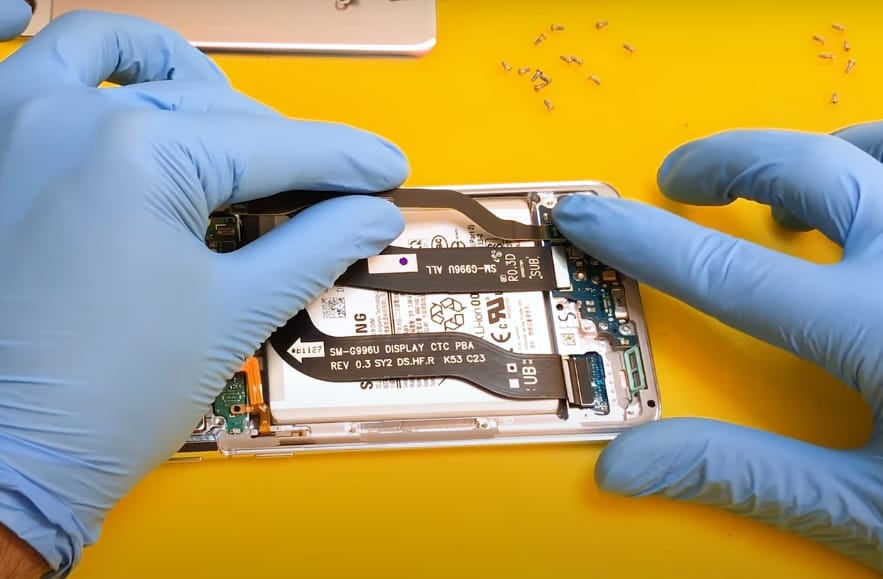
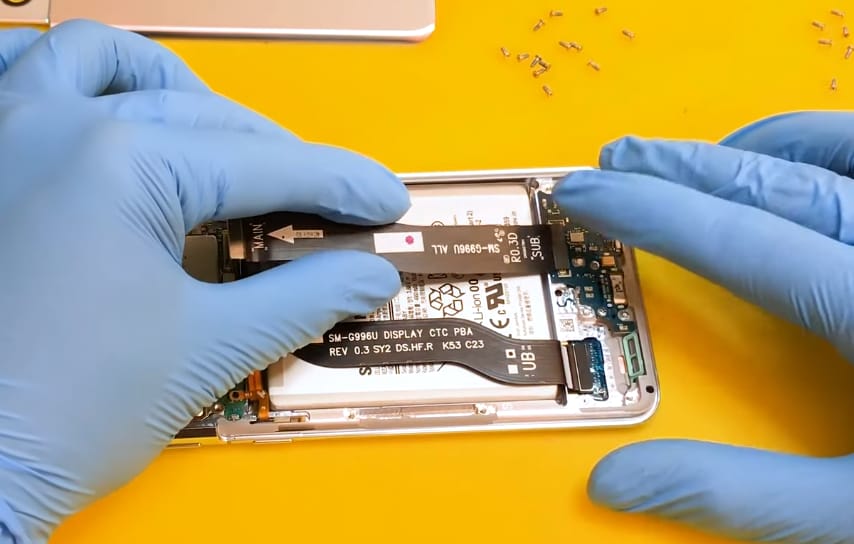
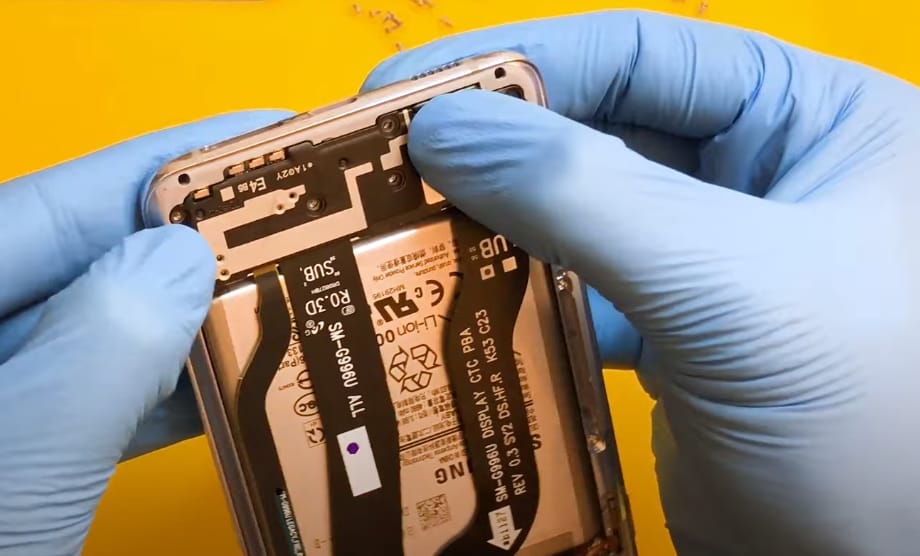
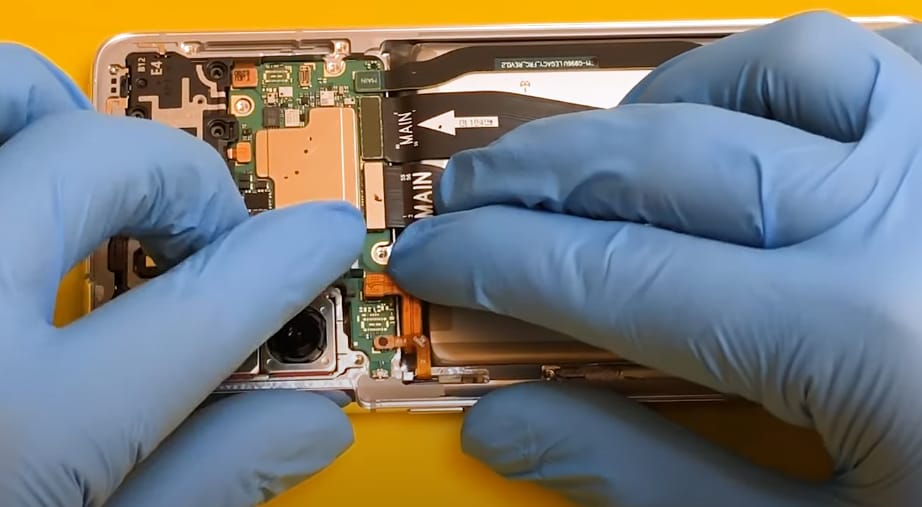
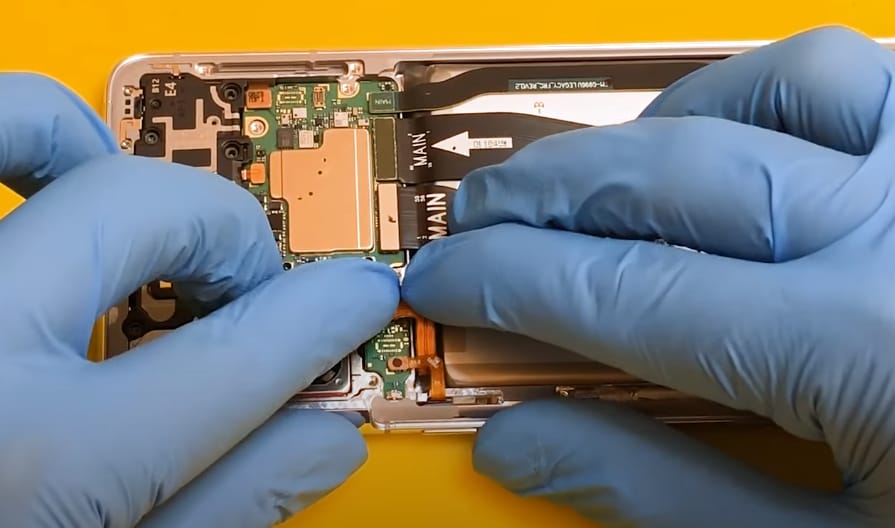
Step 15 – Disconnect The Primary and Secondary Flex Cables
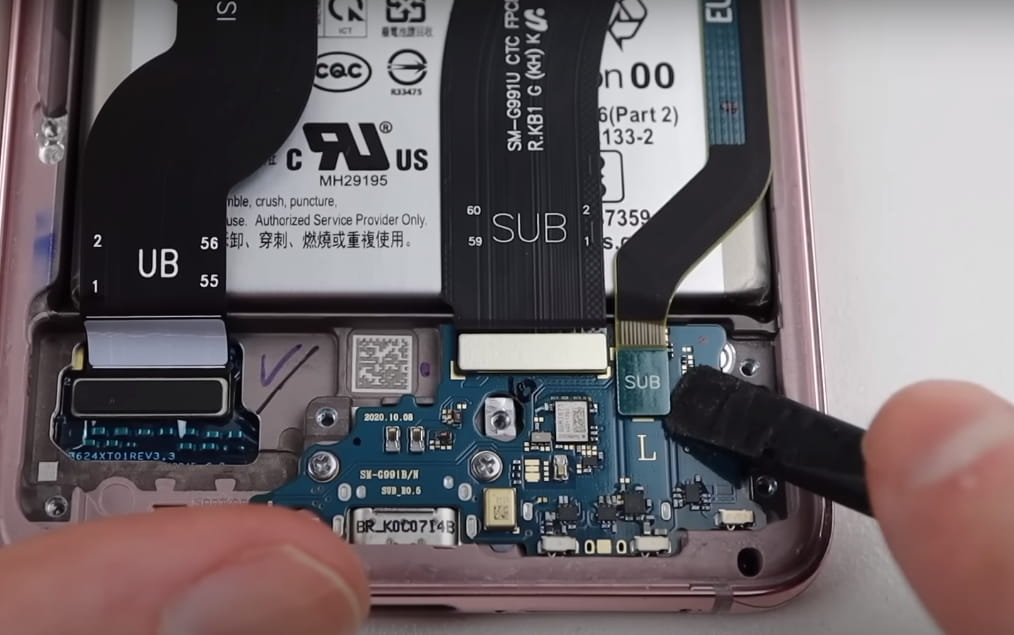
- Use the flat edge of a spudger to unclip the primary and secondary flex cables of the Samsung S21.
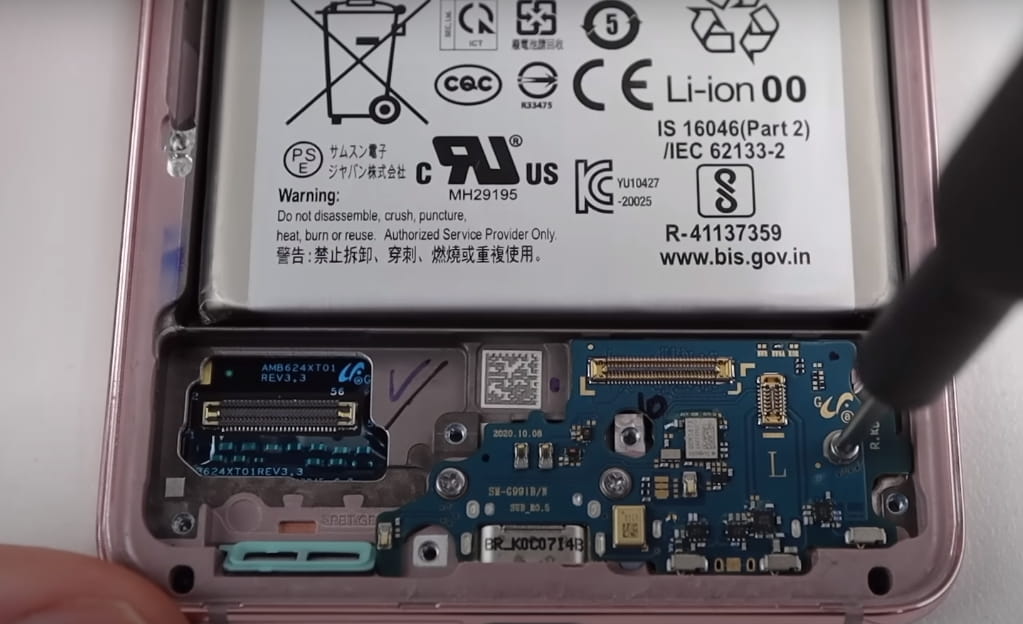
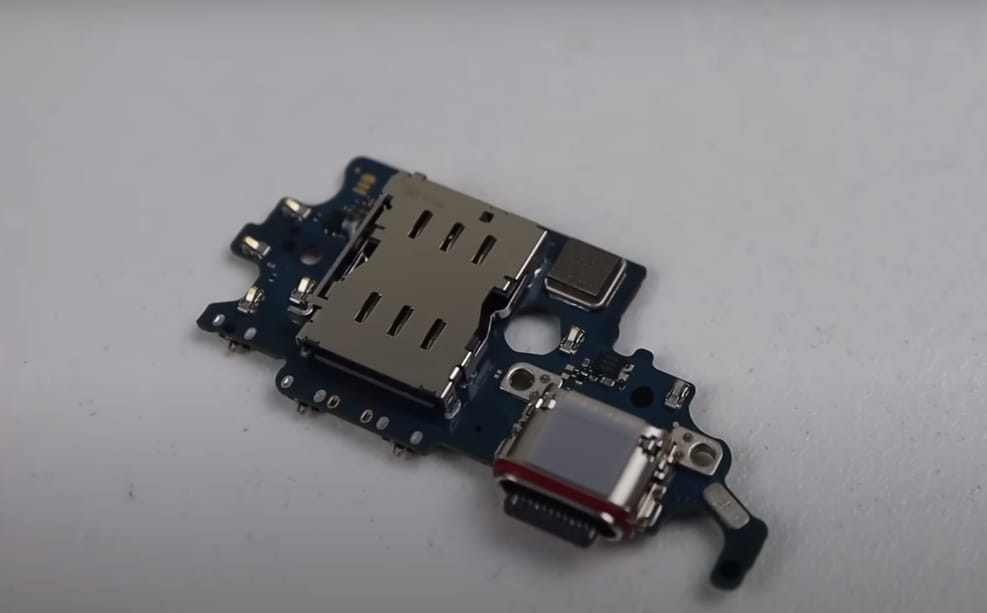
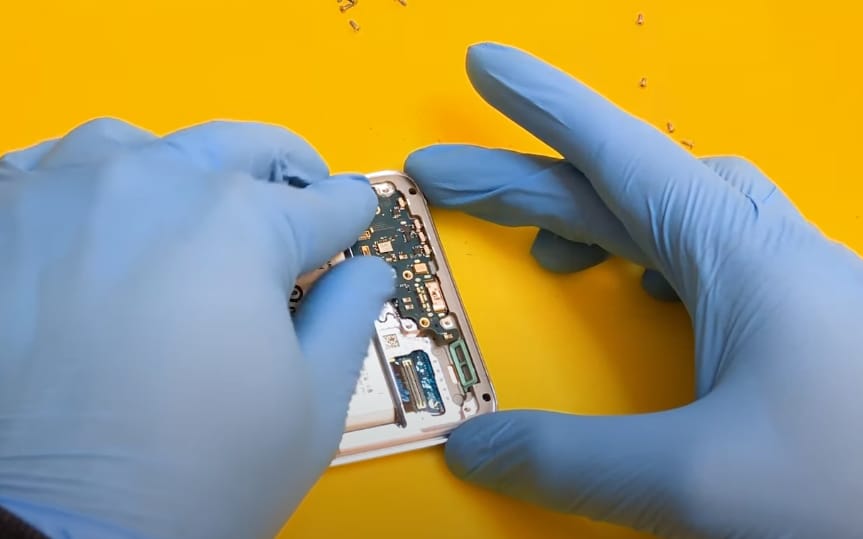
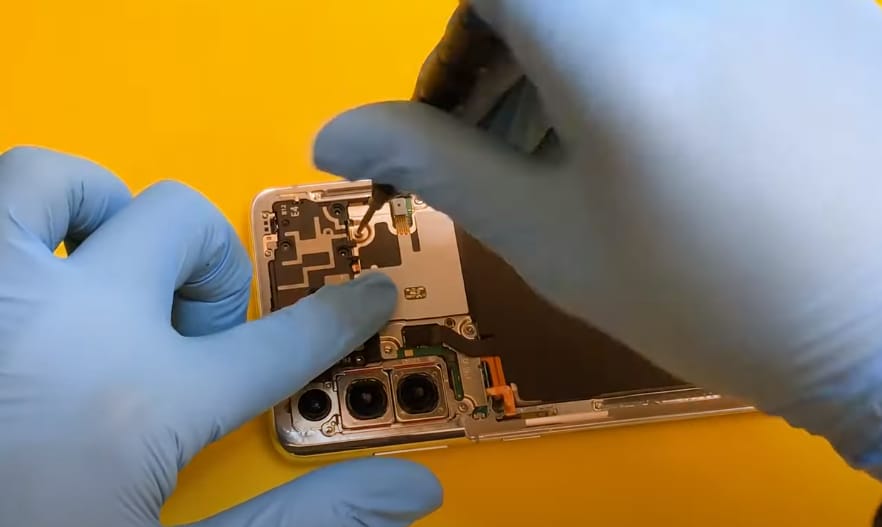
Step 16 – Unfasten And Remove The Daughterboard
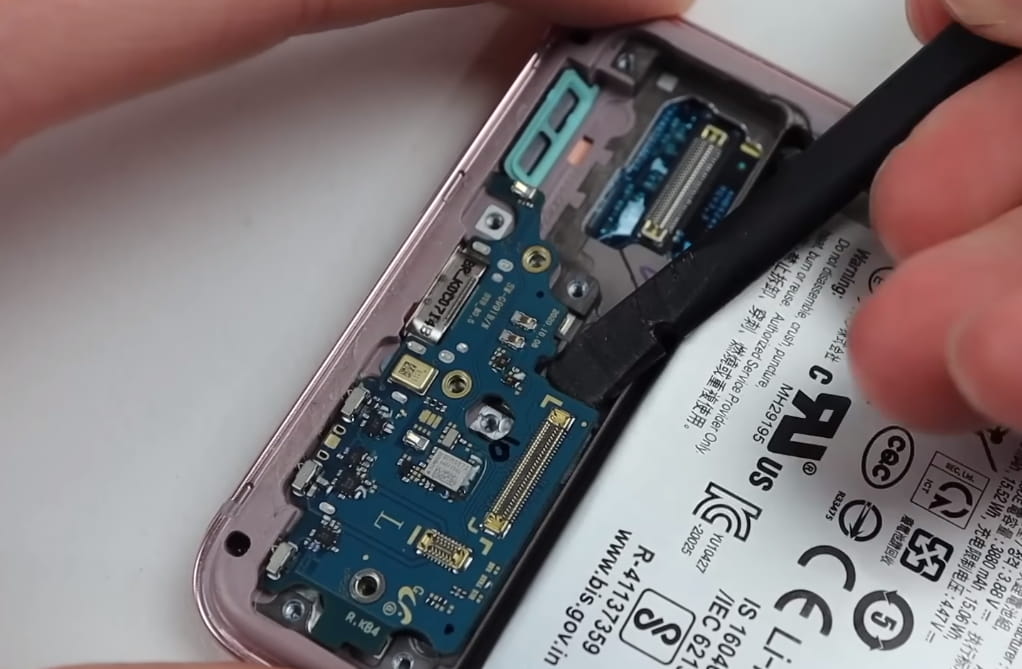
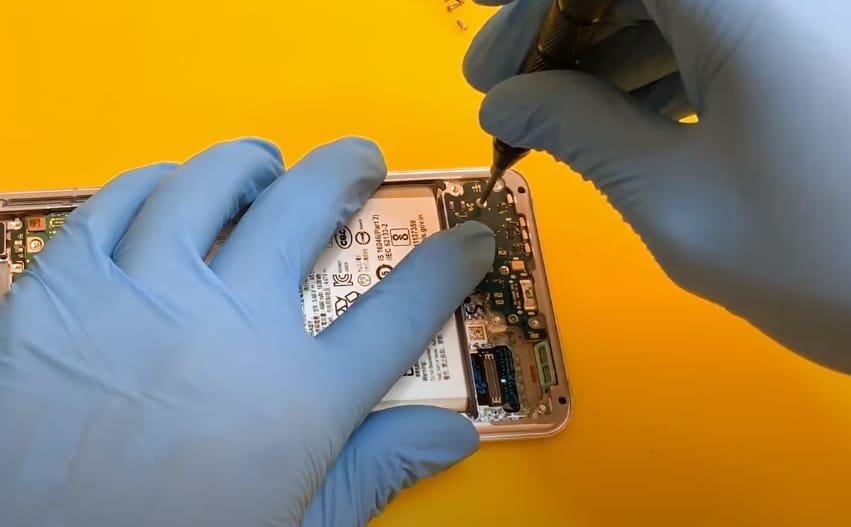
- The daughterboard is secured to the frame with three 3.5 mm-long screws. Remove these screws with a Phillips screwdriver.
- Pry up the daughterboard with a spudger.
- Pull the daughterboard up and away from the bottom of the phone with your fingers.
Step 17 – Reposition And Fasten The S21 Daughterboard
Replace the damaged charging port and then place the daughterboard in its position with the help of your fingers.
Use a screwdriver to fasten the screws of the daughterboard.
Step 18 – Reattach The Flex Cables Of Samsung S21
- Apply even and gentle pressure with your fingertips on the primary and secondary flex cables to reconnect them to the new daughterboard.
Step 19 – Reconnect The Wireless Charging Coil
- Use your fingertips to reconnect the wireless charging coil connector to the motherboard.
- Hold the wireless charging coil in your fingers, then place it in its position.
Step 20 – Fasten The Loudspeaker
- Place the Loudspeaker in its place and tighten the screws with a screwdriver.
Step 21 – Reconnect The Battery
- Press the battery connector to its position with your fingertips to reconnect it.
Step 22 – Fasten The Motherboard Bracket
- After reconnecting all the internal parts, it’s time to fasten the screws of the motherboard bracket.
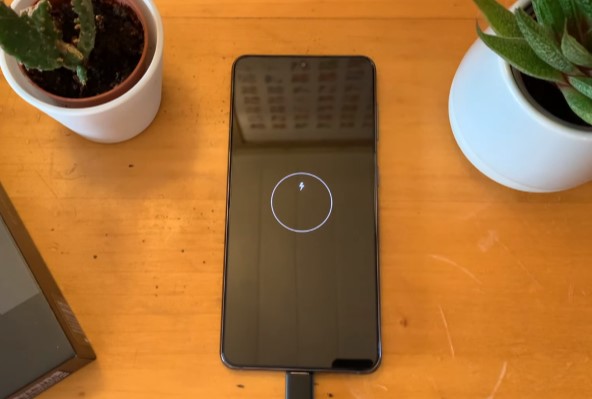
Step 23 – Test The Charging Port
- Test your new USB charging port by connecting it to the phone charger.
Step 24 – Attach The Back Cover
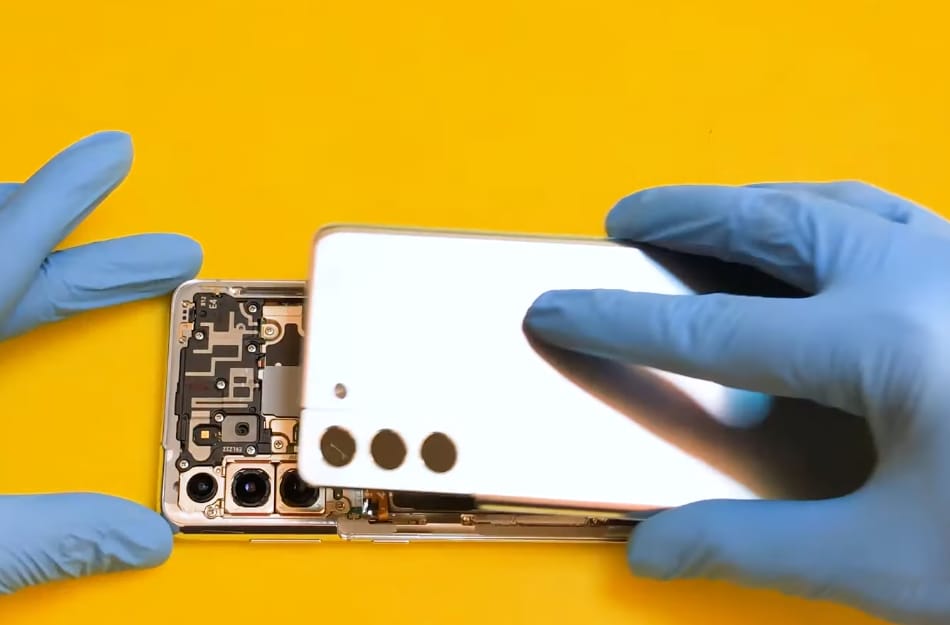
- Clean all four edges of the back cover to remove all the old adhesive glue with a cotton cloth. Apply the new high-quality adhesive glue all around the four corners of the back cover.
- Hold the cover in your fingers and place it on the frame properly.
- Finally, give the back cover a gentle overall press to ensure it is firmly seated and fully attached to the phone’s frame.
- Put some weight on the back side of the phone so that no gaps are left between the back cover and the phone.
Conclusion
To conclude, Samsung Galaxy S21 Charging Port And USB-C Port Replacement can solve all issues like slow charging or an unresponsive charging port. Follow the easy step-by-step instructions with images to effectively restore the charging capability of your Samsung Galaxy S21. You can complete your Samsung Galaxy S21 Charging Port And USB-C Port Replacement process in 40 minutes to one hour. So it means in just one hour your Samsung Galaxy S21 will start charging again. This budget-friendly solution eliminates the need to purchase a new phone. Do not allow a defective charging port to hinder your enjoyment of the Samsung Galaxy S21.
