iPad 10th GenerationIs your iPad Generation 10 screen not responding or cracked? Don’t worry! Follow our step-by-step guide to learn iPad 10th Generation Glass Digitizer Screen Replacement.
Let’s start our step-by-step guide to replacing the glass digitizer screen of your iPad.
Step 1 Gather Necessary Tools

Collect these tools to replace the screen of your iPad Generation 10.
*Hot Gun or hairdryer
*Suction Cup
*Opening Pick
*Spudger
*Set of screwdrivers
*Isopropyl alcohol
*Cotton bud
*Clean lint-free cloth
*New Screen Replacement for iPad
Step 2 Power Off Your iPad


*Press and hold the power button and volume down button for a few seconds.
*Slide the power symbol to the right to power off your iPad.
Step 3 Heat The Edges of The iPad


*Take a heat gun or hairdryer.
*Adjust the medium heat setting on the heat gun or hairdryer.
*Heat the iPad screen for 5 minutes from all sides to melt the adhesive glue.
*Don’t overheat the iPad.
Step 4 Use a Suction Cup

*Apply a suction cup to the screen at the lower left corner.
*Gently pull up the suction cup handle.
*A gap will appear between the screen and the iPad frame.
Step 5 Insert an Opening Pick

*Insert a pick into the gap Between the screen and the iPad frame.
Step 6 Slice The Adhesive


*Move the pick from the lower left corner to the lower right corner.
*Keep sliding the pick from the lower right edge to the upper right corner.
*Now move the pick backward, from the upper right corner to the lower right corner and from the lower right corner to the lower left corner.
*Slide the pick from the lower left corner to the upper left corner.
*Repeat this movement of pick for 2 to 3 times. It will slice all the adhesive present on the three sides of the screen.
Step 7 Prop Up The Screen

*Hold the screen from the left and right sides with your fingers.
*Open the screen like a book.
*Hold the screen in a vertical position, as it is attached to the frame of the iPad.
Step 8 Unfasten The LCD


*Unfasten the screws securing the LCD from the upper and lower sides.
*Keep the screws in a safe place.
Step 9 Pry Up The LCD

*Use a spudger or your fingers to pry up the LCD.
*Lift and hold the LCD in a vertical position.
Step 10 Disconnect The Battery

*Use a pry-up tool to disconnect the battery.
Step 11 Remove The Display Cable Cover

*Unfasten the two screws of the display cable connector cover.
*Remove the cover.
Step 12 Disconnect The Display Cable

*Use a pry-up tool to disconnect the display cable.
*Separate the LCD from the iPad frame.
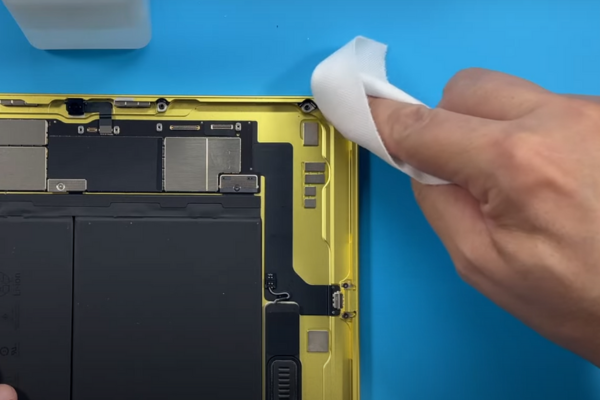
Step 13 Clean The LCD

*Clean the LCD with a dry and lint-free cloth.
*Remove all the dust from the LCD before reassembling the iPad.
Step 14 Disconnect The Flex Cables


*Unfasten the flex cable connector covers.
*Remove the covers.
*Use a spudger to disconnect all the press connectors.
Step 15 Separate The Screen

*Detach the screen from the frame.
*Keep it aside.
Step 16 Remove Old Adhesive From The Sides


*Dip a cotton bud in Isopropyl or a piece of cotton cloth.
*Gently rub around the three sides of the iPad to remove the old adhesive.
Step 17 Attach the Home Button To The New Screen
*Remove the Home button from the old digitizer.
*Attach it to the new screen replacement.
Step 18 Install The New Glass Digitizer

*Reassemble all the components and press connectors of flex cables.
*Reconnect the Display cable.
*Fasten the screws of the LCD.
*Install and attach the new glass digitizer to the iPad.
Final Verdict
Excellent job! You have accomplished your goal of replacing the screen of your iPad Generation 10. Turn on your iPad and enjoy using your iPad.
Admin


