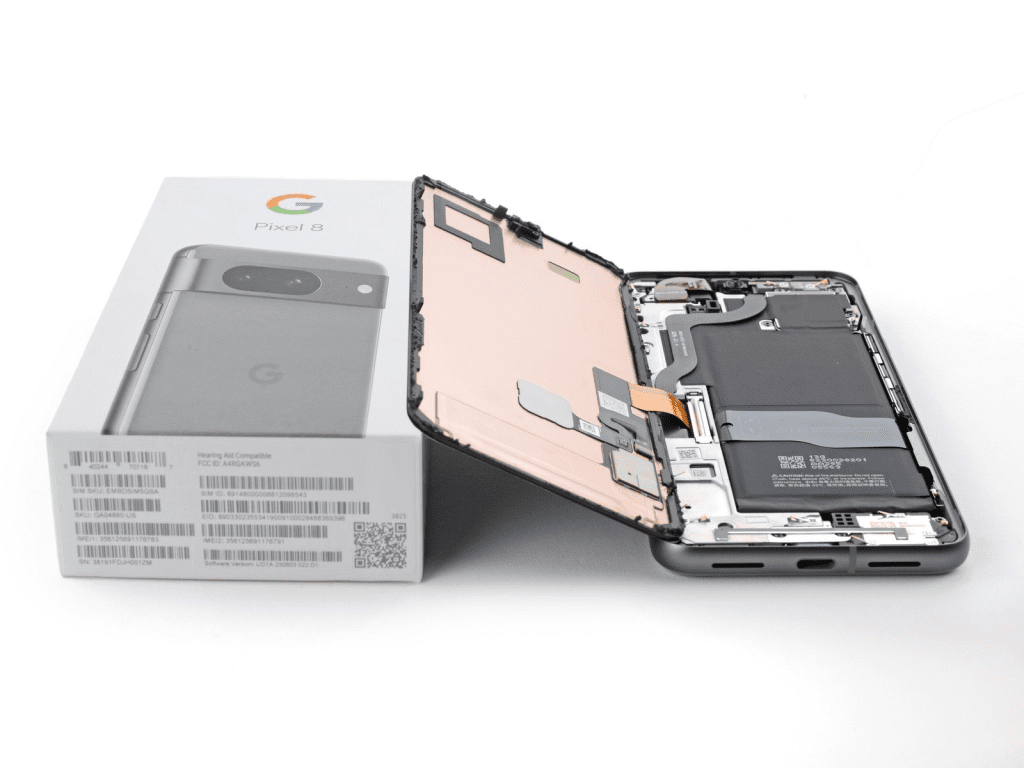
Is your Google Pixel 8 capturing blurry images? Every moment is a picture-clicking moment in this era and having distorted, blurry, or broken pictures with the Google Pixel 8. Not at all tolerable! The time is for the Google Pixel 8 rear camera Assembly replacement.
However this comprehensive guide is specially written with all the illustrations for resolving your Google Pixel 8 rear camera issue. If your Google Pixel 8 is not clicking the right picture because of the cracked camera here is a step-by-step guide. Let’s move ahead for Google Pixel 8 Rear Camera Assembly Replacement.
How To Replace Google Pixel 8 Rear Camera Assembly?
Although the Google Pixel 8 rear camera assembly replacement is not rocket science. Even you can try it yourself with the help of this step-by-step guide. But you must give good attention to the starting steps and then keep reading, focusing, and acting on every replacing step.
Step #1. Prepare Proper Place For The Google Pixel 8 Rear Camera Replacement
Select a suitable place for your Google Pixel 8 rear camera replacement. Here we are mentioning some important precautions. So by following these points you can go closer to the successful rear camera replacement in your Google Pixel 8.
*Choose a well-lit and tidy area
*It shouldn’t be too windy or heated
*Dont choose the suffocated area
However good lighting will help have a good vision while dealing with the tiny screws, connections and components. Also the place should be breathable. If the place will be wind can blow small screws, antennas, or sheets.
However, these simple points will make the replacement process smoother and stress-free. A tidy environment ensures you can easily proceed through each step. It takes you closer to the success of your Google Pixel 8 rear camera replacement.
Step #2. Gather All The Tools
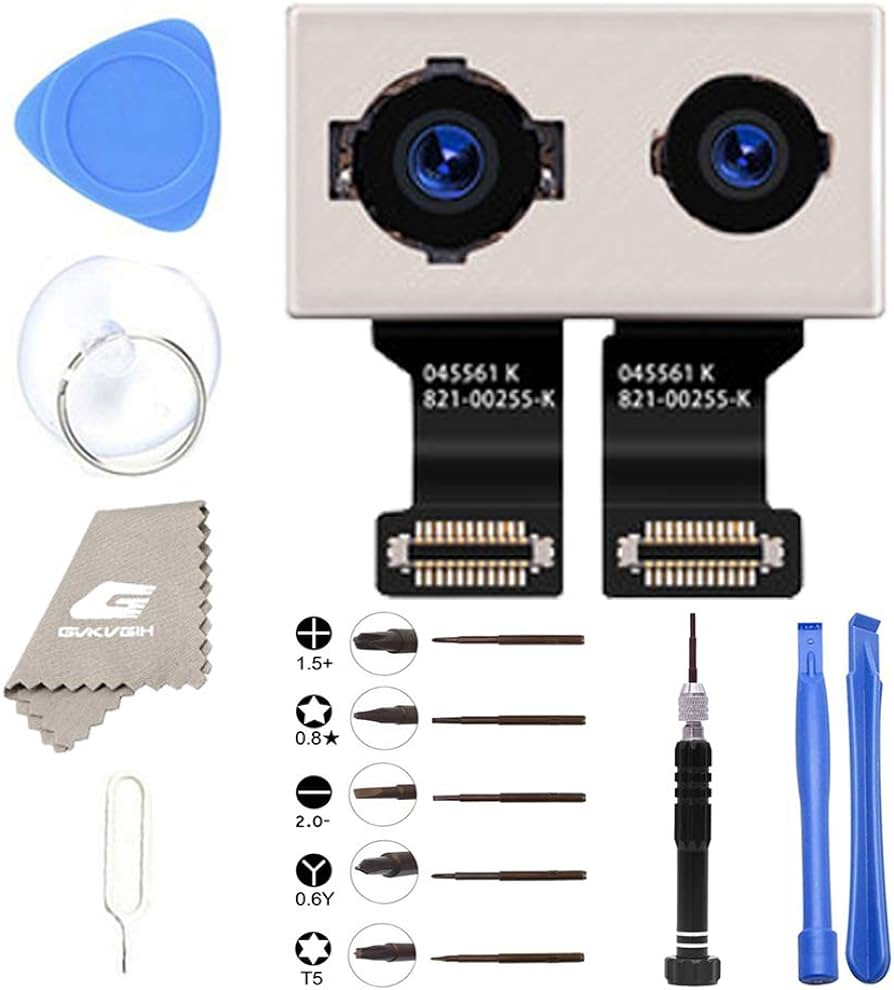
The second most crucial step is to collect all the essential tools for your Google Pixel 8 Rear Camera Assembly replacement.
*4 to 5 opening tools
*Suction Cup
*Pry tool (spudger)
*Tweezer
So you have to make sure these tools are in your access. Because it’s really frustrating to look for the required tool when you need to use it quickly. Thus to make the replacement procedure smooth and hassle-free act strictly on the second step.
Step #3. Get The Replacement Part (Rear Camera Designed For Google Pixel 8)
To replace your Google Pixel 8 rear camera, get the correct replacement part designed specifically for the Google Pixel 8 model. Ensure compatibility and ideal performance by obtaining a rear camera for your phone. Before you start the replacement process double-check that you have the correct part.
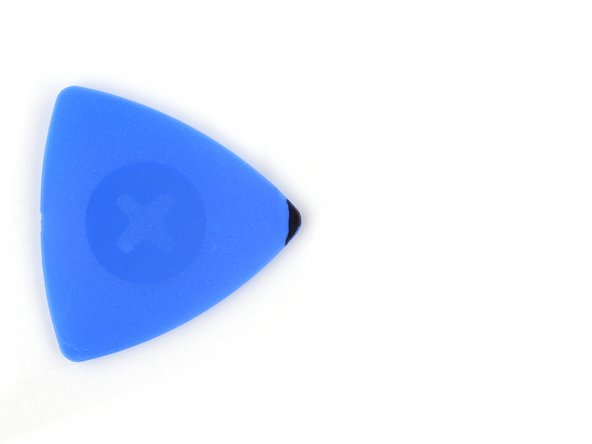
Step #4. Make Your Opening Picks
However the opening pick is the most important tool for repairing a phone. For your Google Pixel 8 rear camera replacement you have to disassemble the Pixel phone. Google Pixel 8 and 8 Pro have delicate screen cables and connections very near the edges. Thus you cannot insert the opening pick too far between the screen and frame.
Therefore the idea is to mark your opening pick to avoid damaging your phone’s connections. Here is the method.
*Measure 3 mm from the tip of the opening pick.
*Mark the opening pick at the 3 mm point using a permanent marker.
*Alternatively, tape a coin to the pick, ensuring it is positioned 3 mm from the tip.
Step #5. Prepare Your Google Pixel 8 For Disassembling
*Disconnect all cables from your phone.
*Completely power off your phone.
*Press both the power and volume-up buttons simultaneously to bring up the shutdown menu.
*Make sure your Google Pixel’s battery drops below 25% before starting the repair to avoid potential fire hazards.
However a charged lithium‑ion battery can quickly catch fire if it is accidentally damaged.
Step #6. Give Heat To The Bottom Of The Google Pixel 8
*The screen is attached to the frame with adhesive and clips.
*Applying heat makes it easier to separate the screen.
*Warm the bottom edge using a heat gun or plate for two minutes.
*Be careful with alternatives like a hair dryer, heat gun, hot plate, or hair straightener to avoid damaging the screen or battery with excessive heat.
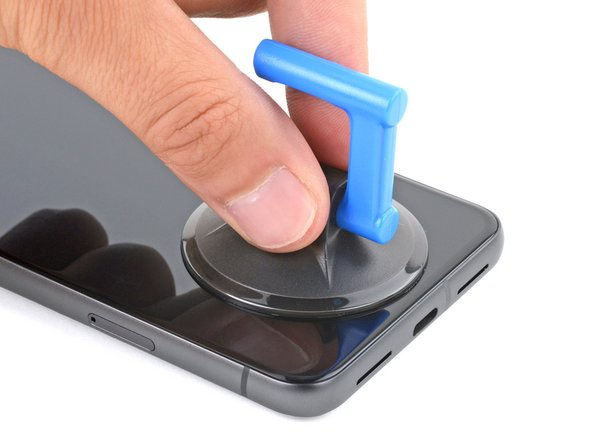
Step #7. Use A Suction Tool For Lifting
Now it’s time to apply a suction at the bottom of the phone. Try to place it in the center and with the help of handle life up the screen make a line gap.
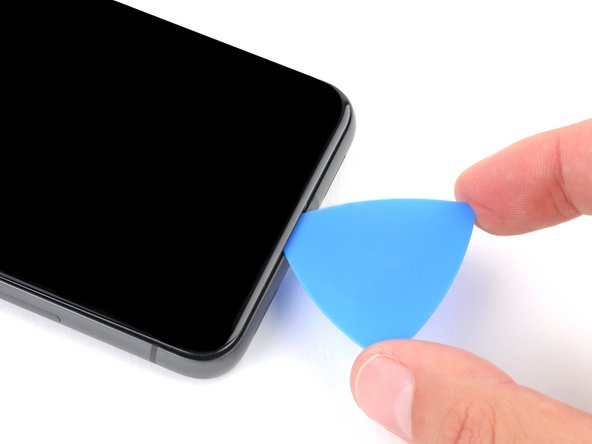
Step #8. Insert A Marked Opening Pick
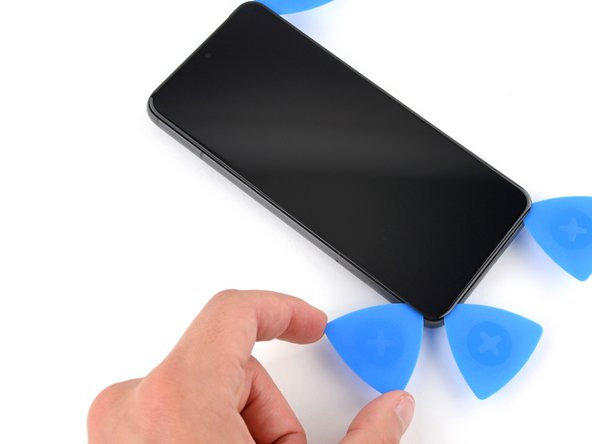
*It’s time to insert a marked opening pick.
*Make sure you have created enough space for inserting an opening pick.
*If you feel it’s still stuck at any point, give more heat for melting adhesive.
Step #9. Avoid Damaging Your Google Pixel 8
*Don’t insert the pick too deep (no more than 3 mm) to keep your phone safe.
*Be extra careful on the left side where the screen cable is halfway up to avoid cable damage.
*The phone’s perimeter has several spring contacts.
*Practice caution in these areas to avoid bending the contacts.
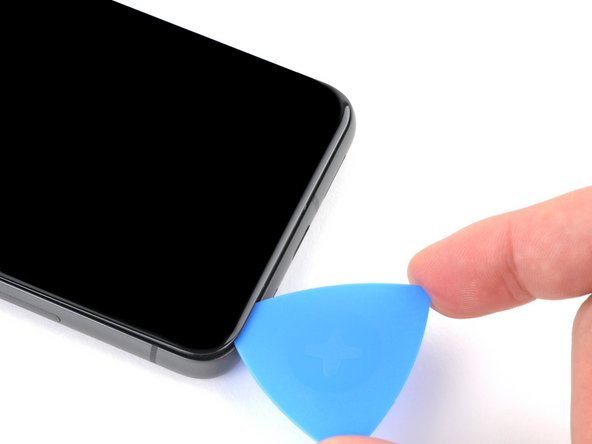
Step #10. Slide Opening Pick And Separate The Bottom Edge
*Gently move the opening pick along the lower edge to separate the adhesive.
*Leave the pick in the bottom right corner to prevent the adhesive from sticking again.
Step #11. Give Heat To The Right Edge Of The Google Pixel 8
Apply a heat gun at the right edge of the Google Pixel 8.
Only apply here for two minutes.
Heating for more than two minutes can harm the battery and screen performance.
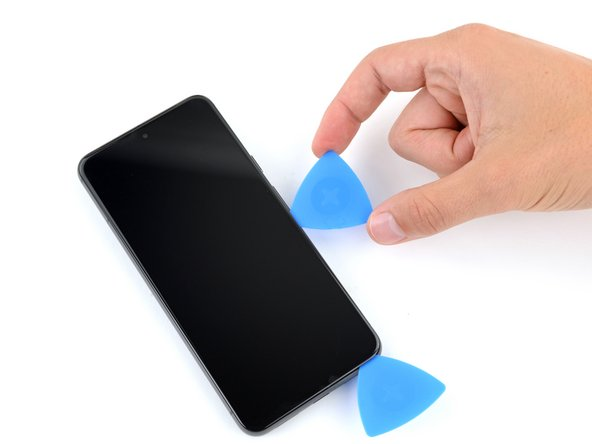
Step #12. Separate Right-Edge Adhesive
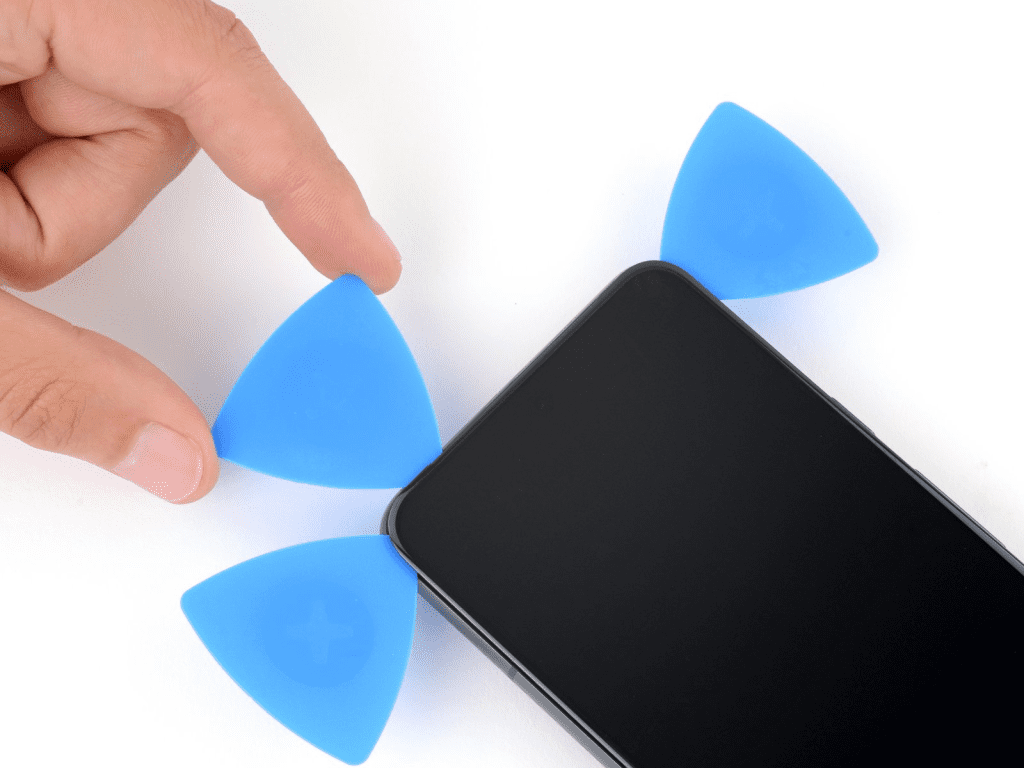
*Put a new pick under the bottom right screen corner.
*Slide it up to the top right to loosen the adhesive along the right edge.
*Leave the pick in the top right to secure resealing.
Step #13. Insert Another Pick And Leave
At this stage insert another pick at the bottom of the Google Pixel 8 and leave it in the bottom left corner. It will stop the screen adhesive from sticking again.
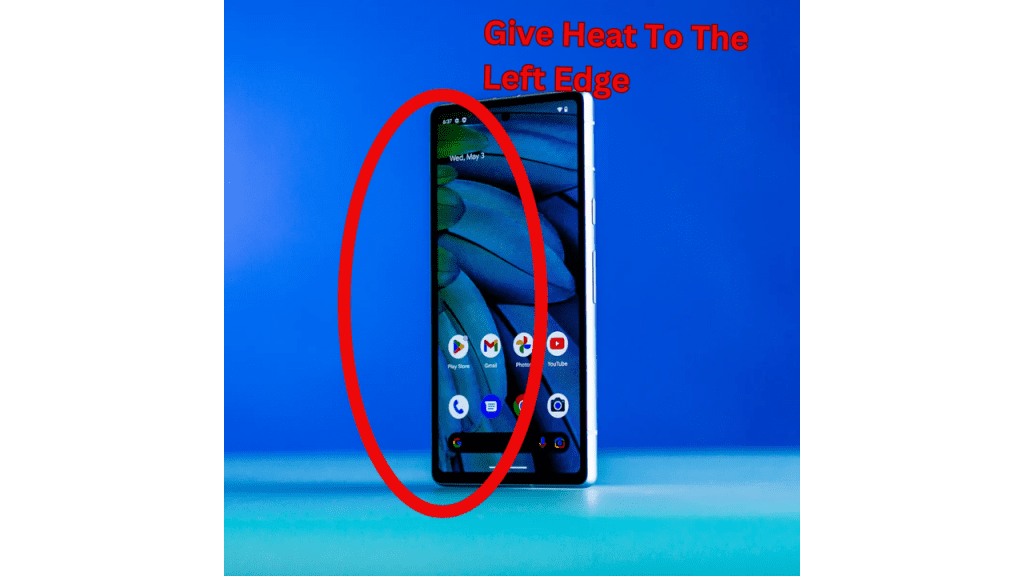
Step #14. Give Heat To The Left Edge
Now move to the left edge and give it heat for two minutes. Don’t forget the alternative actions with precautions as we have discussed above.
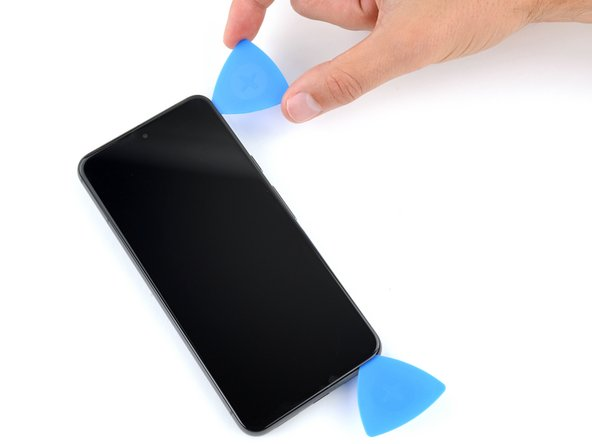
Step #15. Apple Opening Pick For Right Edge Separation
*Gently place a fourth opening pick right under the screen’s bottom left corner.
*Carefully slide this new pick upward, reaching the top left corner. This helps to loosen the adhesive holding the left edge of the screen.
*Keep the pick in the top left corner to stop the adhesive from sticking again. This ensures a smooth and successful separation process for the Google Pixel 8 rear camera replacement.
Step #16. Heat The Top Edge Of The Google Pixel 8
It’s time to give heat to the top edge of the Google Pixel phone. Apply heat for two minutes with all the safety precautions.
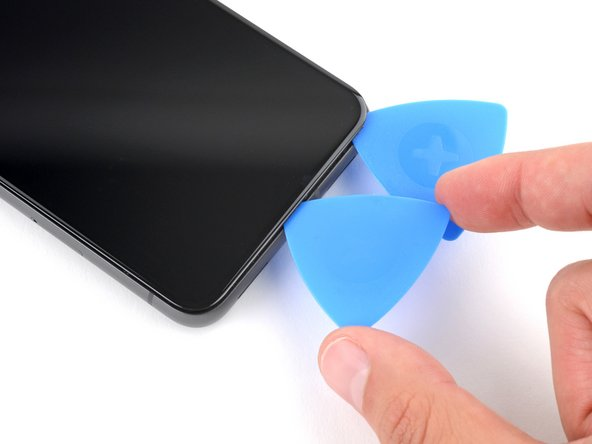
Step #17. Separate Top-Edge Adhesive
*Take the fifth pick and gently slip it at the screen’s top left corner.
*Now slide it over to the top right corner which helps ease out the glue that keeps the screen’s upper part in place.
Step #18. Open The Screen Like A Bool Cover
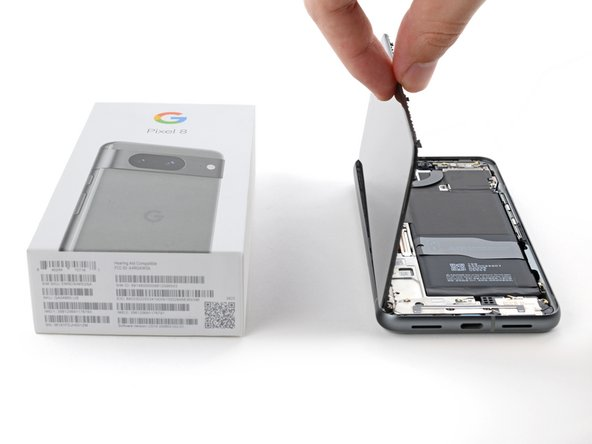
*Now imagine the right edge of the screen is the front cover of a book. Lift it up gently just like you’d open a book. But be gentle with that screen cable.
*But before this find a small box or stack up some books on the left side of your phone. This makeshift support will prop up the screen while you work on disconnecting its cable.
*If the screen seems a bit sticky take your opening pick and go around the edges again. This should free up any leftover stickiness.
Step #19. Support The Screen
Make sure to keep the screen supported. This way you’ll have easy access to that screen cable.
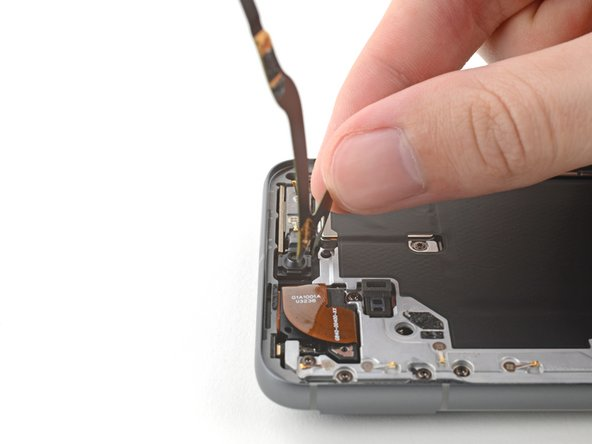
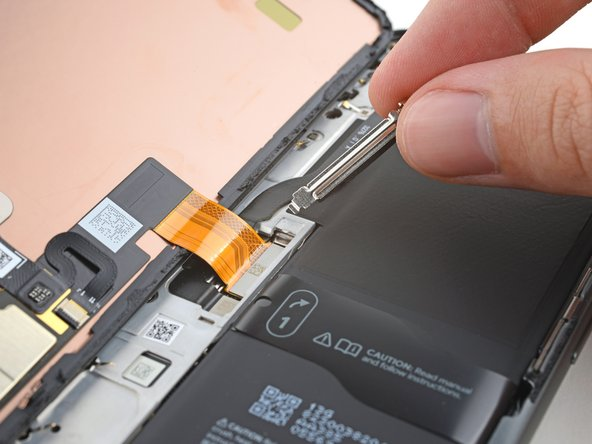
Step #20. Pry Up Cable Cover
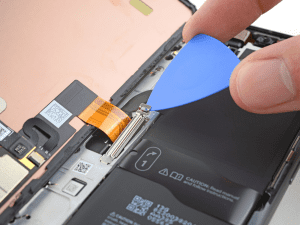
*This time you can use a pry tool or an opening pick.
*Pry up the cable cover that is here to protect the screen cable.
*And then remove the cable cover.
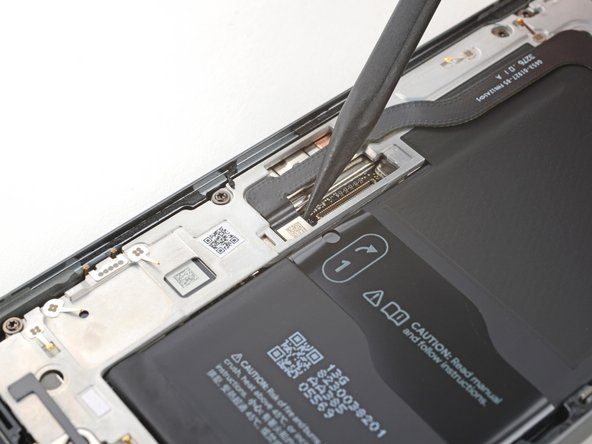
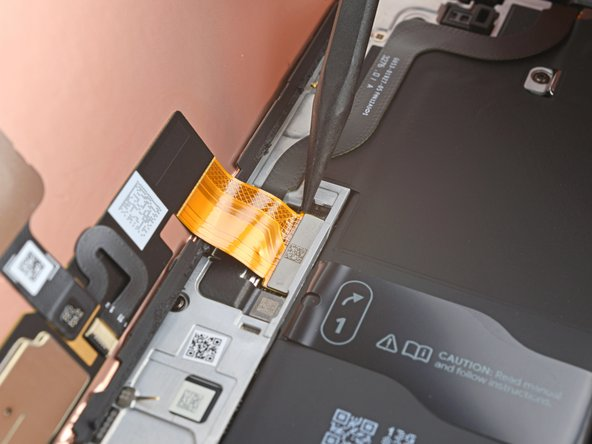
Step #21. Disconnect Screen Cable
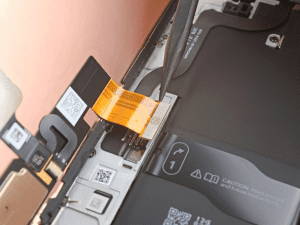
*It’s time to disconnect the screen cable.
*Thus you only need to use a spudger under the top left corner.
*Carefully press it and disconnect the screen cable.
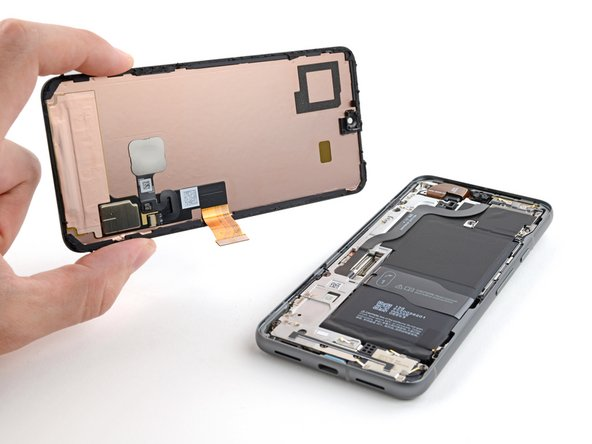
Step #22. Separate The Screen Completely
*Now you can completely separate the screen from the frame.
*Carefully place it in a secure place.
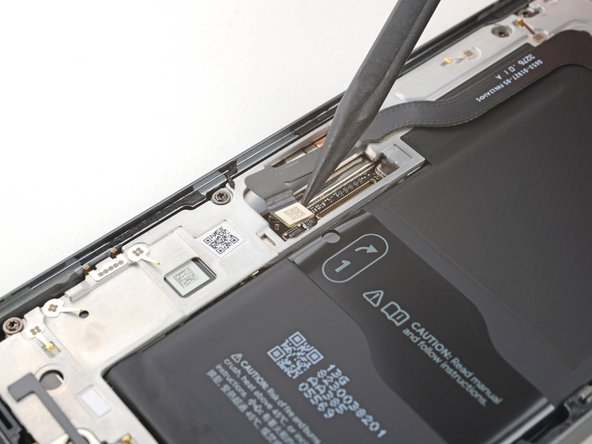
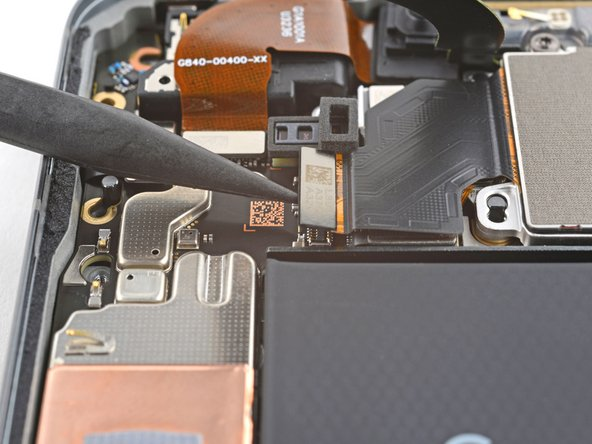
Step #23. Disconnect The 5g MmWave Antenna
*With extra care pry up the 5G mmWave antenna cable and disconnect it from the logic board.
*For this action you can use a pointed spudger.
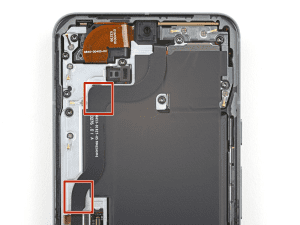
Step #24. Give Heat To The 5g MmWave Antenna
*The 5G mmWave antenna cable is stuck to the midframe with adhesive in two spots.
*Grab a heat gun and aim it at the phone’s left edge for about two minutes. This will make the adhesive melt on the cable and soften it.
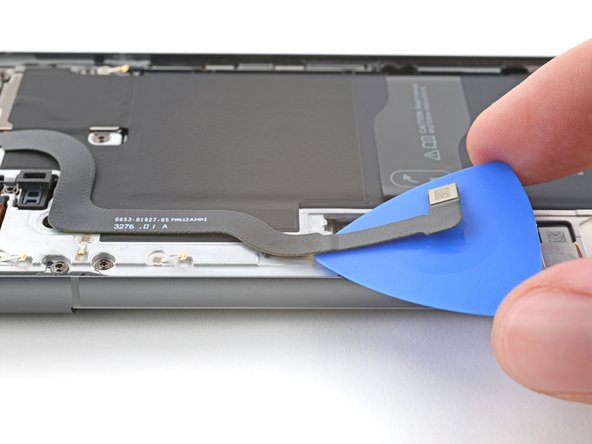
Step #25. Move The Antenna
*Carefully insert an opening pick under the 5G mmWave antenna cable’s bottom adhesive section.
*Gently slide it upward to separate the adhesive.
*Keep moving the opening pick and separate the adhesive to release the 5G mmWave antenna cable.
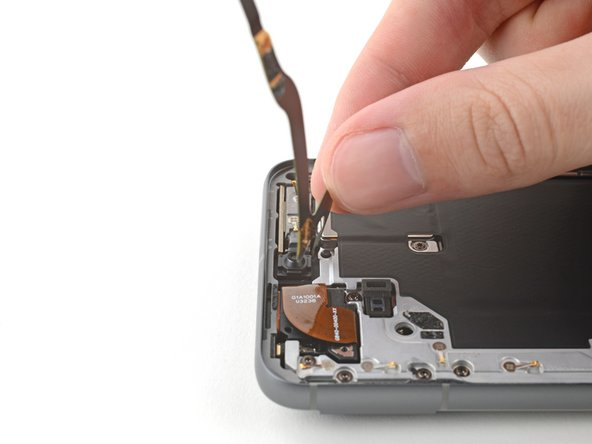
*Guide the 5G mmWave antenna cable over the top of the phone to keep it from getting in your way.
*Remember, be gentle! Don’t fold or crimp the cable. Just move it a bit to stay clear while you take things apart.
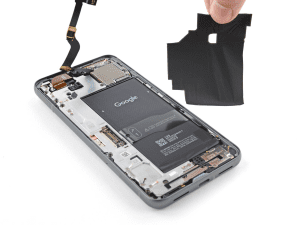
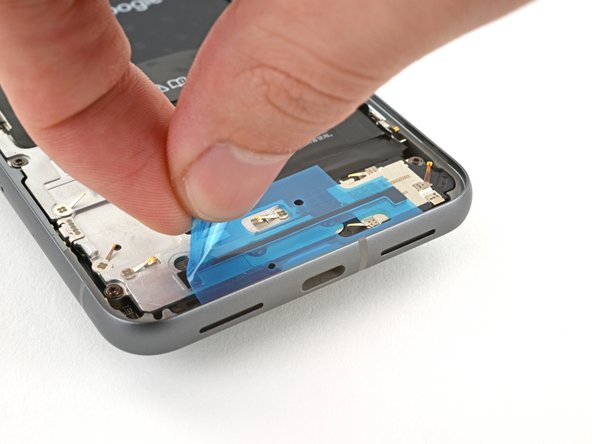
Step #26. Remove The Graphite Sheet
*Now deal with a big graphite sheet connecting the upper battery, midframe, and rear cameras.
*Use the spudger to lift the sheet from the top right corner until you can grab it with your fingers.
*Peel off the entire sheet—it’s like removing a big sticker.
*If it tears, no worries! Just grab the torn parts and take off the sheet in smaller pieces.
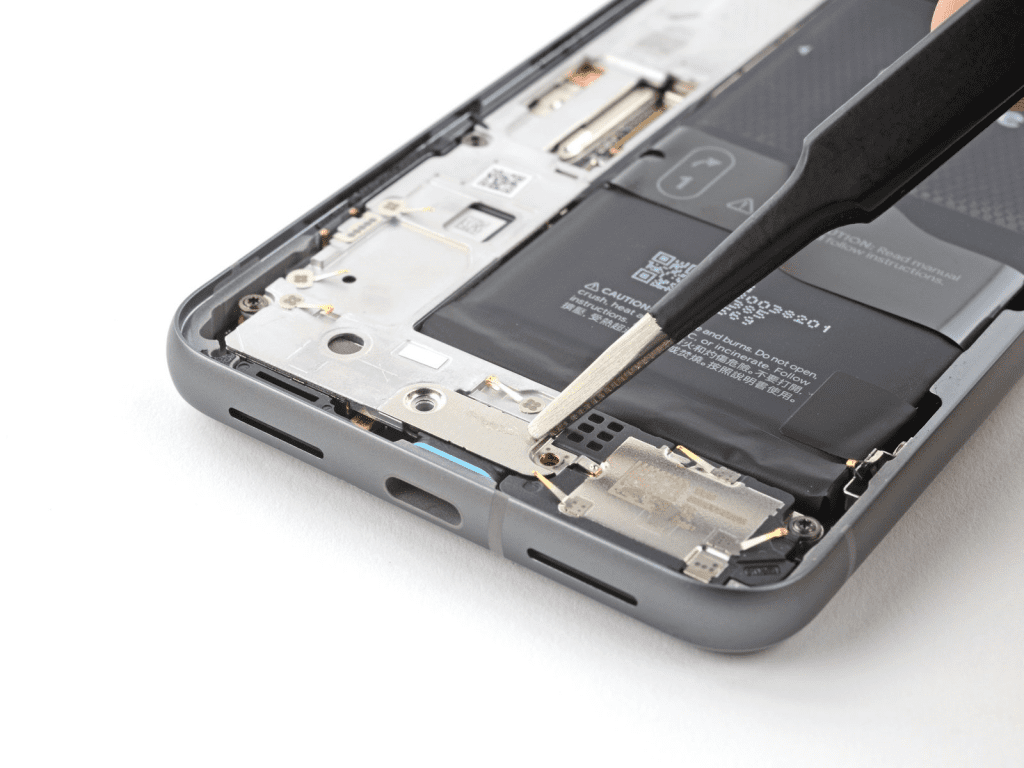
Step #27. Pry Up The Plastic Buffer
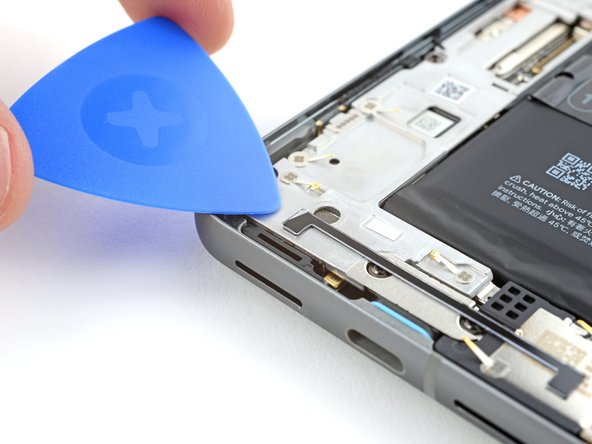
*There’s a plastic buffer stuck gently to the midframe and bottom speaker.
*Use the tip of an opening pick to slide under the plastic buffer. Once it’s lifted, you can grab it with tweezers or your fingers.
*Now, just grab tweezers or use your fingers to peel off and remove that plastic buffer from the midframe and bottom speaker.
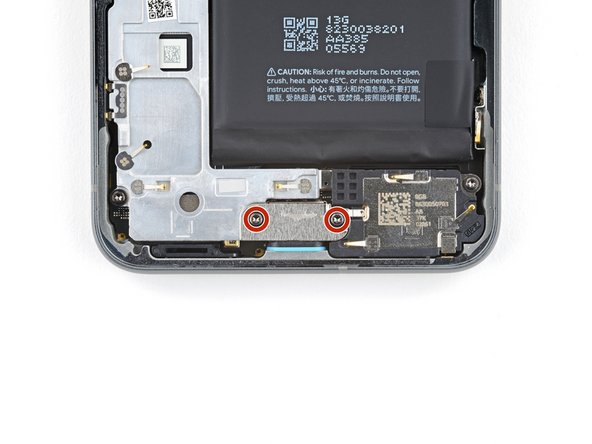
Step #28. Open Screws Of USB-C Port Breket
*While you’re fixing things, make sure to remember where each screw goes.
*Even though the Pixel 8 uses special screws, regular ones will work too. Just press down firmly to avoid any issues.
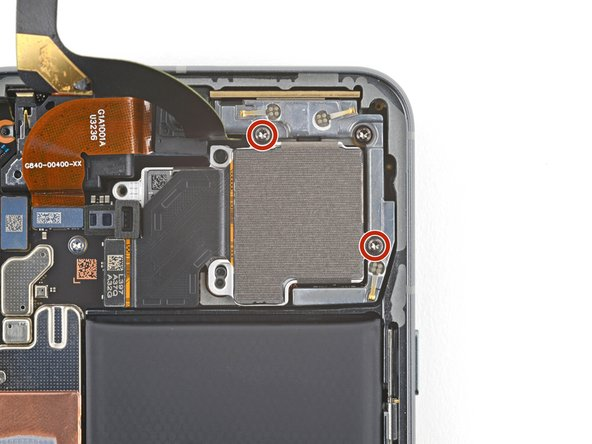
*Grab a T3 Torx driver to remove the two 5mm-long screws holding the USB-C port bracket. Keep it simple for a smooth repair!
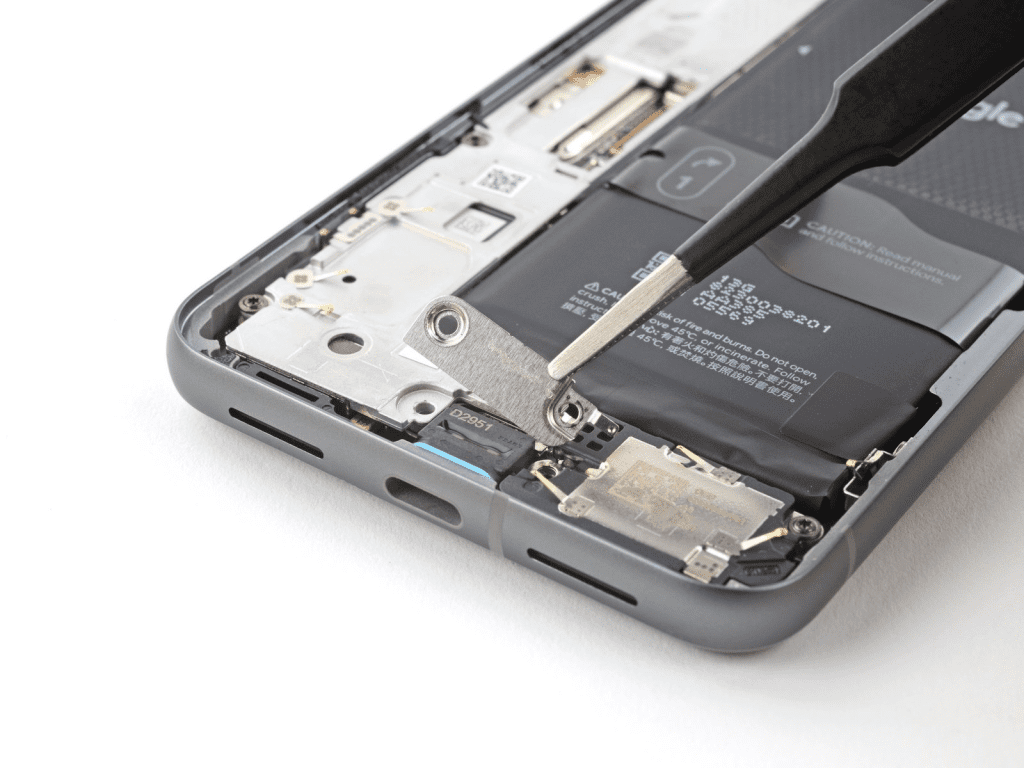
Step #29. Separate The USB-C Port Bracket
Using tweezers or your fingers you can remove the USB-C port bracket.
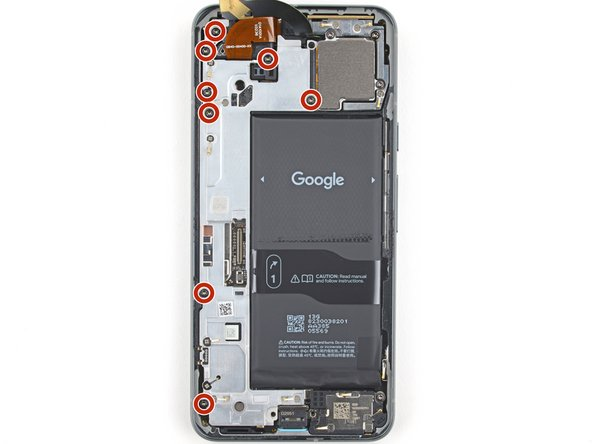
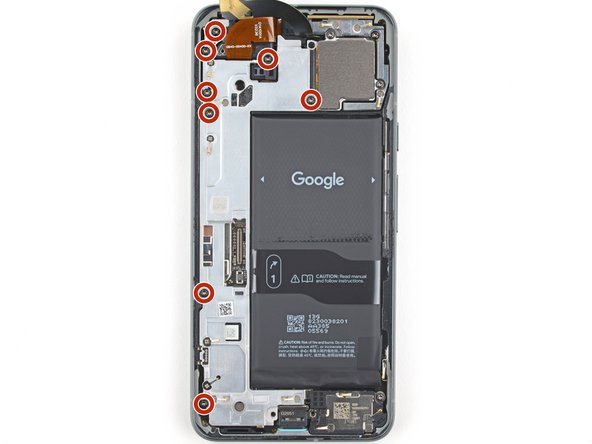
Step #30. Loose Screws From The Midframe
*It’s time to unfasten the screws from the entire midframe.
*Here you will find eight 5.1mm long screws.
Use a T3 Torx screwdriver.
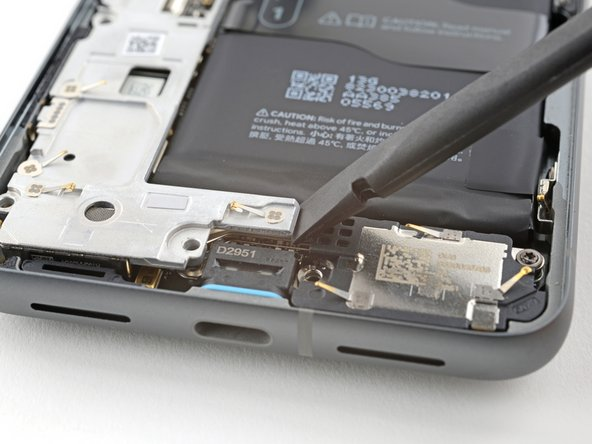
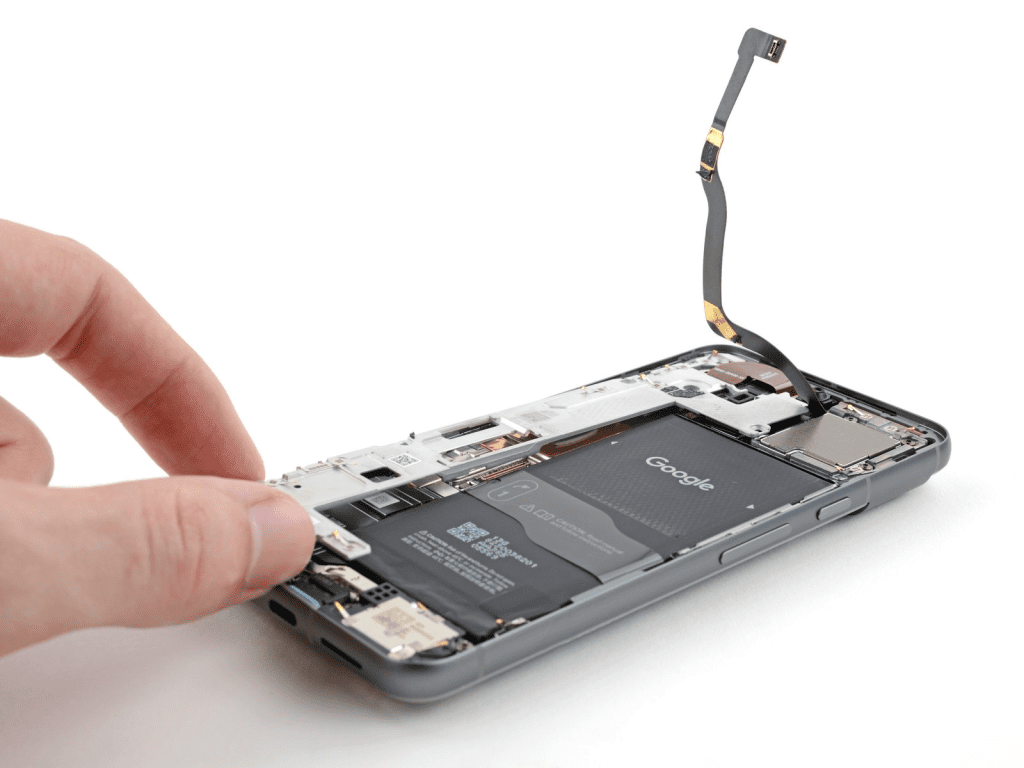
Step #31. Use The Pry Tool To Remove The Midframe
*The middle of the midframe is stuck to a thermal pad.
*Slide the flat end of a spudger under the bottom right corner of the midframe to lift it off from the thermal pad.
*Once it’s separated, you’ll feel the midframe getting looser.
*Lift the midframe and separate it.
Step #32. Disconnect The Battery
Use a flat pry tool to lift up the battery cable.
Carefully disconnect the battery cable.
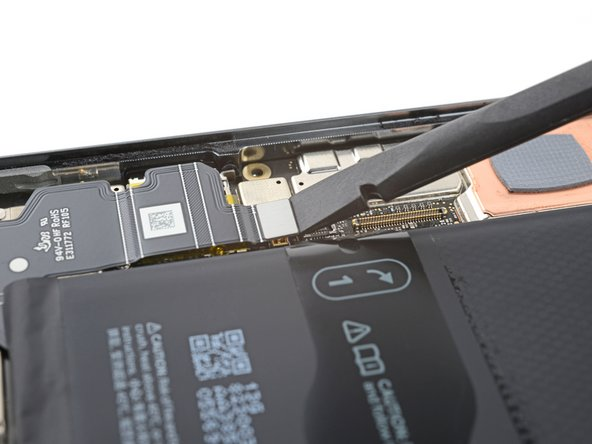
Step #33. Disconnect The Wide Rear Camera Connection
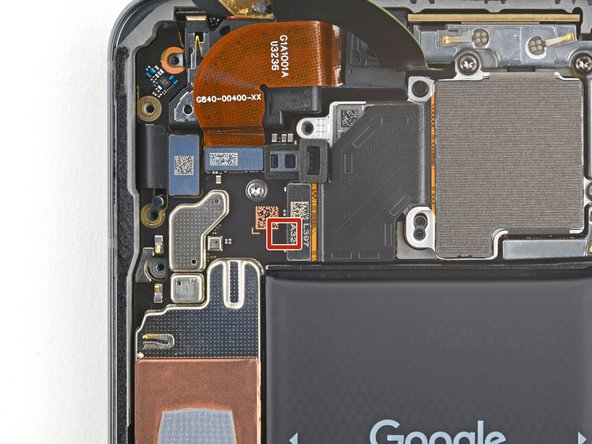
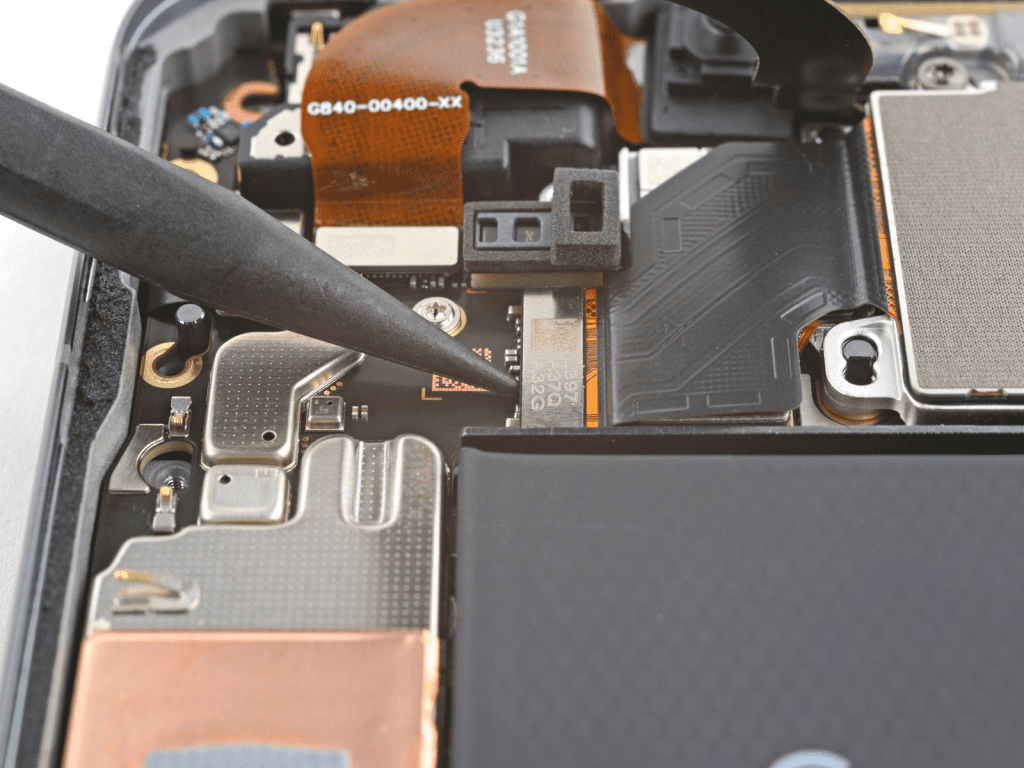
*Stick the pointy end of a spudger under the lower part of the big rear camera connector. Slide it between the little parts on the surface.
*Remember, only use your pick in that spot—don’t mess with the logic board.
*Now, gently lift up to disconnect the wide rear camera. Take it easy and be careful!
Step #34. Open The Wide Rear Camera Screw
Grab a T3 Torx screwdriver to take out the two 5.1mm-long 3IP Torx Plus screws holding down the wide rear camera.
Step #35. Remove Google Pixel 8 Rear Camera
*Slide the tip of a spudger under one of the wide rear camera screw-hole cutouts.
*Lift the camera gently out of its spot using the spudger.
*Now, take out the camera.
Step #36. Replace Google Pixel 8 Rear Camera
Now take the new rear camera and adjust it on the placement of the rear camera.
Be gentle and careful while performing this task.
Step #37. Connect The Cable Of The Wide Rear Camera
However when you feel it’s correctly settled in the right place. Fasten the screws and connect the cable connection of the rear camera.
Step #38. Connect The Battery Cable
It’s time to connect the battery cable.
Step #39. Settle Down The Midframe
Place the midframe and settle it correctly.
Step #40. Tight Midframe Screws
Fasten all the screws on the midframe.
Step #41. Place The USB-C Port Bracket
Put the USB-C port back in its place.
Step #42. Place The Plastic Buffer
*Stick the plastic buffer in the same place where it was.
*You have the option to reuse the old plastic buffer or you can get a new one.
*If placing a new plastic buffer it has all the marking and cutout to guide you for its correct placement.
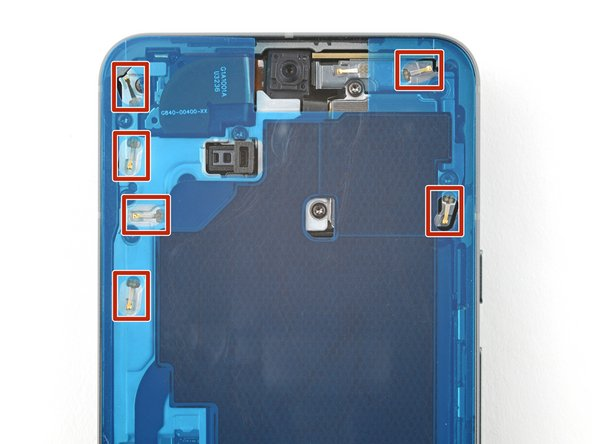
Step #43. Carefully Place The Graphite Sheet
*However you cannot use the old Graphite Sheet.
*Before you stick on the new graphite sheet, check out how it fits on your phone.
*Hold the graphite sheet with the clear liner at the bottom and place it over your phone to see where it lines up.
*Use the cutouts in the liner to get the graphite sheet in the right spot.
*Peel off the big clear liner from the back to expose the sticky part. Be super careful! Once it sticks, you can’t move it. If you mess up, you’ll need a new one.
*Gently place the sheet’s top edge on the frame, using the frame’s lip as a guide.
*Now, carefully lay down the rest of your phone. It must stick well before you remove any liners to avoid messing up the next step.
*Use a spudger or your fingers to press and firmly attach the graphite sheet. Peel off the remaining blue liner.
*If any part starts to peel with the liner, gently lay it back and use your fingers to secure it. Take your time and get it right!
Step #44. Reposition The 5g Mmwave Antenna Cable
However it’s time to reposition the 5g Mmwave Antenna Cable.
Step #45. Connect The 5g Mmwave Antenna
Securely connect the 5g Mmwave Antenna.
Step #46. Connect The Screen Cable
Now connect the screen cable. Be very careful and secure it correctly.
Step #47. Place The Cable Cover
Now place the cable cover and hear the noise of snug fit so that it will be confirmed that the cover is in the correct place.
Step #48. Place The Google Pixel 8 Screen Correctly
Finally it is time to assemble the screen. For assembling the super tip is to check for the front-facing camera hole and place the screen correctly. Before this action you must have connected the screen cable and set the cable cover.
But remember one thing this is the best time to check your Google Pixel 8 for its successful rear camera replacement and other components’ performance.
For this you can connect the screen temporarily, power it on, and ensure everything’s working. Power down and unplug the screen before you continue. That’s it!
Conclusion
Congratulations! You are done with the Successful Google Pixel 8 rear camera replacement. We hope this guide has helped you in every way. This step-by-step guide has all the answers for replacing the Google Pixel 8 rear camera.
However if you feel any trouble during the replacement procedure or want to say something about this guide feel free to write us in the comment section. It’s pleasing for us to help you. Till then capture memories with your Google Pixel 8. Happy repairing!
