The Google Pixel 8 Pro, renowned for its outstanding camera capabilities, represents the pinnacle of mobile photography innovation. However, even the most advanced technology can encounter glitches, and the front camera is a crucial component that might require replacement due to damage or malfunction. Being aware of the details of this process is crucial to maintaining the device’s functionality and photographic quality.
Imagine capturing life’s moments in crystal-clear detail, only to find your Pixel 8 Pro front camera malfunctioning. If it’s a cracked lens or a faulty sensor impacting your ability to snap those perfect selfies or join video calls, the prospect of a non-functioning front camera can be disheartening. Don’t worry, as this step-by-step guide aims to empower you with the knowledge needed to flawlessly replace the front camera of your Google Pixel 8 Pro. With the right tools and guidance, you’ll regain your device’s full photographic potential in no time.
In this tech era, where visual storytelling is integral to our daily lives, a functional front camera isn’t merely an accessory but a necessity. The process of replacing the front camera might seem daunting at first, yet by following this comprehensive guide, you’ll gain insights into the complexity of your device’s inner workings. Empowering yourself with the ability to perform this replacement saves time and money. It nurtures a deeper understanding of the smartphone’s mechanics, allowing you to maintain and appreciate your Pixel 8 Pro’s capabilities fully.
Step 1 Gather Necessary Tools

Gather the following necessary tools to replace the front camera of the Google Pixel Pro 8:
*Heat gun or Hair Dryer
*Suction Cup
*Opening Picks
*A set of screwdrivers (Phillips or Torx)
*Spudger
*Tweezers
*New Google Pixel Pro 8 Front Camera
Step 2 Turn Off Your Phone


*It is necessary to turn off your Phone before disassembly. Push the power and volume up button at the same time.
*A shutdown menu will appear on the screen.
*Select the power off option to turn your phone off.
Step 3 Heat All The Edges Of Your Phone

")
*Take a hairdryer or heat gun.
*Heat all four edges of your phone for 5 to 10 minutes to soften the adhesive around the corners of the phone.
Important Tip
Do not overheat the phone, as it may damage the sensitive internal parts of your phone. You should use a medium heat setting of the hair dryer or heat gun for this task.
Step 4 Use A Suction Cup

*Immediately attach a suction cup at the lower bottom of your phone screen.
*Apply a steady force on the suction cup handle to form a small gap between your phone screen and body frame.
Step 5 Cut The Adhesive From All Sides

")
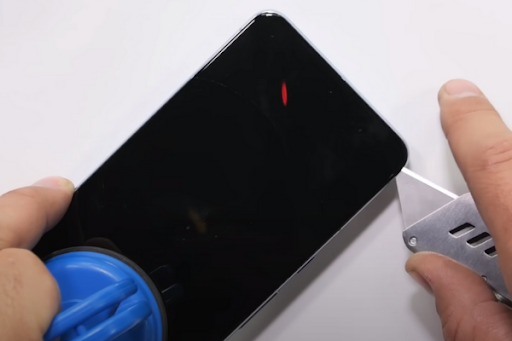
*Quickly insert an opening pick into the gap up to only 3mm inside the phone. If you enter the opening stick more than 3mm inside your phone, it can damage the screen cable.
*Move the pick from the lower left edge to the lower right corner.
*Keep moving the pick from the lower right corner to the upper right corner and then to the upper left corner.
*Move the pick from the upper left corner to the lower left corner until you cut adhesives from all four sides of the phone.
Important Tip
Heat the phone edges again for three to four minutes if you have trouble cutting the adhesive.
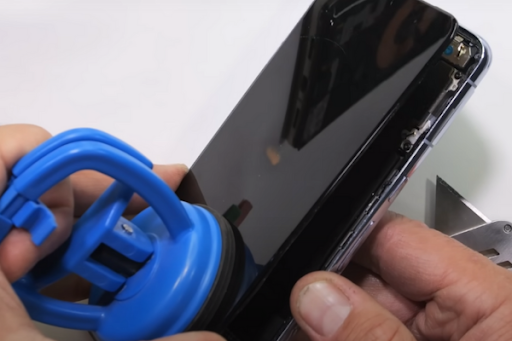
Step 6 Pull Up The Screen
")
*Take a small box or anything that can give your phone screen support.
*Put the box on the left side of your phone.
*Grab the top right corner of the phone screen with your fingers and slowly pull it up with constant force.
*Keep the phone screen in the vertical position with the support of the small box until you detach the screen cable.
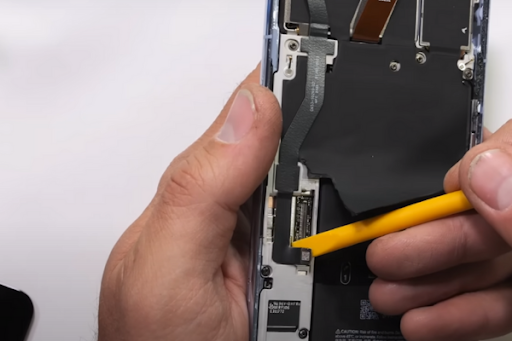
Step 7 Remove The Screen Cable Cover


*Smoothly pry up the upper edge of the screen cable cover with a plastic opening tool or spudger to remove the screen cover.
Step 8 Disconnect And Separate The Screen


*Place a spudger under the top right edge of the press connector to pry up and detach the screen cable.
Step 9 Disconnect The 5G mmWave Antenna
*Pry up the press connector of the 5G mmWave antenna with a spudger to disconnect it.
Step 10 Heat And Remove The 5G mmWave Antenna Adhesive

*You have to heat the 5G mmWave antenna to melt the adhesive glue that has secured the 5G mmWave antenna cable to the phone’s midframe.
Step 11 Separate The 5G mm-wave Antenna


*Slowly pry up the bottom of the 5G mmWave antenna cable with the flat end of a spudger.
*Use your fingers to peel the antenna cable from the midframe.
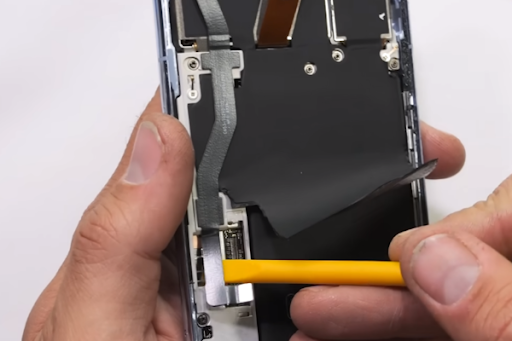
Step 12 Remove The Black Graphite Tape


*A large graphite sheet connects the upper part of the battery, midframe, and the back cameras. Therefore, we have to remove it.
*Use a spudger to detach the graphite tape at different places. Peel the tape with your fingers.
Important Tip
Use a new graphite tape while reassembling.
Step 13 Remove The USB-C cover Tape


*Lift the plastic shim at the top of the USB-C port cover with the spudger.
*Unfasten the two 5mm‑long screws of the USB‑C port cover to remove it.
Step 14 Unfasten And Remove The Midframe


*Unscrew the seven 5mm‑long screws to unfasten the midframe.
*Hold the bottom of the midframe in your fingers.
*Apply a steady force to remove it.
Step 15 Disconnect The Phone Battery


*Pry up and disconnect the battery cable press connector with the help of a spudger.
Step 16 Disconnect And Remove The Front Camera


*Take a spudger to pry up the front camera press connector.
*Disconnect the front camera and gently remove it from the phone’s frame.
Step 17 Install The New Selfie Camera

*Install the new selfie camera to complete the Google Pixel Pro 8 Front Camera replacement procedure.
Step 18 Reassembly

*To reassemble your phone, follow all the above steps in reverse manner.
Step 19 Power On Your Pixel Pro 8
![]()
*Power on your Google Pixel Pro 8 and take a selfie to test the performance of your new front camera.
Final Verdict
Replacing the front camera of the Google Pixel 8 Pro may seem intricate and daunting at first glance. However, armed with the right tools, meticulous attention to detail, and following this step-by-step guide, you can navigate this task with ease.
Commencing with the essential step of gathering the necessary tools, this guide ensures you are equipped for the intricate disassembly. Turning off the phone is a crucial preliminary step to prevent any mishaps. Heating the phone’s edges delicately is necessary to soften the adhesive, facilitating easier disassembly without damaging the device.
Employing a suction cup and carefully cutting the adhesive from all sides demands precision and patience. The subsequent steps involving removing the screen and disconnecting various components, like the 5G mmWave antenna and the front camera, require a gentle touch and careful maneuvering. Each step is essential in ensuring the safe removal and replacement of the front camera.
The guide’s clarity and detailed instructions are invaluable, guiding users through every intricate phase of the replacement process. The emphasis on cautionary tips regarding heating, cable detachment, and handling delicate components serves as a safeguard against accidental damage.
Upon successful replacement, the guide meticulously advises on reassembling the phone, ensuring every component is correctly placed and secured. Finally, powering on the Google Pixel 8 Pro and testing the newly installed front camera reaffirms the success of the replacement procedure.
Admin


