Have you ever been stuck with a dead iPhone 14 in the middle of an important call or while browsing for something important? Or maybe you’ve experienced your iPhone shutting down unexpectedly, even when the battery percentage showed a decent amount of charge remaining. If so, consider getting your iPhone 14 battery replacement.
Don’t let a failing battery ruin your iPhone experience because a worn-out battery can significantly impact your iPhone’s performance. Replacing your iPhone 14’s battery can breathe new life into your device and restore its performance. This will also allow you to use it without worrying about battery drain. Take action now and replace your iPhone’s 14 battery with the simple guide mentioned in this article. Let’s get started!
Battery Life Of iPhone
iPhone batteries typically retain about 80% of their capacity for up to 500 charge cycles, translating to approximately 18-24 months of usage for the average user. Beyond this point, you may notice your iPhone requires more frequent charging, and iOS might alert you about decreased performance, resulting in slower operation.
Precautions Before Battery Replacement
Before you start replacing your iPhone 14’s battery, it’s essential to take some precautions to ensure a smooth and safe experience. Neglecting these steps could lead to data loss, damage to your device, or even personal injury. Let’s ensure your iPhone 14 battery replacement goes smoothly by following these essential steps:
- Create a complete data backup to avoid losing any valuable files or settings.
- Disable the Find My iPhone feature to prevent potential issues during battery replacement.
- Before beginning the battery replacement process, ensure your device’s battery level is below 25%. This precaution minimizes the risk of fire in case the battery is inadvertently damaged during the repair
- Gather the necessary tools, such as a pentalobe screwdriver, ESD-safe mat, and tweezers.
- Ensure your workspace is clean, well-lit, and free from distractions to avoid accidents or mishaps.
- Read and understand the instructions provided by the manufacturer or repair service thoroughly.
Tools and Materials
The right tools and materials are crucial when attempting an iPhone 14 battery replacement. Without proper equipment, you risk damaging your device or compromising your safety. Here’s what you’ll need:
- Pentalobe screwdriver
- ESD-safe mat
- Tweezers
- Replacement battery
- Adhesive strips
- Isopropyl alcohol and cleaning cloths
- Well-lit workspace and good lighting
- Opening tools
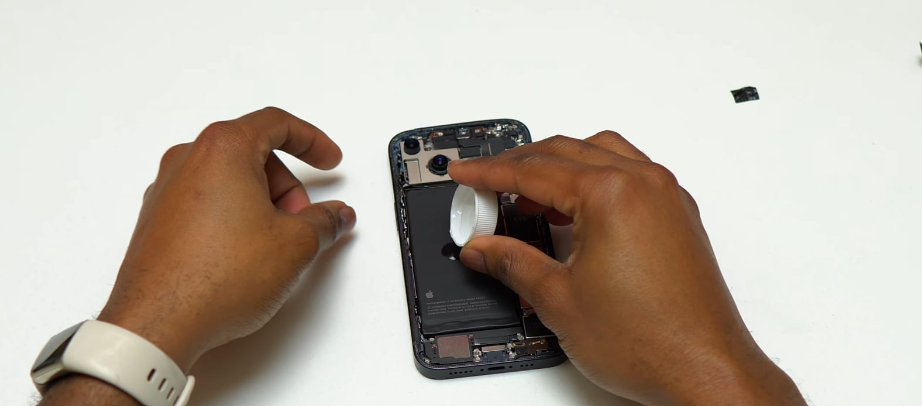
- Suction cup
- Spudger
Step-by-Step iPhone 14 Battery Replacement Process
Replacing the battery in an iPhone 14 is a delicate process that requires attention to detail and the right tools. Here are the steps involved in the battery replacement process:
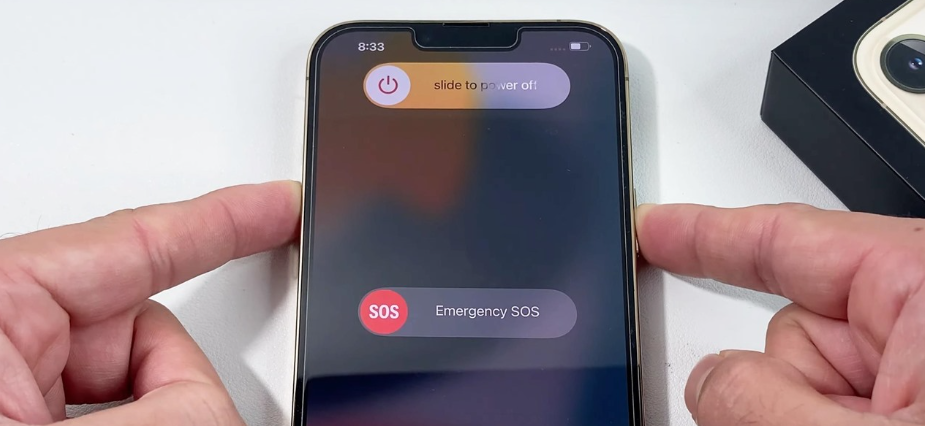
Step 1: Power Off the iPhone
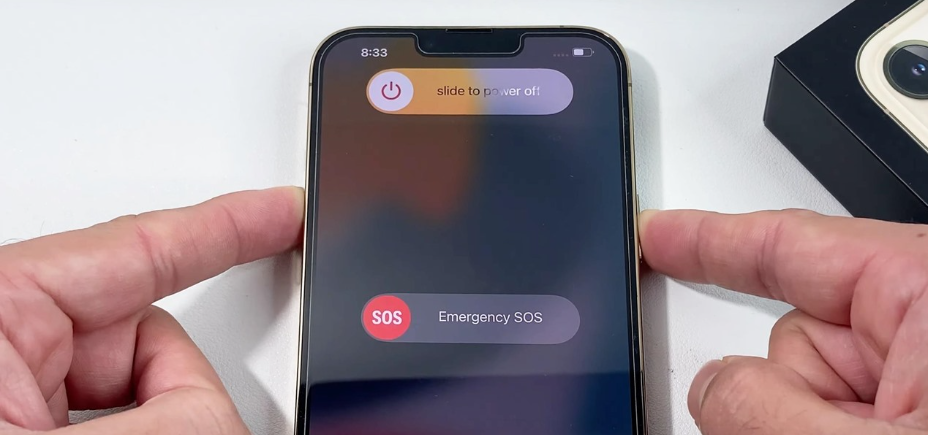
- Locate the power button on your iPhone 14.
- Press and hold the power button until the “slide to power off” slider appears.
- Slide the slider to power off the device.
- Wait for the iPhone to completely shut down before proceeding.
- Ensure the screen is off and no lights are visible.
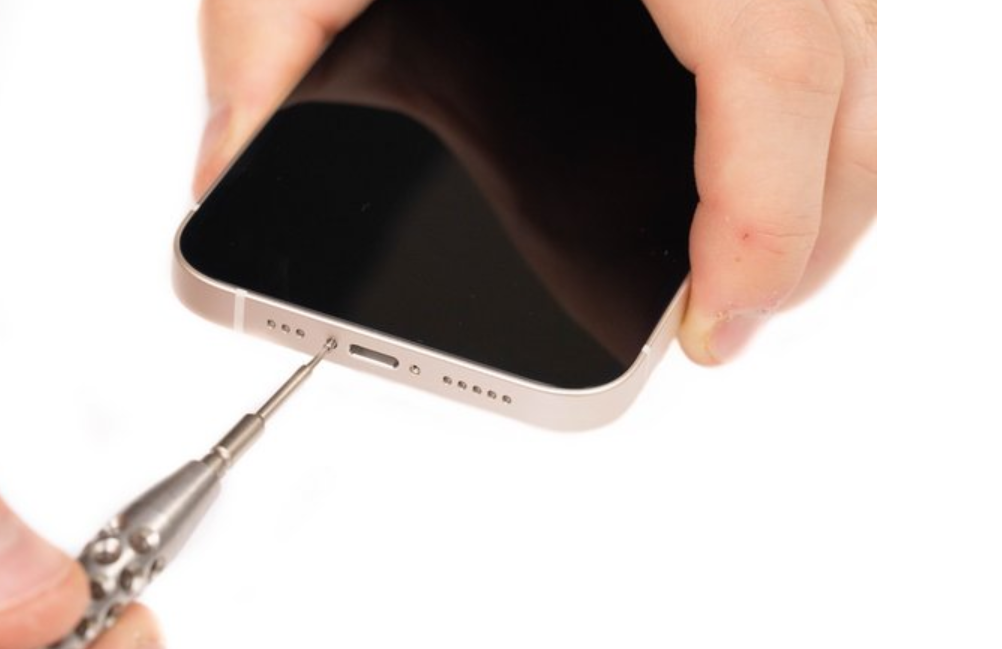
Step 2: Remove the Screws
- Identify the pentalobe screws at the bottom of the iPhone 14.
- Use the pentalobe screwdriver to unscrew and remove each screw.
- Keep the screws in a cover to avoid losing them.
- Handle the screws carefully to prevent damage.
- Make sure to remove all screws before heading to the next step.
Step 3: Mark Your Opening Picks
- To avoid damaging your device, it’s crucial to mark your opening pick correctly.
- Measure 3 mm from the tip of the pick and mark it with a permanent marker.
- These markings ensure precise placement and prevent accidental damage.
- Take your time to ensure accuracy; this step sets the stage for the entire repair process.
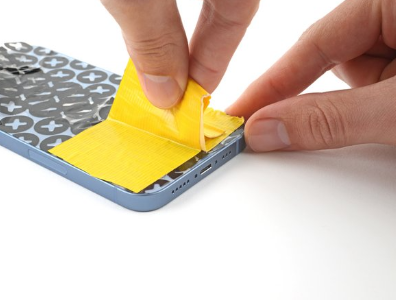
Step 4: Tape Over Any Cracks
- Safeguard your iPhone from further damage and prevent any potential harm during repair.
- Lay overlapping strips of clear packing tape over the cracked rear glass until fully covered.
- Wear safety glasses to protect your eyes from any glass shards that may come loose.
- If the suction cup struggles to adhere, fashion a handle using strong tape like duct tape.
Step 5: Heat the Bottom Edge
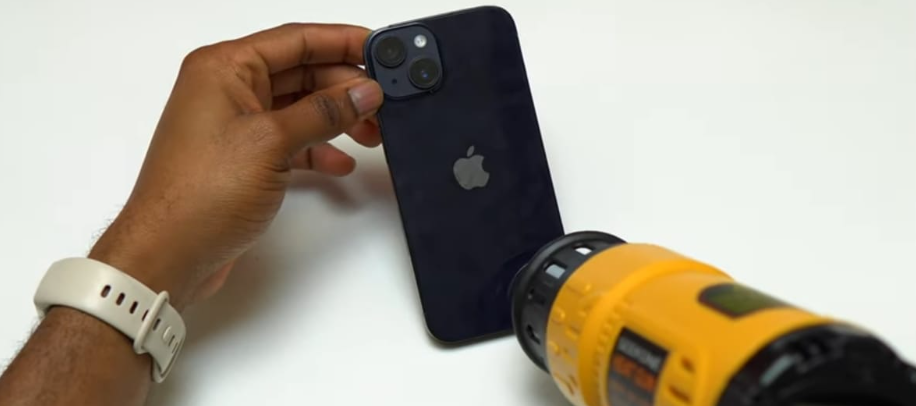
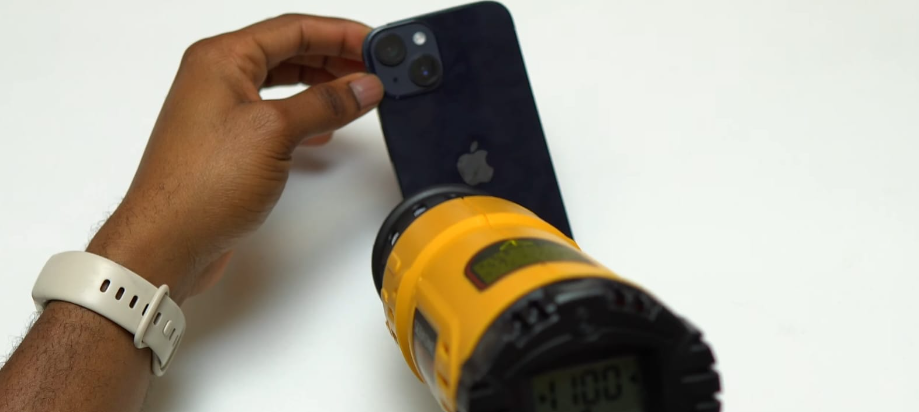
- Prepare the rear glass for removal by heating its bottom edge.
- Use a hair dryer or heat gun to apply heat for approximately 90 seconds or until the glass is too hot to touch.
- Ensure you keep the heat source moving to prevent damage to the device.
- Heating the edge softens the adhesive, making it easier to separate the glass from the device.
- Be cautious not to overheat or concentrate heat in one area for too long.
Step 6: Insert an Opening Pick
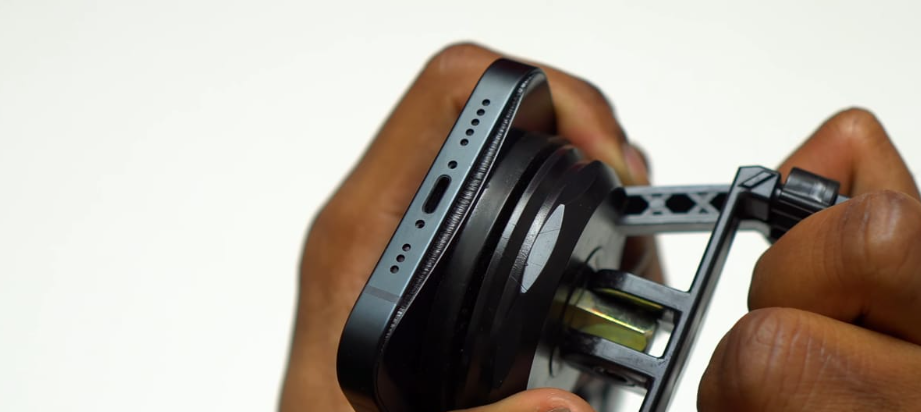
- Attach a suction handle to the bottom edge of the rear glass, avoiding the very edge.
- Apply firm, steady pressure on the suction cup to create a slight gap between the rear glass and the case.
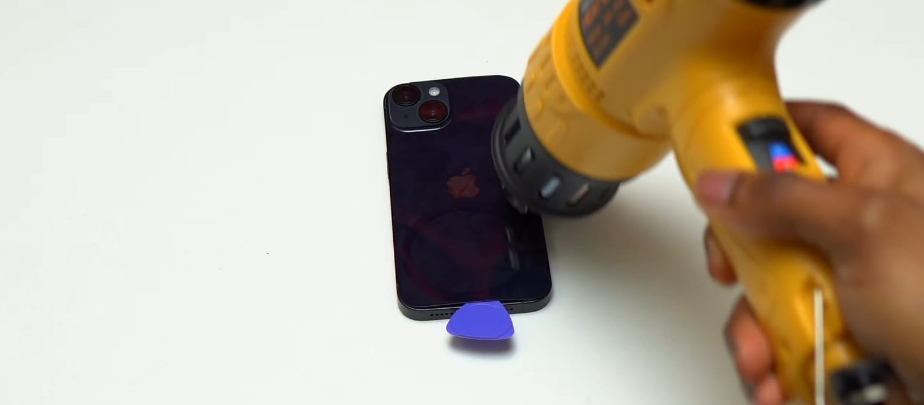
- Once a gap is created, carefully insert an opening pick into the space.
- If you encounter resistance, apply more heat and gently rock the rear glass to weaken the adhesive.
- Take caution, as the adhesive is intense and requires significant force to create the initial gap.
- Avoid inserting the pick too deeply to prevent damage to internal components.
Step 7: Heat the Left Edge
- Heat the left edge of the iPhone using a hair dryer for approximately 90 seconds or until the rear glass is too hot to touch.
- Slide the opening pick around the lower left corner and up the left edge, slicing through the adhesive.
- Ensure the pick doesn’t penetrate more than 3 mm to avoid damaging internal components.
- Be mindful of the delicate cable along the right edge; avoid inserting the pick in this area to prevent damage.
- This step requires precision and care to safely separate the rear glass from the device.
- The heating softens the adhesive, making it easier to maneuver the opening pick.
Step 8: Heat the Right Edge
- Apply heat to the right edge (the edge with the power button) of the iPhone using a hair dryer for about 90 seconds or until the rear glass is too hot to touch.
- Re-insert the pick at the bottom edge and slide it up the right side to continue separating the adhesive.
- Exercise caution to avoid inserting the pick more than 3 mm to prevent damage to the charging coil cable.
- Carefully maneuver the pick along the edge, ensuring not to damage any internal components.
- This step completes the process of loosening the rear glass, preparing it for safe removal.
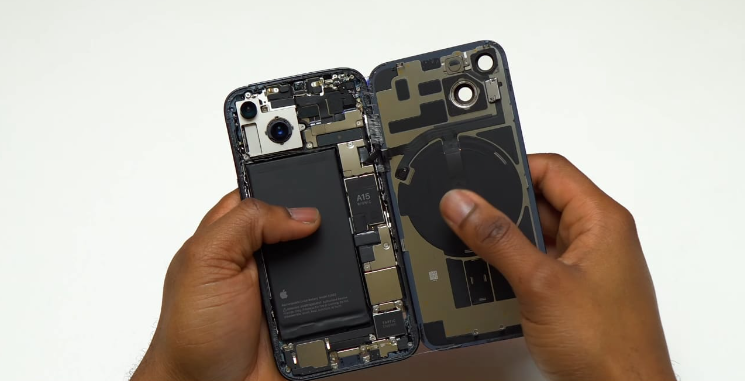
Step 9: Open the iPhone
- Remove the suction handle from the rear glass.
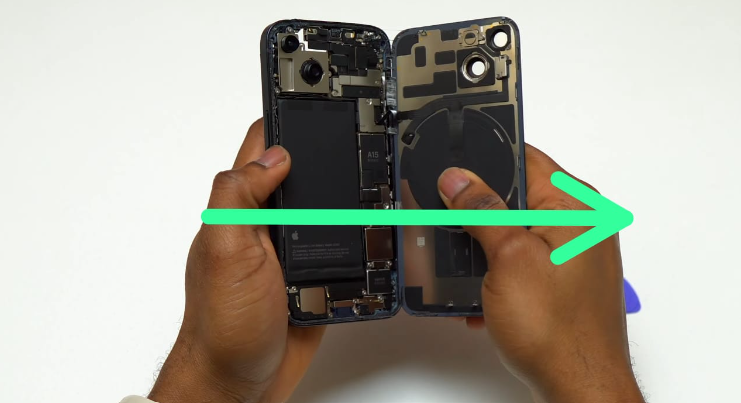
- Gently open your iPhone by swinging the rear glass up from the left side, similar to opening the back cover of a book.
- Take care not to strain the short charging coil flex cable during the opening process.
- Lean the rear glass against a stable surface to keep it propped up while you work on the phone.
- If a stable surface isn’t available, you can use the suction handle to prop up the rear glass securely.
- During reassembly, align the clips along the top edge of the rear glass and press the top edge into place before securing the rest. Check the condition of the clips to ensure they’re not bent or damaged.
Step 10: Remove the Battery Connector Cover
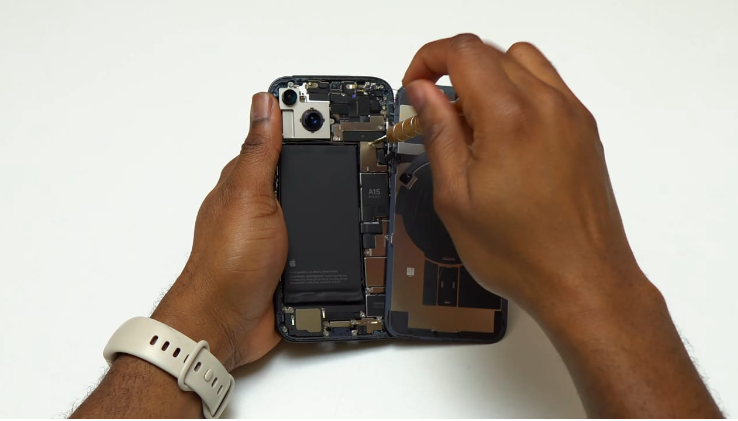
- Utilize a Y000 screwdriver to remove the two 1.3 mm-long screws that secure the battery connector cover.
- Keep track of each screw throughout the repair process to ensure they’re returned to their original positions.
- Before reassembly, it’s advisable to power on your iPhone and test all functions. Power down the device completely before continuing the repair.
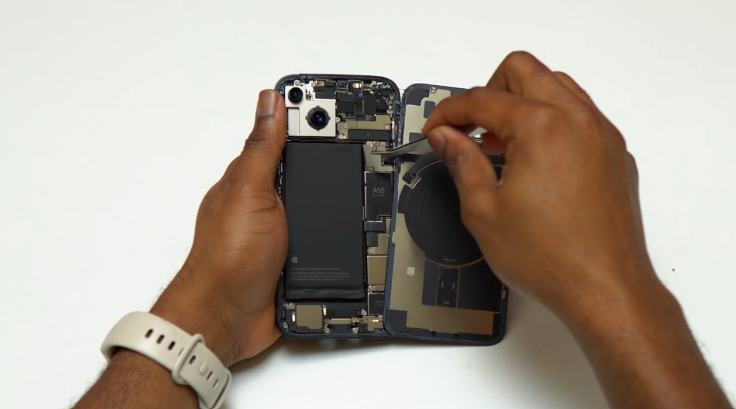
- Grasp the battery connector cover with tweezers and slide it upwards to unlatch the top hook.
- Carefully remove the battery connector cover to access the battery connector.
- This step prepares the iPhone for disconnecting the battery safely.
Step 11: Disconnect the Battery
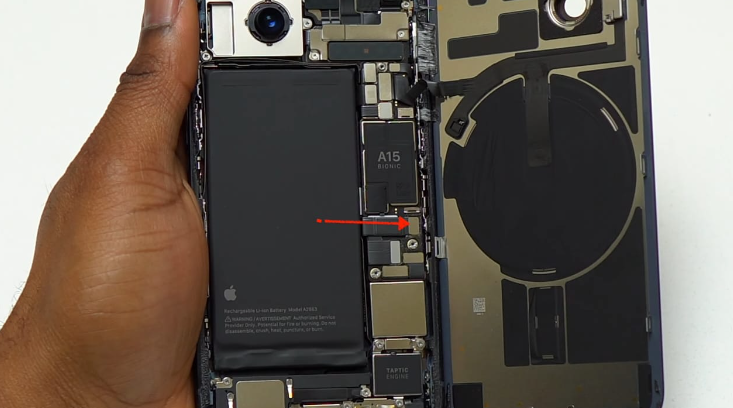
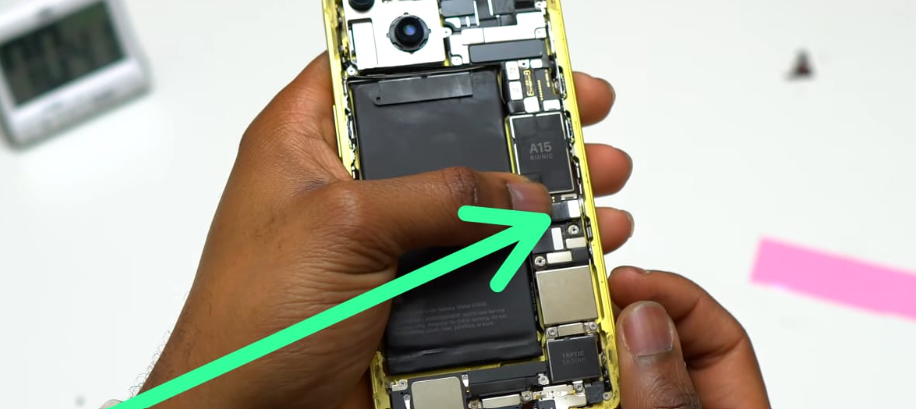
- Use the pointed end of a spudger to disconnect the battery cable by gently prying the connector straight up from its socket.
- Take care not to damage the black silicone seal surrounding the connector, as it provides protection against water and dust intrusion.
- Bend the connector slightly away from the logic board to prevent accidental contact and power supply during the repair.
- Disconnecting the battery is a crucial safety measure before proceeding with any internal repairs.
- Ensure the battery is completely disconnected to prevent any electrical mishaps during the repair process.
- This step sets the stage for further disassembly and repair of the iPhone’s internal components.
Step 12: Disconnect the Charging Coil
- Utilize a Y000 screwdriver to remove the single 1.0 mm-long screw securing the charging coil connector cover.
- With a pair of tweezers, carefully lift and remove the charging coil connector cover.
- Use the pointed end of a spudger to disconnect the charging coil cable by prying the connector straight up from its socket.
- Take caution to avoid damaging any components during the disconnection process.
- This step prepares the charging coil for safe removal from the device.
- Ensure all connections are properly disconnected before proceeding further.
Step 13: Remove the Rear Glass Assembly
- Carefully remove the rear glass assembly from the iPhone.
- If necessary, apply new adhesive to ensure proper reassembly after cleaning the relevant areas with isopropyl alcohol (>90%).
- During reassembly, take a pause here if you intend to replace the rear glass adhesives.
- Ensure the rear glass assembly is handled with care to prevent any damage.
- Cleaning the areas with isopropyl alcohol helps ensure a clean and secure bond when applying new adhesive.
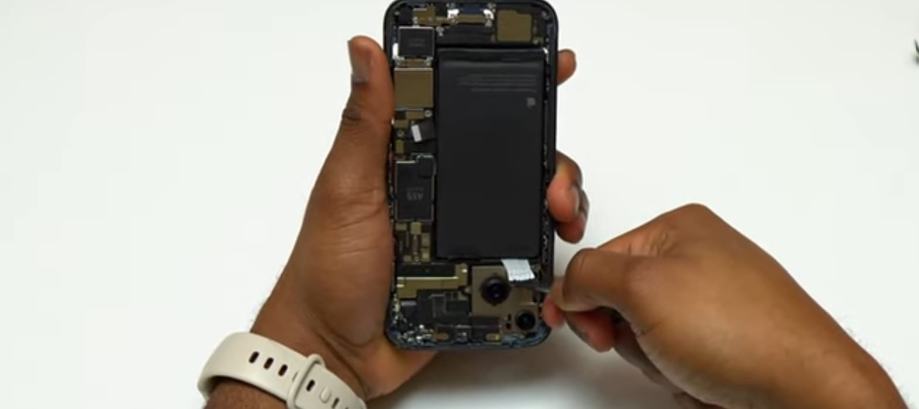
Step 14: Remove the Stretch-Release Adhesive
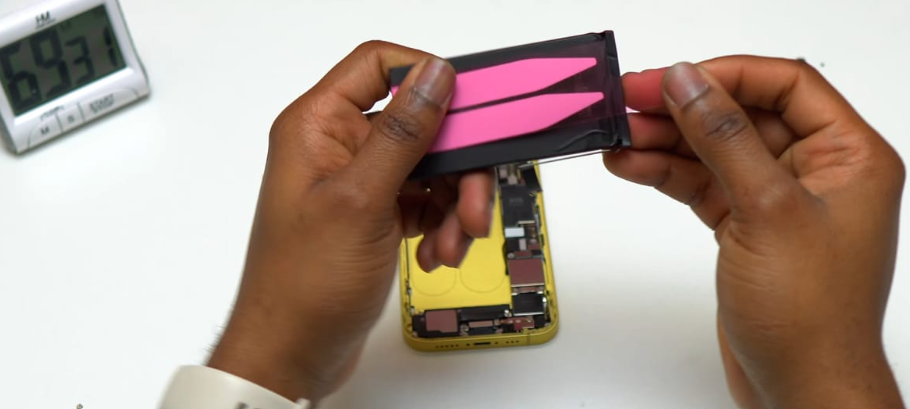
- Identify the two stretch adhesive strips securing the battery to the case, accessible from the top edge of the battery.
- Each adhesive strip features a black pull-tab lightly adhered to the edge of the battery.
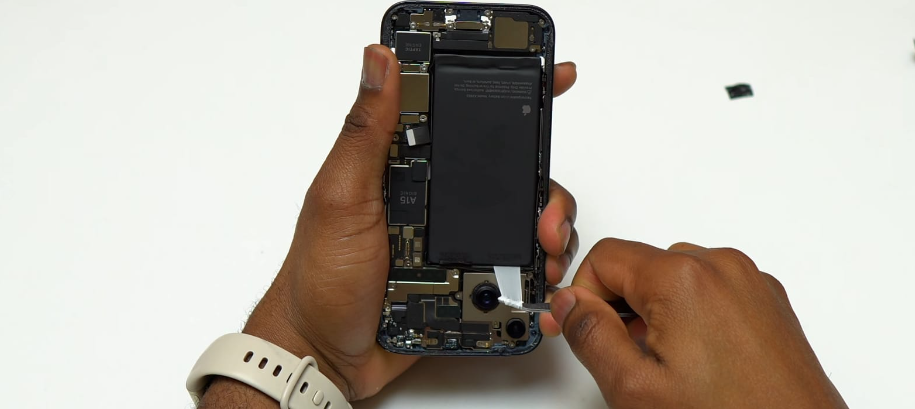
- Gradually pull each tab to stretch out the adhesive underneath the battery, akin to “command-strip” style adhesives.
- If the strips break, remain calm and follow additional tips provided for removing broken strips.
- Exercise caution to avoid jabbing the battery with sharp tools, which could lead to leakage or fire hazards.
- Utilize blunt-nosed tweezers to carefully peel up the two battery adhesive pull-tabs along the top edge of the battery, ensuring a smooth removal process.
Step 15: Removing the Adhesive Strips
- Grab the first pull-tab with fingers or a spudger and pull it toward the top of the iPhone.
- Apply enough force to maintain tension on the strip without excessive force.
- Allow time for the strip to stretch and unstuck from under the battery.
- Hold the iPhone firmly by its sides, avoiding pressure on the battery.
- Keep the strip flat and pull evenly across the whole strip.
- If the strip breaks, attempt to retrieve it with fingers or tweezers, avoiding prying under the battery.
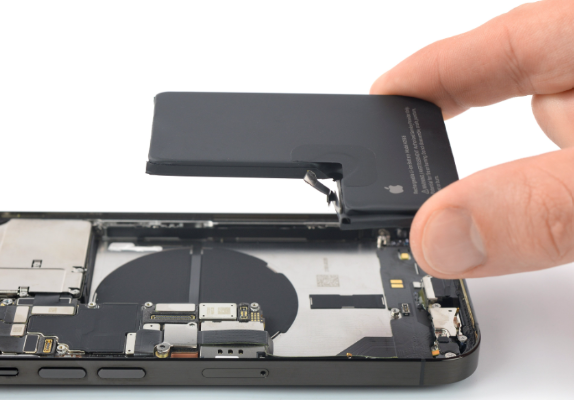
Step 16: Remove the Battery
- Use a tri-point screwdriver to remove the screws holding the battery.
- Take out the screws carefully to avoid losing them.
- Once the screws are out, gently lift the battery away from the iPhone 14.
- Be cautious not to damage any other components while removing the battery.
- Ensure you have a clear workspace to work safely.
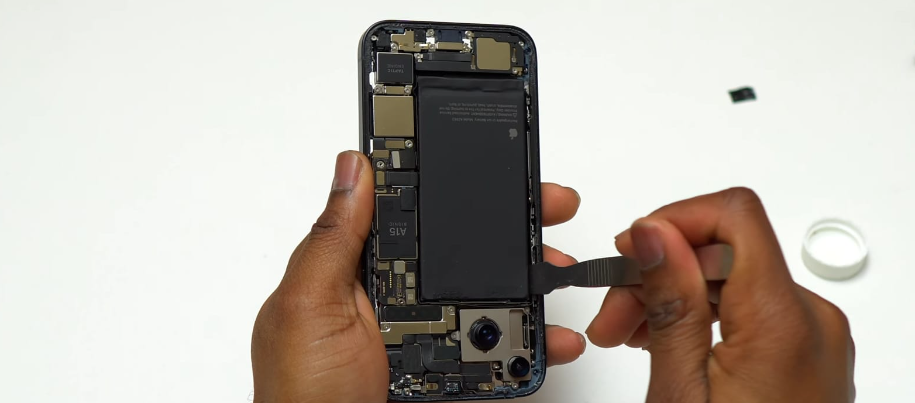
Step 17: If Battery Got Stuck
- If you encounter difficulty removing the battery, apply a few drops of high-concentration (90% or higher) isopropyl alcohol under the edge of the battery where the adhesive strips are broken.
- Allow approximately one minute for the alcohol solution to weaken the adhesive effectively.
- Utilize an opening pick or the flat end of a spudger to gently lift the battery, avoiding forceful levering.
- Ensure not to deform or puncture the battery with the pry tool to prevent any safety hazards.
- If necessary, apply additional drops of alcohol to further weaken the adhesive if the battery remains stuck.
- Exercise caution and patience during this process to avoid damaging the battery or other components of the device.
Step 18: Install the New Battery
- Carefully place the new battery into the iPhone 14.
- Align the battery correctly with the slots provided.
- Secure the battery in place by reinserting and tightening the screws.
- Double-check that the battery is firmly seated in its position.
- Handle the new battery with care to avoid any damage during installation.
Step 19: Reconnect the Display Assembly and Battery cables
- Reattach the cables connecting the display assembly to the iPhone 14.
- Ensure the cables are properly aligned and securely connected.
- Lower the display assembly back into place gently.
- Take your time to avoid pinching any cables during reassembly.
- Listen for clicks to confirm that the cables are properly connected.
Step 20: Replace the Screws
- Use the screwdriver to put the screws back into their respective holes.
- Tighten the screws firmly, but not excessively, to secure the display assembly.
- Check each screw to ensure they are all tightened evenly.
- Be careful not to over-tighten the screws, as this could damage the threads.
- Make sure all screws are accounted for and properly seated.
Step 21: Power On the iPhone
- Press and hold the power button to turn on the iPhone 14.
- Wait for the Apple logo to appear on the screen, indicating that the device is booting up.
- Monitor the startup process to ensure there are no issues with the new battery.
- Once the iPhone is powered on, check for any error messages or abnormal behavior.
- Test the functionality of the device to ensure everything is working as expected with the new battery.
Conclusion
Taking care of your iPhone 14 battery is crucial for its overall performance. Following the steps outlined in this guide ensures that your iPhone 14 remains functional and efficient for years. A healthy battery means longer usage times and fewer charging hassles, making it worth the effort to replace when needed.
Maintaining a properly functioning battery is essential for maximizing the lifespan and usability of your iPhone 14. Whether you choose to replace the battery yourself or enlist the help of professionals, the key is to prioritize the health of your device. With a new battery in place, you can enjoy uninterrupted usage and peace of mind knowing that your iPhone 14 is operating at its best.
