The iPad 9 is a popular and versatile tablet, but over time, its internal components can experience wear and tear. If you’ve noticed that the right speaker on your iPad 9 is not functioning properly, such as distorted sound, no sound at all, or muffled audio, then it’s time to replace it. Fortunately, replacing the speaker on your iPad 9 is a simple process that you can do yourself with the proper tools and guidance.
In this step-by-step guide, we’ll show you how to replace the right speaker on your iPad 9. Whether you’re a tech enthusiast or a newbie, this guide will help you get your device back to its original sound quality in no time. So, put on your work gloves and let’s get started!
Tools and Materials Needed
Before diving into replacing the right speaker on your iPad 9, it’s essential to gather the necessary tools and materials. Having everything prepared will ensure a smooth and efficient repair process.
Here are the tools and materials you will need:
*Replacement Speaker
*Screwdriver Set
*Plastic Pry Tools
*Spudger
*Adhesive Strips
*Cleaning Cloth
*Magnetic Mat or Tray
*A pair of tweezers
*Adhesive tape
Safety Precautions:
Before diving into replacing the right speaker on your iPad 9, it’s crucial to prioritize safety.
*Disconnect the power to avoid any potential electrical shock.
*Choose a clean and well-lit environment.
*Clear your workspace of any clutter to minimize the chances of losing small screws or damaging delicate parts of your device.
*Consider using an anti-static mat or wristband to prevent static electricity build-up, which can potentially damage the internal components of the iPad.
Step-by-Step Process to Replace the Right Speaker on iPad 9
Here, you should go through all the steps to replace your iPad 9 damaged or faulty speaker right speaker with the new one.
Step 1: Removing the Damaged Speaker Grill
Before you can replace the right speaker on your iPad 9, you will need to remove the damaged speaker grill.
- First of all, power off your iPad and place it on a flat and clean surface. This will provide stability and prevent any accidental damage during the repair process.
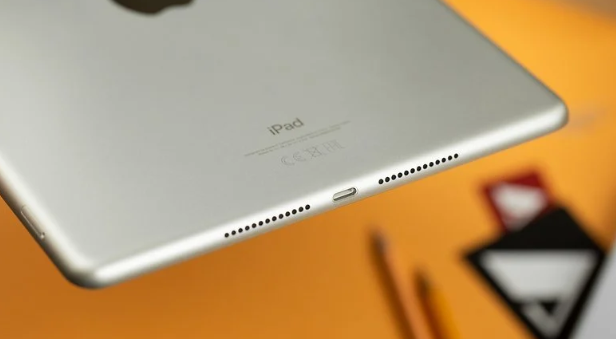
- Locate the damaged speaker grill on the right side of your iPad. It is usually positioned towards the bottom of the device, near the charging port.
- Use the plastic opening tool to gently pry off the damaged speaker grill. Start from one corner and gradually work your way around the edges. Apply even pressure to avoid causing any additional damage.
- Be patient and take your time during this step. The speaker grill may be held in place by adhesive or clips. Carefully maneuver the plastic opening tool along the edges until the grill is completely detached.
- Once the grill is removed, set it aside in a safe place. Take a moment to inspect the speaker underneath for any signs of damage or debris. If necessary, use the tweezers to remove any foreign objects or obstructions.
Step 2: Remove the Screws to Access the Speaker
- Locate the screws that are holding the speaker in place. On the iPad 9, these screws can usually be found near the bottom of the device, close to the charging port. They are typically small and may require a precision screwdriver to remove.
- Carefully unscrew these screws one by one, making sure to keep them in a safe place where they won’t get lost. Use a magnetic mat or tray to keep track of the screws and ensure they are easily accessible when it’s time to reassemble the device.
- Once all the screws are removed, you can gently lift the speaker from its housing. Take note of any connectors or adhesive that may be holding it in place, and gently detach or remove them as necessary. Be cautious and take your time to avoid damaging any other components or cables.
- With the old speaker removed, it’s time to prepare the new speaker for installation. Ensure that the replacement speaker is compatible with your iPad model. Double-check the connectors and any adhesive needed for proper installation.
- Now, align the new speaker with the housing, taking care to secure it in place. Reattach any connectors or adhesive that were previously removed, ensuring a secure and snug fit.
Step 3: Disconnecting the Speaker Cable
- Locate the speaker cable found near the bottom of the speaker assembly.
- Using a pair of tweezers or a plastic opening tool, carefully lift the connector that holds the speaker cable in place. Be cautious not to apply too much force or bend the connector, as it may cause damage.
- Once the connector is lifted, gently pull the speaker cable away from the connector. This should detach the cable from the mainboard.
- Take a moment to examine the connector and the speaker cable for any signs of damage or dirt. If necessary, clean the connector and cable using a small amount of isopropyl alcohol and a soft, lint-free cloth.
- To avoid any accidental reconnection or tugging on the cable during the remaining steps of the replacement process, it is recommended to secure the disconnected cable using a piece of adhesive tape or a small clip.
Step 4: Installing the New Speaker
- Take the new speaker out of its packaging.
- Carefully align the new speaker with the designated slot on the iPad’s housing. Make sure that the connectors on the speaker are properly aligned with the corresponding connectors on the device.
- Gently press down on the speaker to secure it in place. Apply even pressure to ensure a stable connection and avoid any potential damage.
- Once the speaker is securely in place, use the appropriate tools to reattach any screws or clips that were removed during the disassembly process. Make sure that they are tightened but not overly tightened, as this could cause damage to the device.
- Test the new speaker by playing a sound or video on your iPad. Adjust the volume to ensure that the audio is clear and at an appropriate level. If the sound quality is not satisfactory or if there are any issues, double-check the connections and make any necessary adjustments.
- Once you are satisfied with the installation and sound quality, reassemble the remaining components of your iPad, following the reverse order of the disassembly process. Take your time and be meticulous to avoid any accidental damage or misplacement of parts.
Step 5: Reconnecting the Speaker Cable
- Locate the speaker cable.
- Take the connector end of the speaker cable and carefully align it with the corresponding port on the replacement speaker. Ensure that the connector is facing the right way and matches the orientation of the port.
- With steady hands, gently insert the connector into the port on the replacement speaker. Apply even pressure to avoid bending or damaging the delicate pins on the connector or the port.
- Once the connector is fully inserted, you should feel a slight click or resistance, indicating a secure connection. Double-check that the connector is properly seated and aligned with the port.
- Before proceeding to the next step, it’s important to test the connection and ensure that the speaker is functioning correctly. Turn on your iPad 9 and play some audio or a test tone to verify that the sound is coming from the replacement speaker.
- If everything is working as expected, you can proceed to reassemble your iPad 9. Follow the previous steps in reverse order, carefully placing the components back in their original positions and securing any screws or clips.
Step 6: Securing the Screws and Replacing the Speaker Grill
- Take the screws that you had set aside earlier and carefully insert them into their respective holes. Make sure to tighten them gently but securely using the screwdriver. Be cautious not to overtighten, as this could damage the delicate components inside.
- Now carefully put the speaker grill back on. Align it properly with the holes on the iPad’s casing and press it down gently until it clicks into place. Ensure that all edges are flush and the grill sits evenly on the device.
- This step is crucial as it not only protects the speaker from any external damage but also ensures that sound is directed towards the user for an optimal audio experience. A loose or misaligned speaker grill may result in muffled or distorted sound quality.
Testing the New Speaker:
Turn on your iPad 9 and ensure it is fully booted up before proceeding with the testing process. Navigate to the Sound & Haptics section. Make sure the volume is turned up to an audible level. Open any audio or video application on your iPad to check if the new speaker is producing sound properly. Pay attention to both the left and right speaker volumes to confirm that the replaced speaker is functioning correctly.
Check for distortions or anomalies: Listen carefully to the audio coming from the new speaker. Look out for any distortions, crackling sounds, or unusual noises that may indicate a problem with the replacement speaker. If you encounter any issues or notice any abnormalities, it may be necessary to revisit the replacement process or seek professional assistance to resolve the problem.
Conclusion:
Replacing the right speaker on an iPad 9 can be a challenging but achievable task with the right tools and guidance. This step-by-step guide provides a comprehensive overview of the process, from gathering the necessary tools to carefully disassembling the device and replacing the speaker. By following each step closely and exercising patience and precision, users can successfully restore the audio functionality of their iPad 9.
It is important to note that this process requires careful attention to detail and a steady hand, as any mistakes could potentially damage the device. It is always recommended to seek professional assistance if one is unsure about their ability to complete the task.


