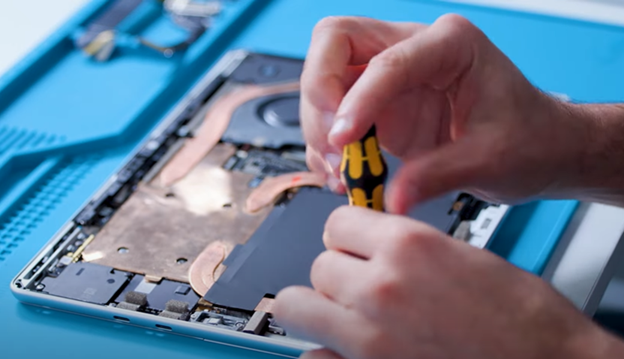
Microsoft Surface Pro 9 is one of the most repairable devices in the Surface Pro generation. So this will be very exciting because we are presenting you with a Microsoft Surface Pro 9 Speaker replacement Step-by-step guide.
However in this comprehensive guide we will guide you through every single step and show you pictorial illustrations. Microsoft Surface Pro 9 Speaker replacement can be easy if you correctly follow every step. This guide will also inform you of precautions and preparation tips for the Surface Pro 9 and its components. So without wasting any time let’s start Surface Pro 9 Speaker Replacement.
How To Start Surface Pro 9 Speaker Replacement
Certainly before starting the replacement of the Surface Pro 9 speaker you should know some very important precautions. These precautions will help you protect yourself and your precious surface pro 9.
First of all make sure that your Surface Pro 9 has a low battery. Like the battery should be drained up to 25% or less. A charged battery can easily catch the fire or risk severe damage. Also take out the SSD and SIM card from your Surface Pro 9 first. That is how you can avoid any accidental harm when you replace the speaker of Surface Pro 9. And when you are taking your device apart be careful to mark the opening pick correctly. This will help you prevent damage to important parts and internal connections. Now you move the first step of Surface Pro 9 Speaker Replacement.
Step #1. Gathering Tools For Surface Pro 9 Speaker Replacement
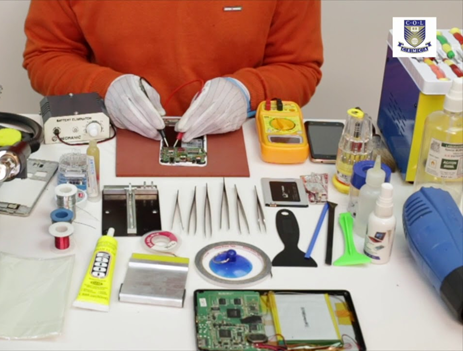
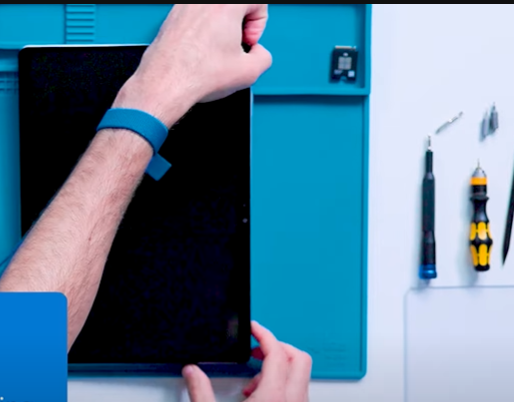
However as the first step you have to make sure you gather all the tools you will need for the Surface Pro 9 speaker replacement. Here’s a checklist of the tools you should have.
*Plastic Spudger
*Suction Tool
*Tweezers
*4 to 5 Opening Picks
*Screwdriver (3IP Torx-Plus)
*Metal Ruler
*Anti-static Wrist Strap (with 1 Mohm Resistance)
*Protective Eye Ware
*Microfiber or Lint-Free Cloth
*Speaker Replacement Specifically Designed for Surface Pro 9 Tablet
*Plastic tray or plate (for safe placement of screws and small components)
Having these tools ready will make the process of replacing your Surface Pro 9 speaker much easier and smoother.
Step #2. Power Off/Shutdown Surface Pro 9
*Select the Start button.
*Choose “Power.”
*Click on “Shut down.”
*Press and hold the power button for 4 seconds.
*Swipe down to power off the Surface Pro 9.
Step #3. Open the Kick Stand
However to replace the speakers of Surface Pro 9 you do not need to remove the kickstand. You need to open it to its fullest so that you can access the SSD card easily.
Step #4. Remove The SSD Card Door
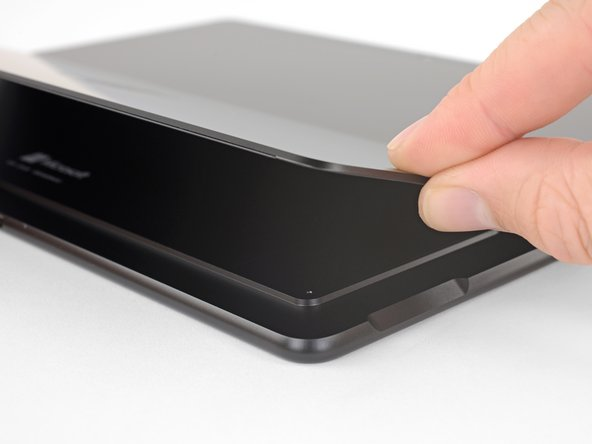
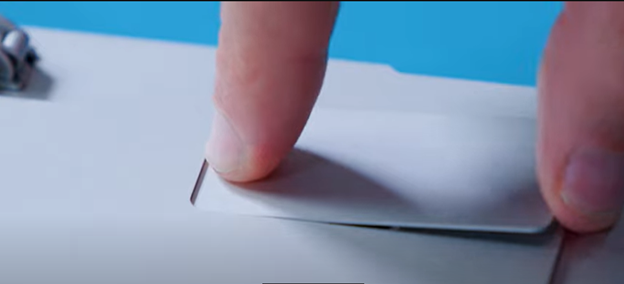
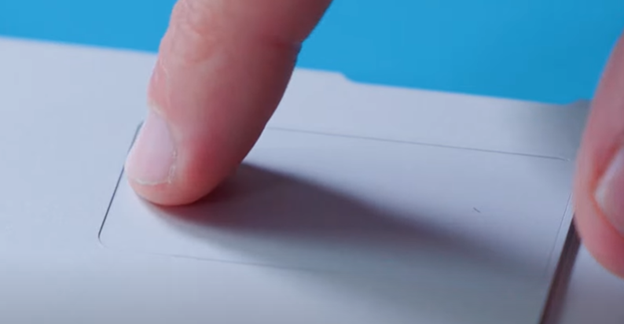
Certainly to remove the SSD card door you only need to press the door on its top with your finger. Hold it with your finger and put it aside.
Step #5. Remove the SSD
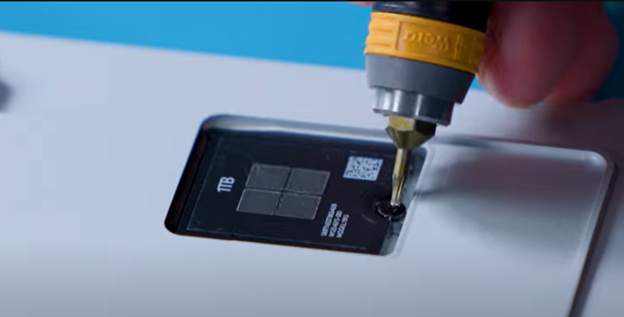
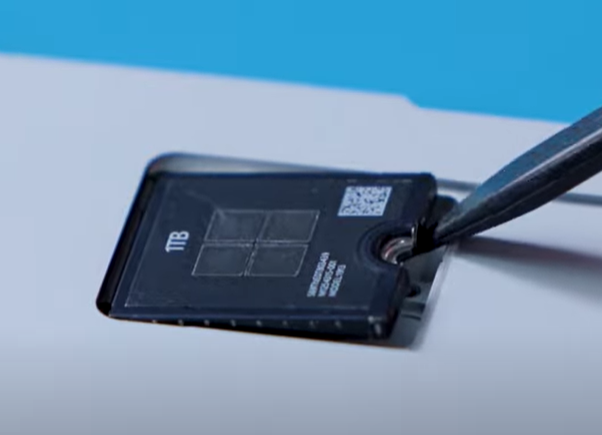
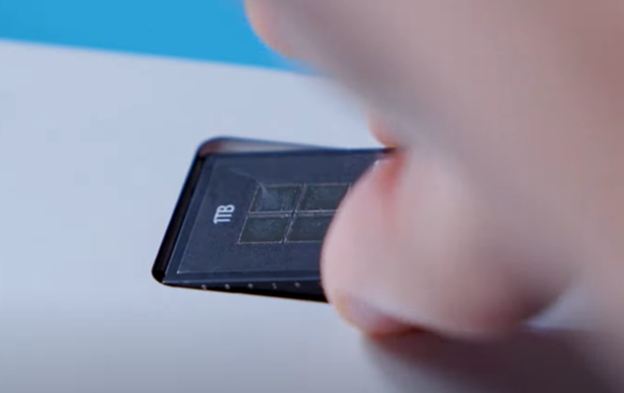
However the SSD is now exposed. Use a 3IP Torx-Plus screwdriver for opening the screw on the SSD. After opening the screw carefully keep it aside and lift the SSD with the help of a plastic spudger. Now carefully put the SSD in a safe area of your table or plastic tray.
Step #6. Apply A Suction Cup On The Screen
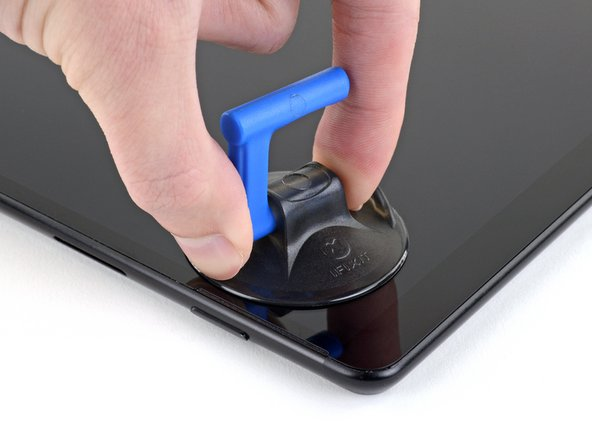
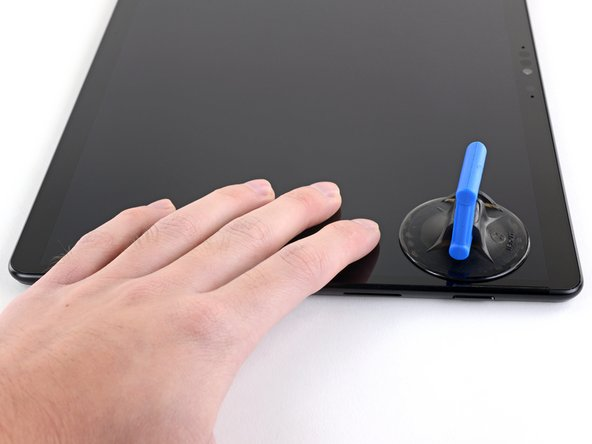
Now it is time to apply a suction cup to the screen. However it’s better to apply it next to the speaker grill. For this action you have to place the Surface Pro 9 screen up on the table.
Step #7. Support Your Surface Pro 9 Screen
After applying the suction tool you have to give support to the tablet’s screen.
You can just put your hand on the screen next to the suction cup. It will secure the screen and reduce the risk of breaking it.
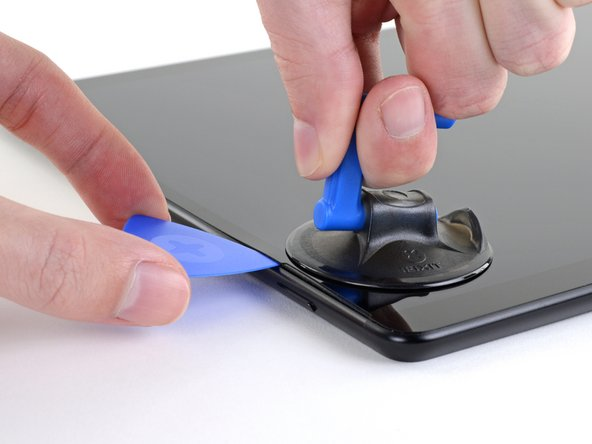
Step #8. Pull the Suction Tool And Create a Gap
Now pull the suction tool from its handle. Keep your hands soft and carefully pull them until you see a line gap between the screen and frame of the Surface Pro 9.
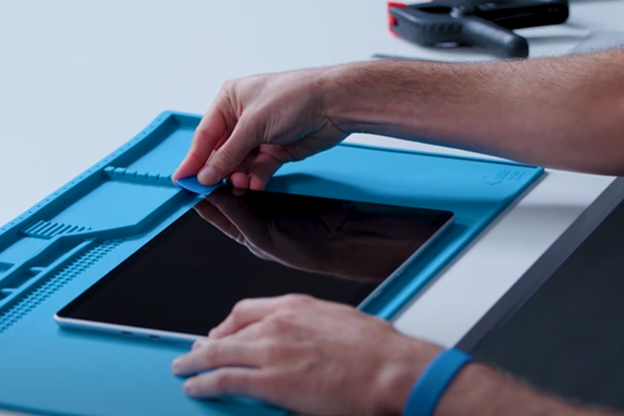
Step #9. Insert An Opening Pick
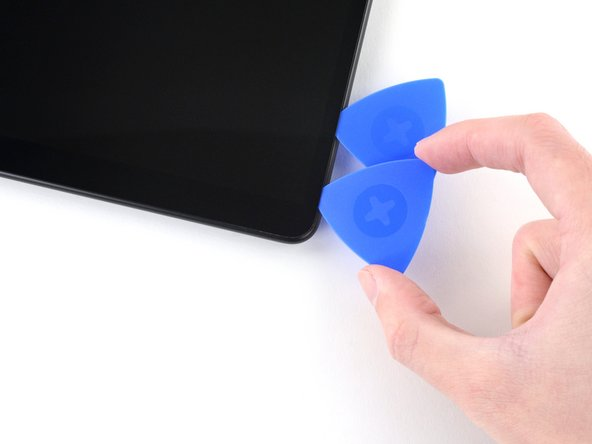
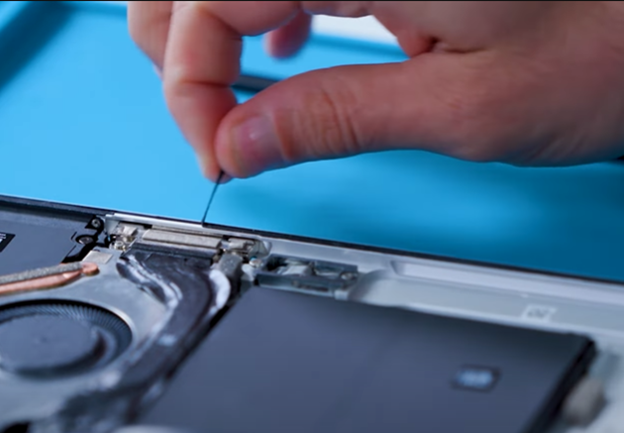
It’s time to insert your first opening pick into the gap. Make sure the opening pick should be marked for 3 mm. Don’t insert the opening pick far into the screen. Otherwise the internal connections or tiny components may damaged.
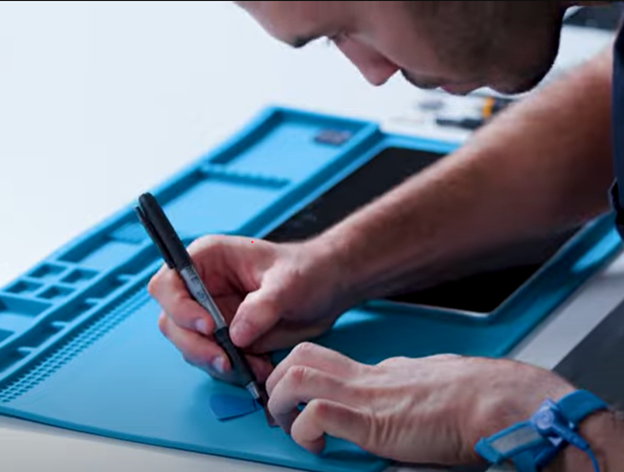
How To Mark An Opening Pick For Surface Pro 9
When using opening picks on your Surface Pro 9 it’s important to avoid damaging internal parts. Here’s a simple way you can mark opening picks before insertion. Take a ruler and a permanent marker. Now draw a line at the 3 mm point for the right, bottom, and left edges of the screen. For the top edge mark it at 10 mm. These marks help you stop going too deep into the screen. And it will keep your Surface Pro 9 safe from damage.
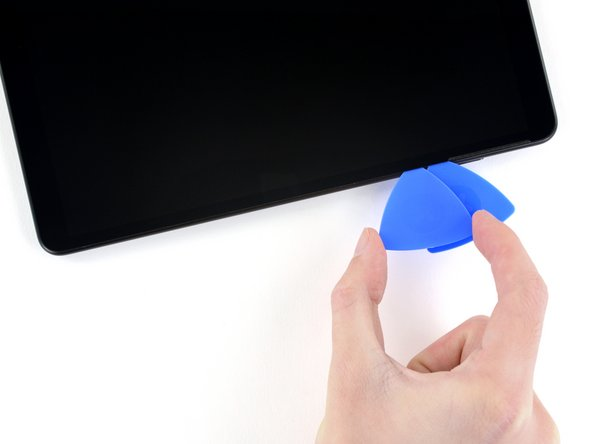
Step #10. Insert Second Opening Pick
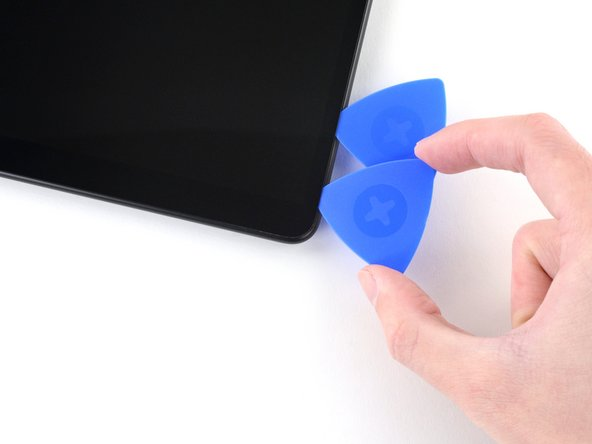
However just next to the first opening pick put another opening pick and slide it to the bottom edge of the screen. Leave the opening pick here. It will stop the screen from sticking again with the frame.
Step #11. Slide Third Opening Pick
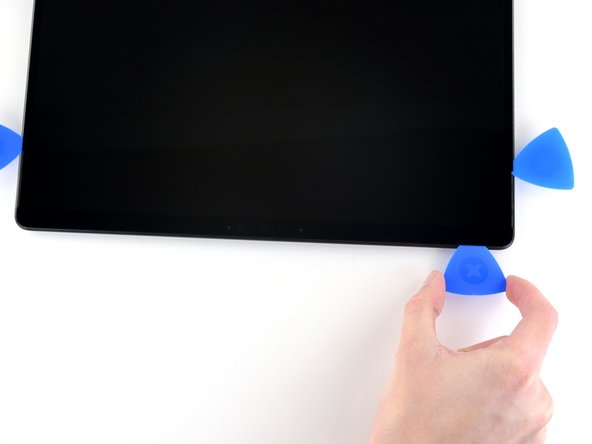
*Now, it’s time to use the third-opening pick.
*Start by inserting it near the second one and starting at the bottom-right corner of the Surface Pro 9.
*Gently slide it along the corner to loosen the adhesive.
*Rotate the pick towards the bottom edge of the Surface Pro 9.
*Slide the pick along the bottom edge to separate the screen from the frame by cutting through the adhesive.
*Once completed please keep the pick in position along the bottom edge to stop the adhesive from sticking again.
Step #12. Slide Forth Opening Pick
*Let’s insert another opening pick into the bottom left corner now.
*Carefully slide it around the corner towards the left edge.
*Though keep sliding the pick along the left edge of the Surface Pro 9 to cut through the adhesive while securing the screen.
*Remember to leave this pick on the left edge to stop the adhesive from sealing again.
Step #13. Insert Opening Pick For Sperating The Top
*Place the fifth opening pick into the top left corner now.
*Gently slide it around the corner towards the top edge of the Surface.
*Continue sliding the pick carefully along the top edge to cut through the adhesive.
*Remember to use only a 10 mm opening pick for the top edges of the screen.
*Inserting too far can cause serious damage to the internal connections and components.
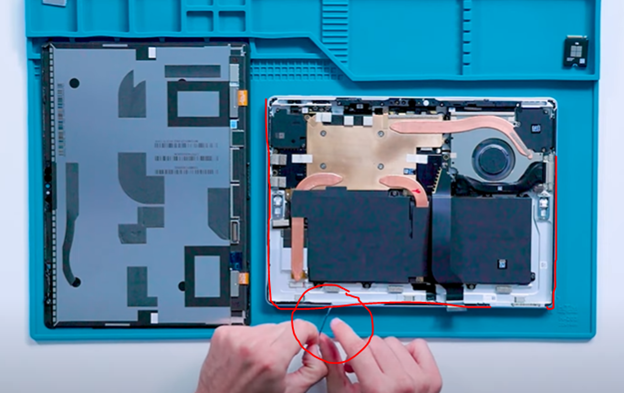
Step #14. Seperate The Screen
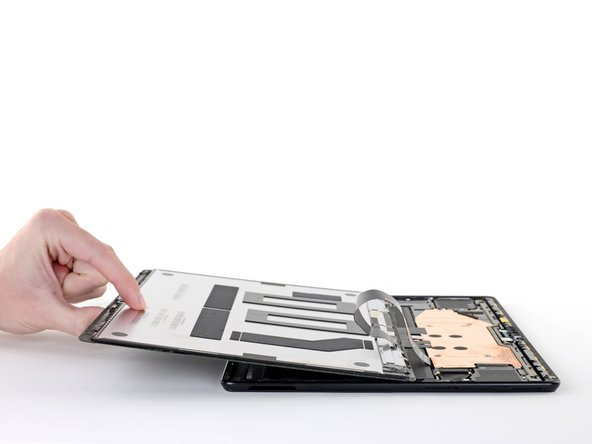
*Lift the top edge of the screen to a 30-degree angle compared to the frame.
*If you feel the stickiness of the screen with the frame don’t try hard. Instead you should make sure all adhesive is evenly separated. Use an opening pick to cut through any remaining adhesive.
*Rotate the screen so its bottom edge lines up with the centre of the frame. Make sure the screen is positioned perpendicular to the frame.
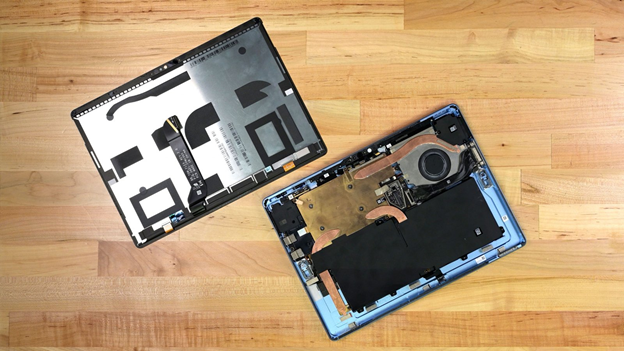
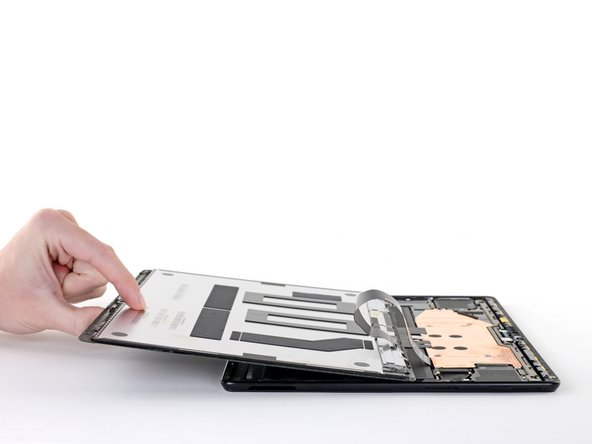
*Now rotate the screen 90 degrees so it faces downwards. Carefully place the screen onto the frame.
Note
Be very careful now! Don’t remove the screen all the way from the tablet’s frame. It’s still attached to the motherboard with a cable. So keep the screen near the Surface’s frame to avoid stretching the cable. And don’t touch the battery with the screen. If the battery gets damaged it might leak harmful chemicals or even catch fire.
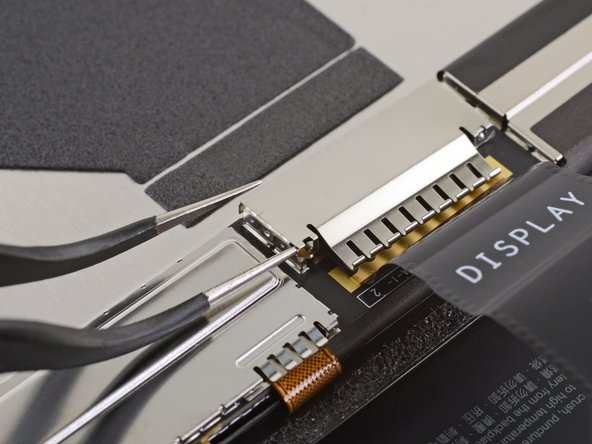
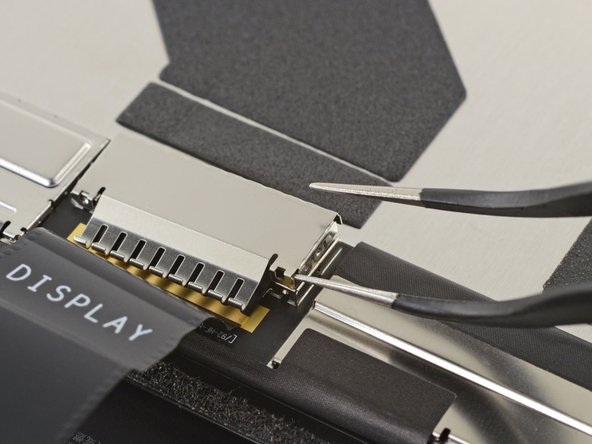
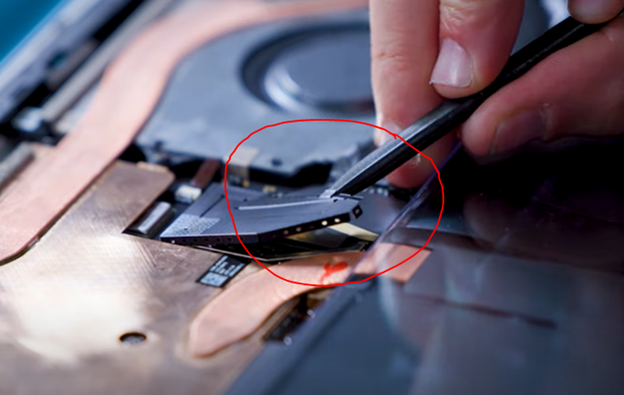
Step #15. Unclip The Display Cable Sheild
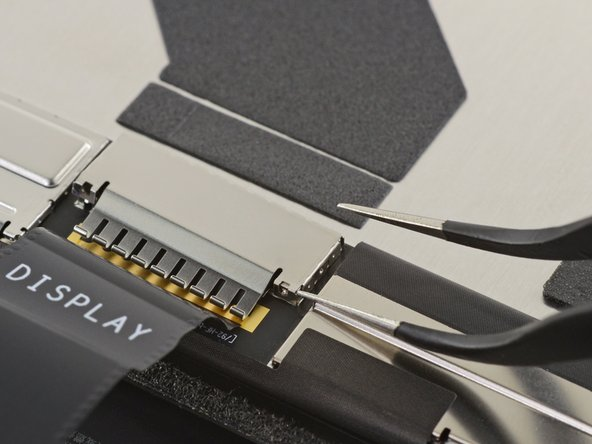
*Use tweezers to slide under the bottom right corner of the display cable shield, where the cable points downward.
*Gently lift the corner to detach it from the screen.
*Repeat the same process with the left corner of the screen cable shield.
*If the display cable shield remains partly attached to the screen you can carefully pry up other areas along the edges until it is fully detached.
*Separate and secure the detached cable shield.
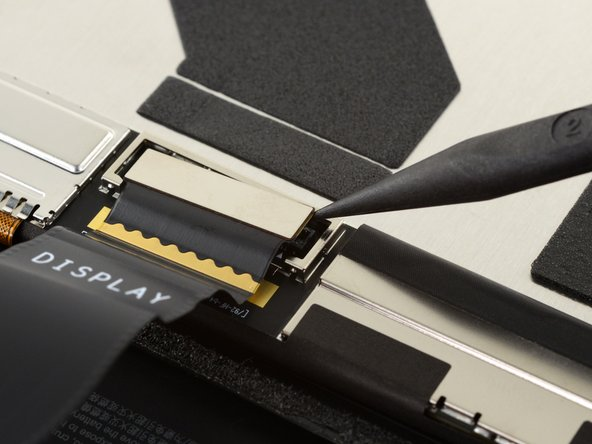
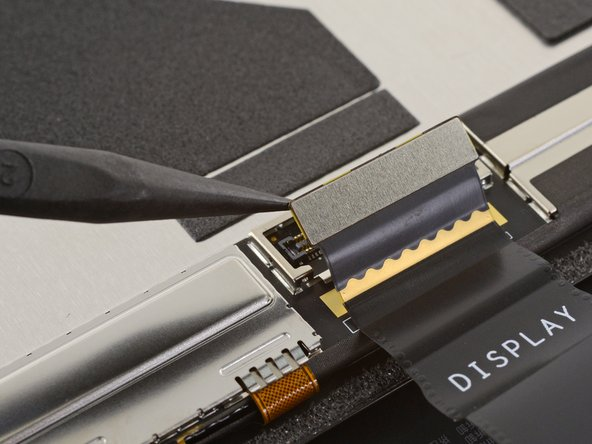
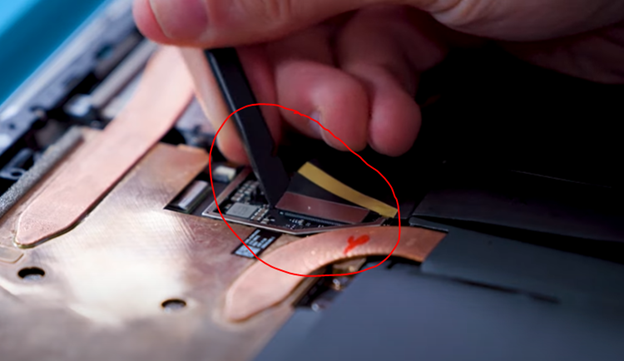
Step #16. Seperate The Display Cable
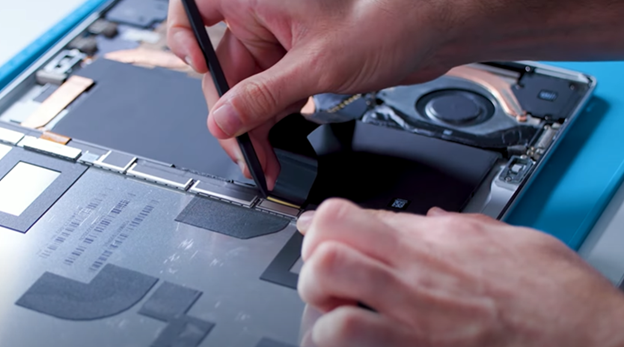
*Use a spudger to slide under the right edge of the display cable press connector.
*Carefully lift the right side of the press connector to disconnect it from the socket on the screen.
*Repeat the process on the left side of the display cable connector to make sure it is fully detached from the Surface Pro 9 screen.
Step #17. Peel The Adhesive
*Gently grasp the edge of the adhesive with your fingers or tweezers.
*Slowly peel the adhesive away from the Surface Pro 9.
Step #18. Put A Cover on the Battery
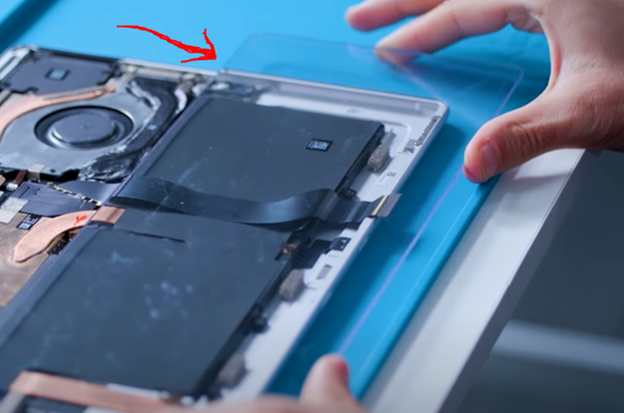
Carefully position the battery cover over the battery. You can only put a transparent thick and hard plastic shield. It will secure the battery and stop your hands or any other tool from touching the battery accidentally.
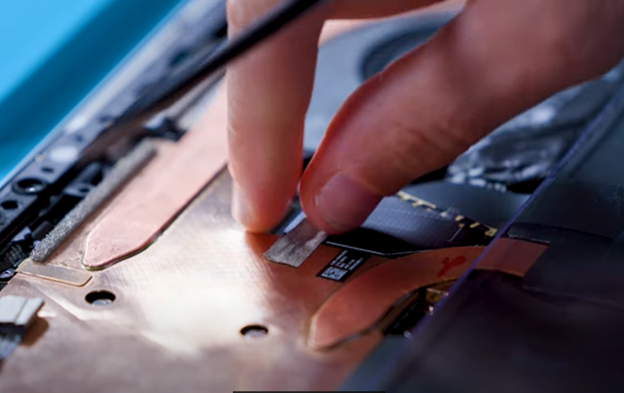
Step #19. Remove Conductive Tape
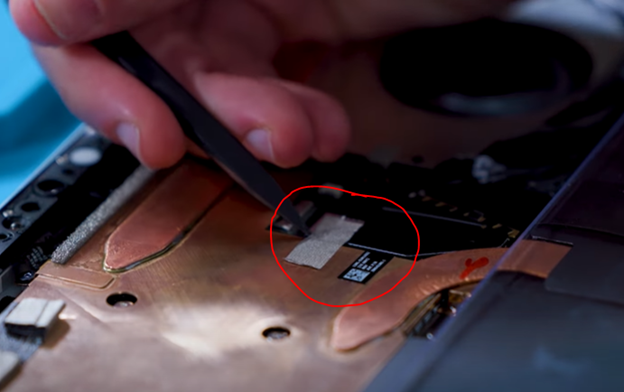
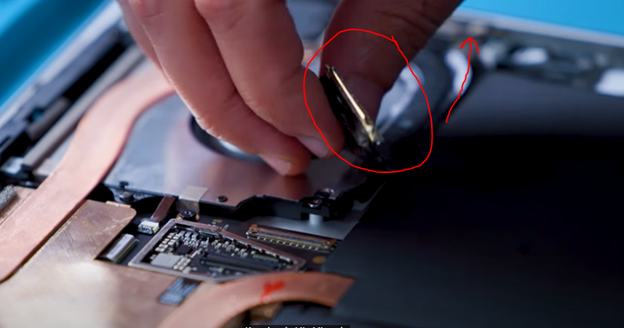
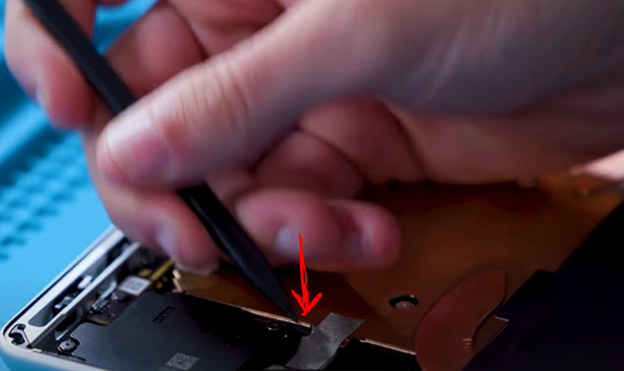
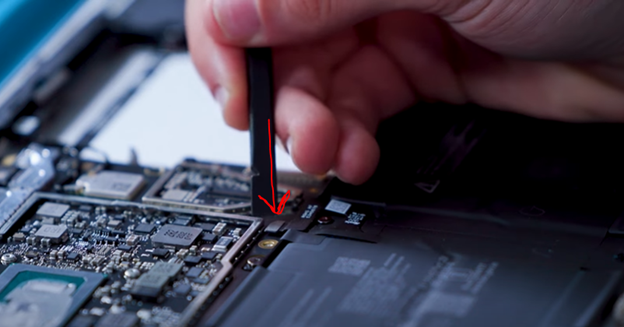
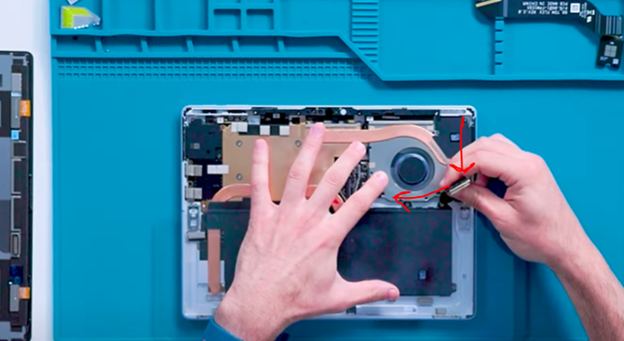
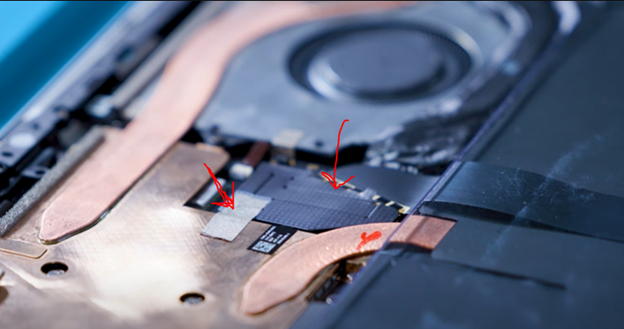
Now carefully remove the conductive tape to reveal the other end of the display cable.
Use a spudger for peeling the conductive tape. Now a black coloured shield will be exposed and you can remove that shield easily.
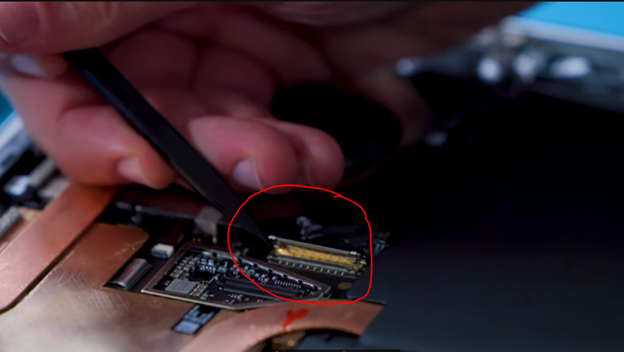
Step #20. Remove The Other End Of The Display Cable
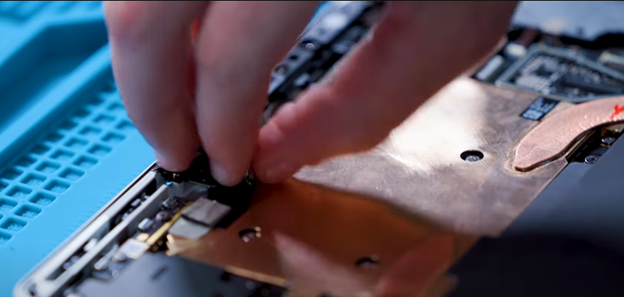
It’s time to remove the other end of the display cable. Use a spudger to pry up the cable. Gently push it through the spudger and the cable will be detached.
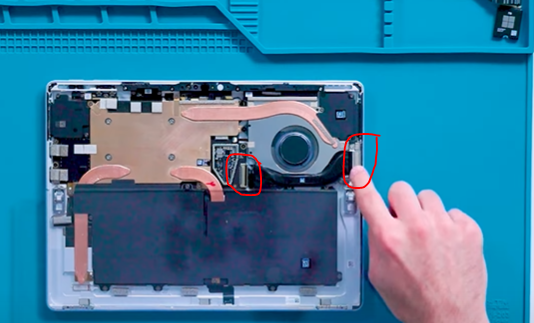
Step #21. Remove The Surface Connect Cable
However here you have to use a spudger to disengage the latch. This disengaging will release the left end of the surface connect cable. Although at this stage the connecting cable is only attached by screws and adhesive straps.
Step #22. Remove The Screws From The Surface Connect Cable
Thus remove the two screws from the right side of the surface connect cable. For this unfastening of the screws you should use a 3IP screwdriver. However note that there is a magnet on these screws and connector. So that the screws might become attached to them during removal.
Step #23. Remove The Surafec Connect Cable
Certainly to remove the cable hold the retention cable on your finger from the left side and gently pull the retention latch up. Keep in mind that is the adhesive that is holding the cable. Keep it securely aside.
Step #24. Disassembling The Thermal Module
Now let’s remove the thermal module. First of all when start removing the thermal module you have to remove the conductive tape on the top and left side of the thermal module.
Step #25. Unfasten The Screws On the Thermal Module
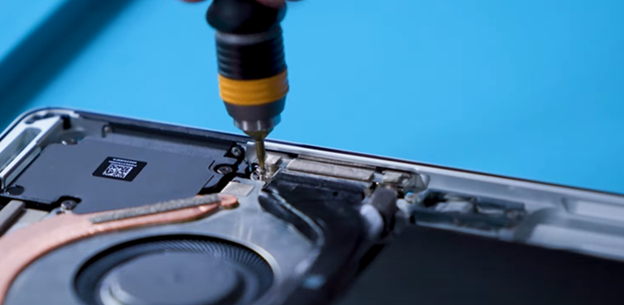
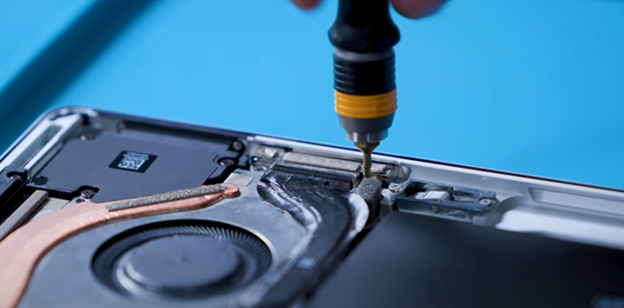
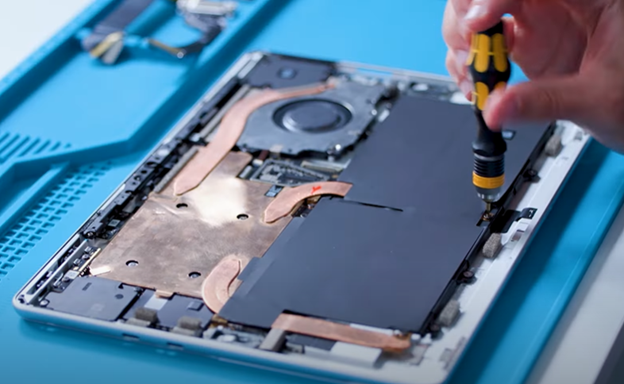
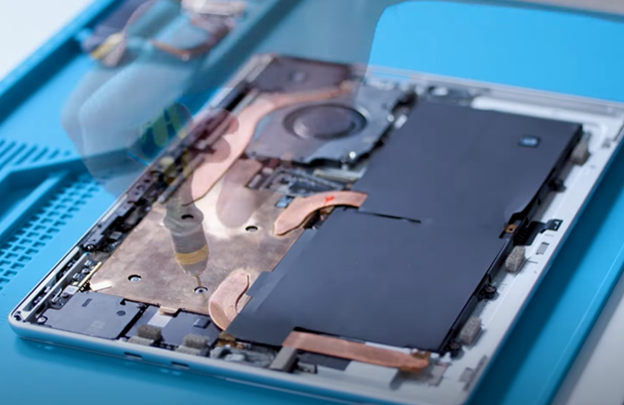
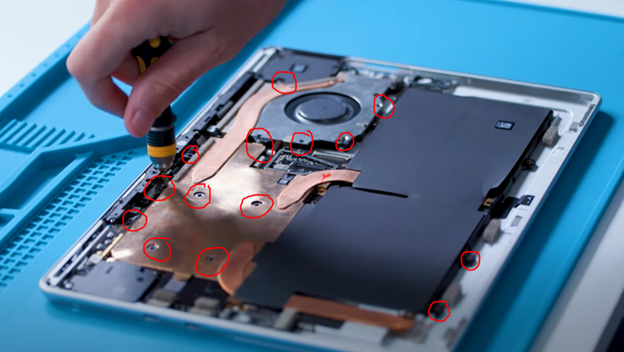
*Next note that 14 screws are holding the thermal module. Which includes the fan that is attached to the thermal module.
*Use a 3IP bit to remove these screws.
*Be gentle and careful. Don’t apply the screwdriver harshly if you feel any difficulty while unfastening the screws.
*Just apply a little bit of heat on that screw and then try again.
Step #26. Disconnect The Fan Connector
*After unfastening all the screws remove the screws and place them securely.
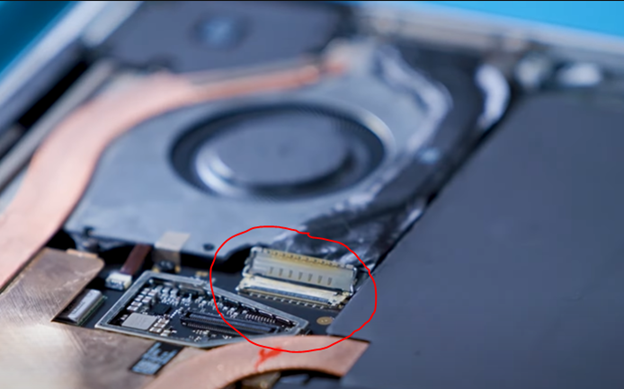
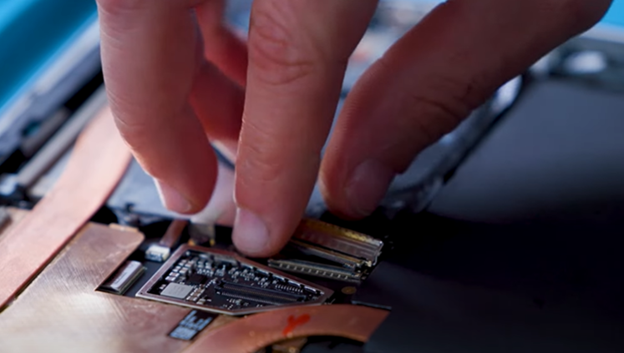
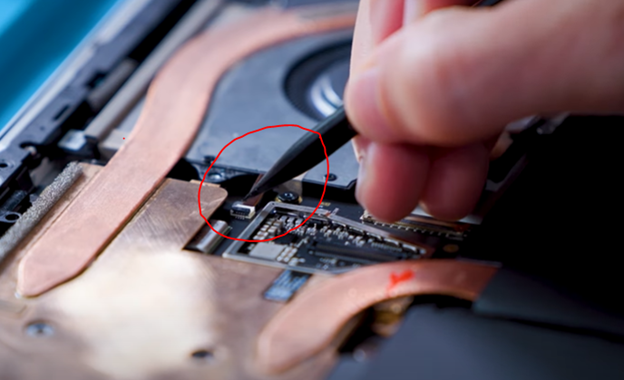
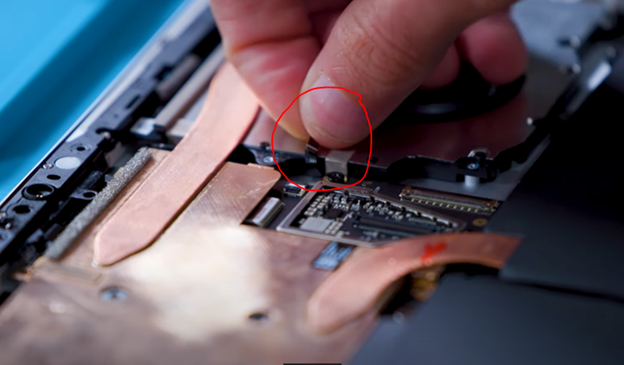
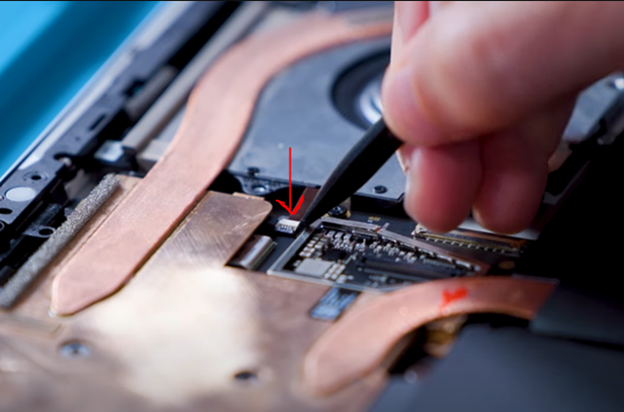
*Before removing the thermal module and fan connector you have to disconnect the fan connection.
*Use a pointed spudger and lift the fan connector.
*Now pull it and disconnect the fan FPC.
Step #27. Remove The Thermal Module
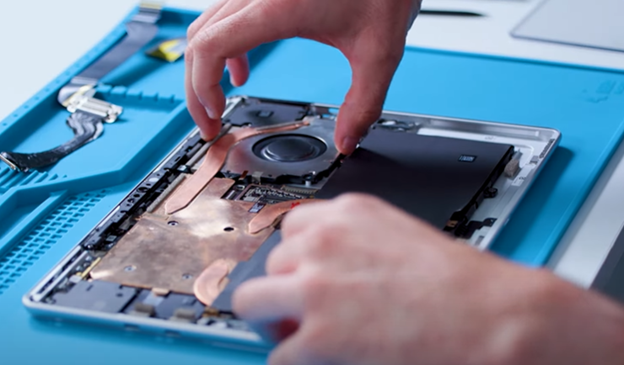
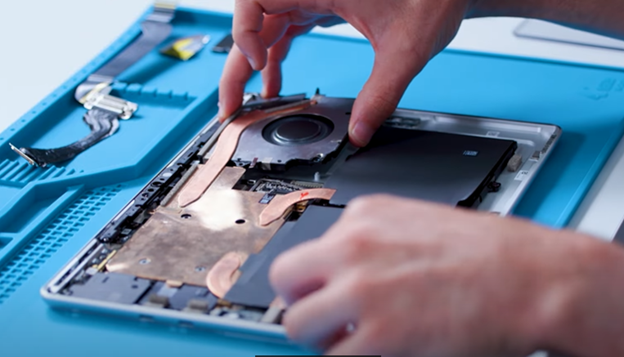
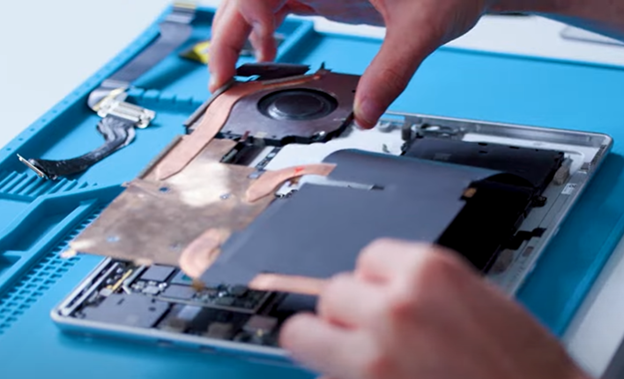
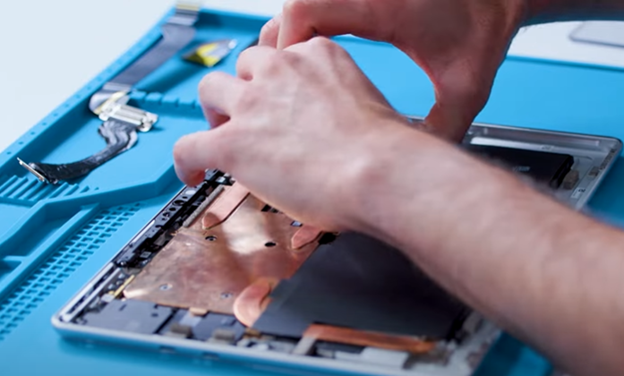
It’s time to remove the thermal module and fan assembly.
*The thermal module and fan assembly of the Surface Pro 9 can be removed by holding your hand carefully.
*Next gently pull up the fan assembly with one hand and another hand will pull the thermal module.
*Although you have to keep in mind that there is a thermal interface material that could create a slight bond.
*Carefully put the fan assembly and thermal module aside in a safe place.
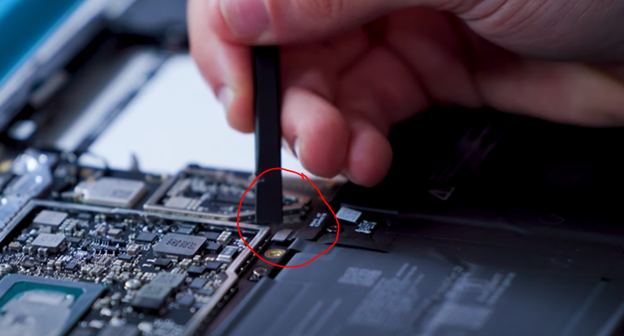
Step #28. Disconnect the Battery from the Motherboard
Now the battery of the Surface Pro 9 will be exposed.
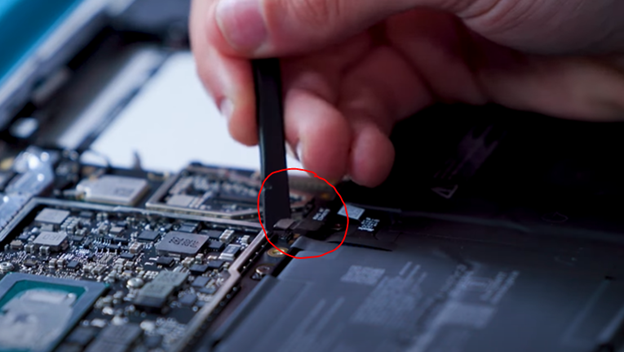
*Using a spudger you can disconnect the battery from the motherboard
*This discotion of the battery will prevent the tablet from other damages. That can accidentally happen.
Step #29. Remove The Left Speaker Of the Surface Pro 9
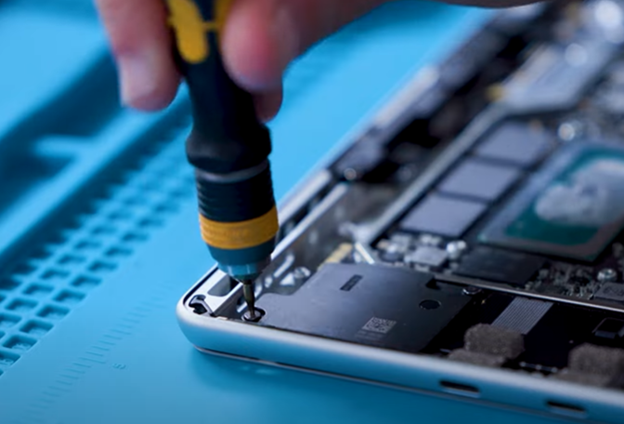
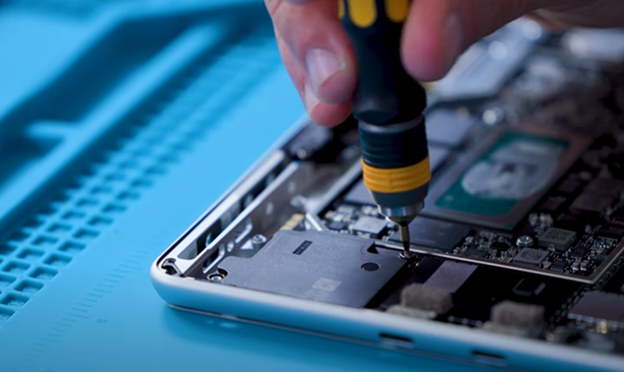
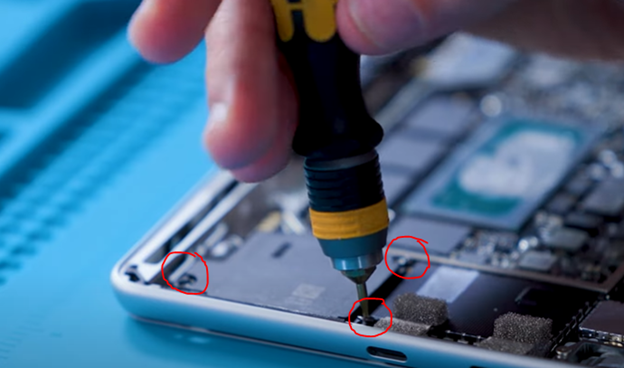
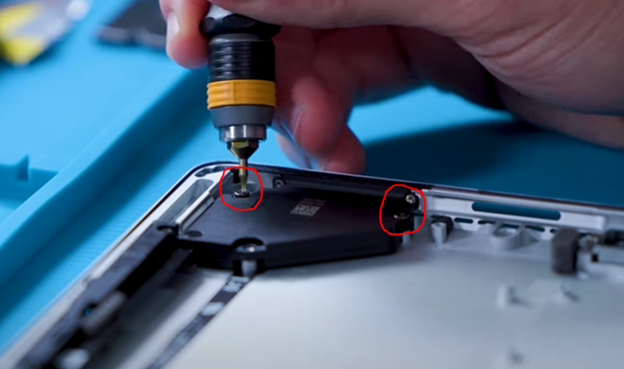
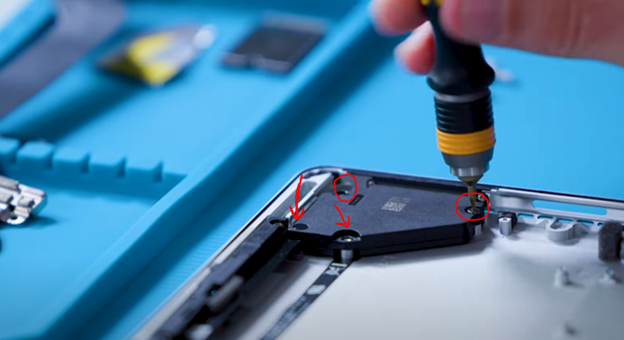
*Use a 3IP screwdriver to remove the speaker on the left side of the Surface Pro 9.
*At this speaker you will see 3 screws that are holding the speaker on the frame.
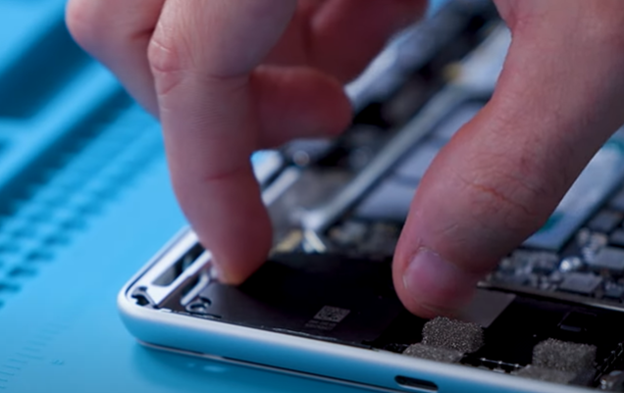
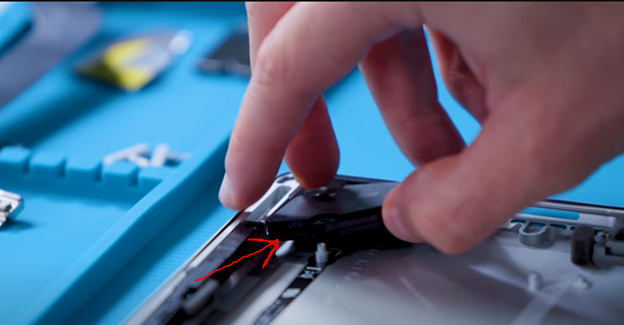
*After removing the screws lift the speaker with your finger to remove from the frame.
*If your Surface Pro 9 is having an issue with only the left speaker you can remove and replace the Surface Pro 9
*Replace the Surface Pro 9 left speaker the same way as you remove the speaker from the frame.
*Must check the alignment and fasten the 3 screws accurately.
*Now you can proceed with the further reassembling process of the Surface Pro 9.
Step #30. Remove the Right Speaker Of the Surface Pro 9
*However for the right speaker of the Surface Pro 9 you have to remove only 2 screws.
Use a 3IP screwdriver for unfastening the screws.
*Note that the missing screws are already removed during removing the thermal module and fan assembly.
*After removing the screw you can lift the right speaker of the Surface Pro 9 with your finger and take it away from the frame.
Step #31. Replace Surface Pro 9 Right Right Speaker
*However after removing the Surface Pro 9 Right Speaker you can replace it with a new speaker.
*Place the speaker with an accurate alignment and listen to the snug fit.
*Now fasten the two screws that you remove just to unfasting the right speaker.
*The other two screws will be fastened during the reassembly of the thermal module and fan assembly.
Step #32. Connect The Battery To The Motherboard
*Now we are in the Reassembling Process after the Surface Pro 9 speaker replacement.
*After installation of both the speakers or one of any speaker we have to connect the battery connector to the motherboard.
*To do this you only need to use a Spudger and gently set the connection cable on the socket.
*Press it with the help of a spudger and listen for the snug fit. Now the battery is connected again.
Step #33. Place The Thermal Module And Fan Assembly
*Certainly place the thermal module and fan assembly in its place.
*Hold it with your hand and put it in exactly the same area where it was located before.
*You can align the thermal module and fan assembly by matching the screw holes.
Step #34. Fastening the 14 Screws
*Thus it’s time to fasten the fourteen screws.
*You will use the same screwdriver.
*Don’t apply extra force and do extremely tighten the screws.
Step #35. Connect The Fan FPC Cable
*However after placing the thermal module and fan assembly it’s time to connect the fan FPC cable.
*Insert the connection into its place and secure the connection.
Step #36. Place The Surface Connect Cable
*Certainly to place the surface connect cable you have to fasten the two screws to secure the cable.
*Now pressing down the surface connect the cable and slide the finger toward the retention letch.
*Now push the retention letch with your finger and secure the connection.
Step #37. Place The Shield Lid And Conductive Tape
*Next it is time to place the Surface connection shield lid and tape.
*Fell secure cover of the shield lid.
Step #38. Assembling the Surafec Pro 9 Display
*However this time is important because you now installing the display of the Surface Pro 9.
*Thus at this stage you have to apply the adhesive on the Surface Pro 9 frame.
*The application of pre-cut adhesive is very easy.
Step #39. Place the Dispaly At the Center Of The Frame
After application of the Adhesive you have to place the display panel on the Surface Pro 9 facing down.
Just flip the screen make it face down and set it for connecting the display cable.
Step #40. Connect the Display Cable
*Make sure proper alignment of the press connector by carefully positioning it before reconnecting.
*Press down gently on one side of the connector until you hear or feel a click indicating it has securely connected.
*Repeat the process for the other side of the connector to make sure both ends are properly seated.
*Avoid applying pressure to the centre of the connector to prevent any potential damage.
*Be cautious of misalignment, as it can cause the pins to bend and result in permanent damage to the connector.
Step #41. Place The Display Cable Shield
*Now it’s time to place the cable cover shield.
*Carefully position the display cable shield over the display connector.
*Use your finger to snugly fit one side of the shield into place.
*However make sure the shield is securely covering the display connector before proceeding further.
Step #42. Flip And Align the Display Module
*Once the display is securely attached to the cable it’s time to perform a thorough check to make sure it is functioning correctly in all aspects.
*Certainly carefully lift the screen and flip it over to position it onto the frame. Make sure to align it accurately.
*Gently press down on the display and apply even pressure across all edges to ensure a proper fit.
Step #43. Install The SSD And SIM Card
It’s time to install the SSD card.
*Put the SSD back in its place.
*Make sure it’s placed correctly. Start by lifting it slightly then gently put it in the right spot.
*Tighten the SSD screw with a special tool until it’s snug.
*Give the screw a little more turn until it’s tight enough and make sure the SSD stays in place.
*Now cover the SSD card with the SSD card Door.
Conclusion
Congratulations! Finally we have reached the conclusion of this comprehensive guide about Microsoft Surface Pro 9 Speaker Replacement. We hope that this guide is super helpful for your Surface Pro 9 speaker replacement. In this guide we have also mentioned all the steps. Although at every step we also have guidance about needed precautions and important tips. So that it will prevent further damage or loss even if you are a beginner or trying DIY. However the best thing is you will also get the pictorial step-by-step guidance.
Thus now you can enjoy the sound of your Surface Pro 9 after its speaker replacement. We will be back in the next guide till then stay tuned.
If you have any query related to this guide or any other thing related to Surface Pro 9 you can write to us in the comments section. We feel obligated to answer your question and resolve your issues.
