To Successfully Complete This iPhone 5 LCD Screen Repair You Will Need:
– iPhone 5 Screen Repair kit
– #000 Phillips Screw Driver
– Plastic Pry Tools
– Suction Cup
– P2 Pentelobe Screwdriver
Step 1 – Remove The Two Main Screws
Remove the two screws that are situated either side of the charge port. Like all screws that you remove well repairing your iPhone 5, keep them in a safe and secure place.

Above: Removing the two screws that secure the screen to the frame of the iPhone 5.
Step 2 – Lift The iPhone 5 Screen
To lift the screen from the device; place the suction cup on the screen. (Where you place the suction cup is important to successfully lifting the Screen) We always suggest placing the suction cup just above the home button, be sure to have it placed in the middle of the screen. With one hand, hold the frame of the phone on your desk or table while pulling vertically on the suction cup. (Note: You will need to use a small amount of force, just make sure that the screen does not come flying up out of the frame because you may damage some critical cables)
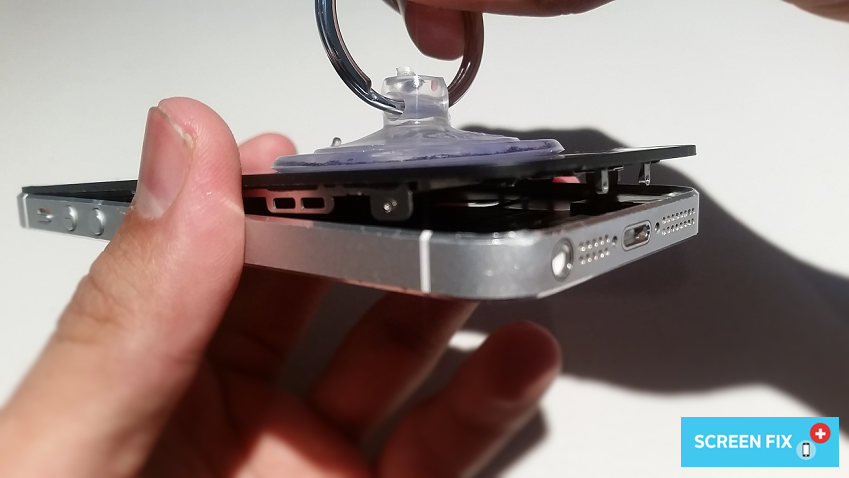
Above: Gradually lifting the screen away from the frame of an iPhone 5.
Step 3 – Remove The Metal Plate – Which Secures The Flex Cables
Once you have lifted the screen, it is now time to remove it from the device. From the bottom of the screen, lift so it is on a 90 degree angle to the chassis of the device. Hold the screen with one hand and from right to left unscrew each of the 3 screws you see highlighted in red. Once the screws have been removed, gently lift the plate that holds the connecters to the main board. (Note: when lifting the plate make sure you don’t cut the ribbon cable that runs under the plate)
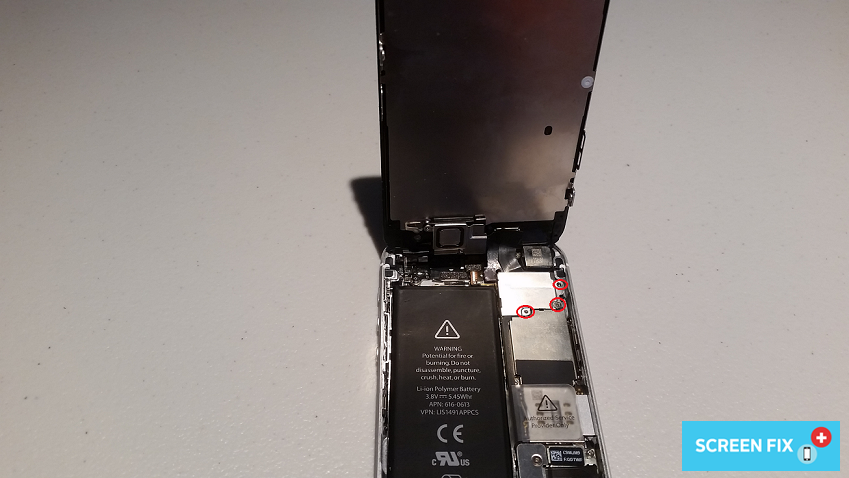
Above: Removing the plate that holds the flex connectors to the mainboard of the iPhone 5.
Step 4 – Disconnect The Screen’s Flex Cables
Lifting the three flex connectors is easy. You can either use your finger nail or the plastic pry tool for this. The most important thing is to lift the connectors in the correct order. Starting from right, this is the flex cable for the front facing camera, ear speaker, & proximity sensor. Next, move to the middle flex cable. This is the flex for the digitizer (touch component of the screen). The last remaining flex is the LCD, remove this also. (Note: Be careful not to damage the mainboard, always use a plastic tools when working around the mainboard)
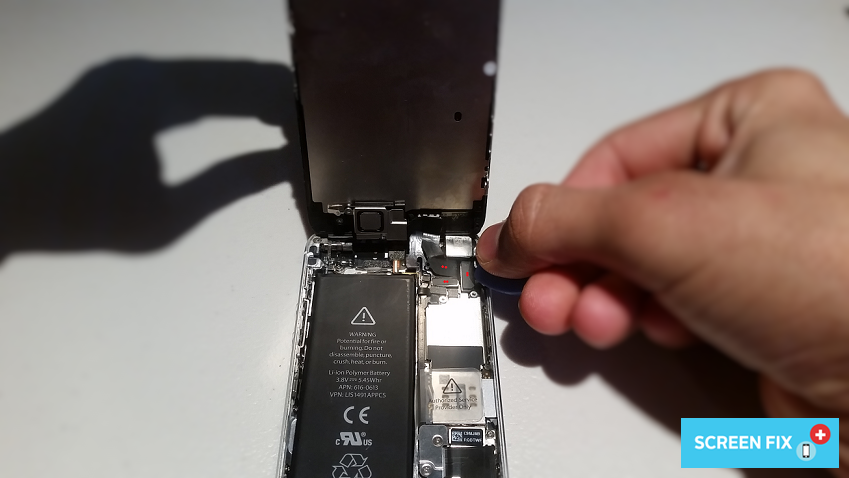
Above: Removing the flex cables that connect to the main board.
Step 5 – Remove The Metal Speaker Plate
Now you have the screen removed from the chassis, you can go ahead and remove the steel plate that covers the ear speaker, front facing camera and proximity sensor. There are two screws which you need to remove. Once removed you can lift the plate off.
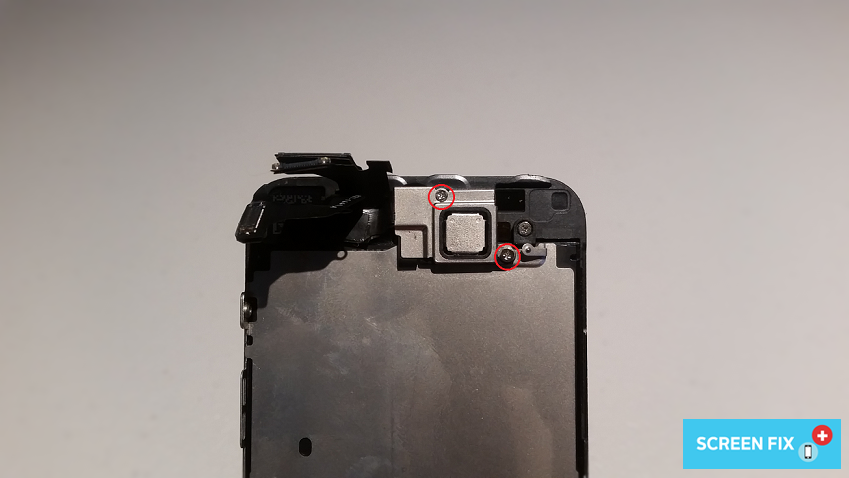
Above: Removing the metal plate that holds the iPhone 5’s proximity sensor, camera and ear speaker in place.
Step 6 – Remove Rear Camera, Proximity Sensor And Ear Speaker
Using a flat head screwdriver or plastic pry tool gently lift the flex away from the screen of the iPhone. Start at the right hand side by getting your pry tool under the contact points on the flex cable and peeling it from the plastic frame. (Note: there is adhesive) Now that it’s lifted you can easily pry the rest of the flex from there plastic slots.
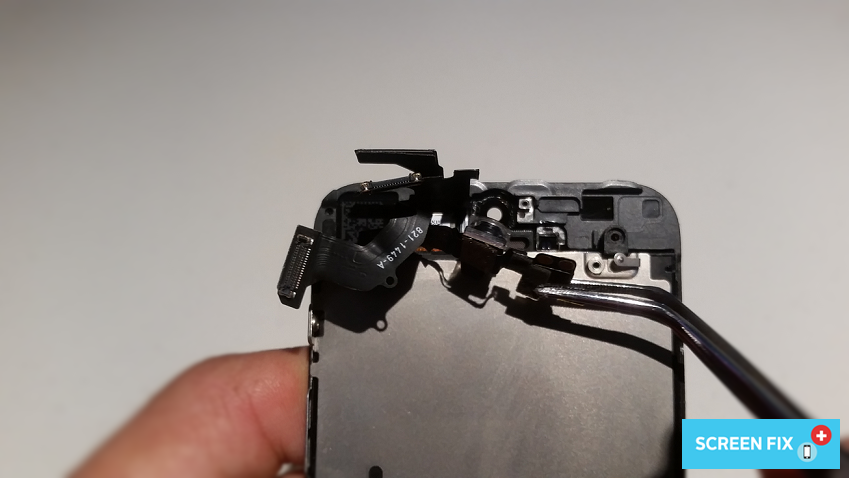
Above: Removing the rear facing camera, proximity sensor and ear speaker on the iPhone 5.
Step 7 – Remove Metal LCD Plate
Step 7 is easy! There are 6 screws to remove around the frame of the iPhone 5. Start by removing the 4 screws (2 on each side) that connect the plate to the frame. Once these are removed move on to removing the top and bottom screws. Now that these are out you can lift the metal plate away from the LCD.

Above: Removing the metal plate which protects the LCD on the iPhone 5.
Step 8 – Remove The Home Button Plate
Removing the home button is the final step in dismantling the broken screen. Remove the 2 screws which secure the metal plate to the screen. (Note: be gentle when lifting the plate because the home button flex is stuck to the plate with adhesive)
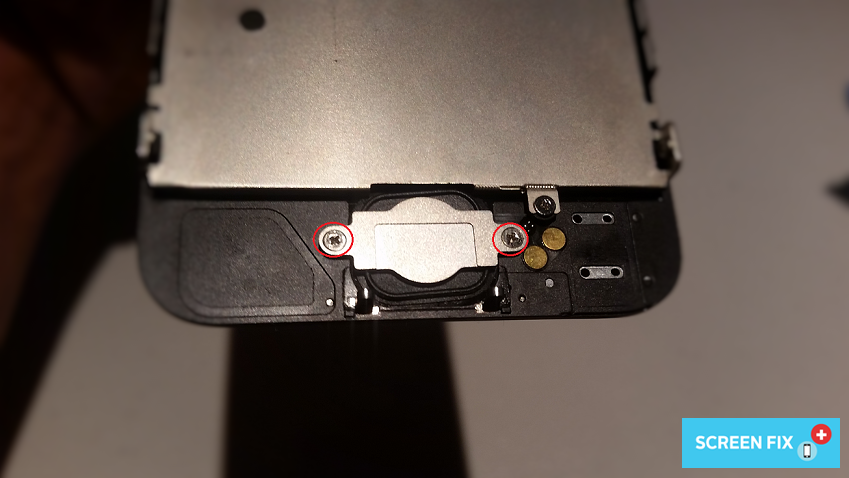
Above: Removing the metal plate which holds the home button to the frame of the iPhone 5.
Step 9 – Remove The Home Button & Flex Cable
Now you can peel the flex cable back from the plastic frame of the screen. Take extra care when doing this. If you pull to hard it may break! Once the flex cable is removed, you can lift the home button out of the phone. (Note: It will be sealed to the frame. So, with a flat head screw driver gradually lift the seal as you pull it out)
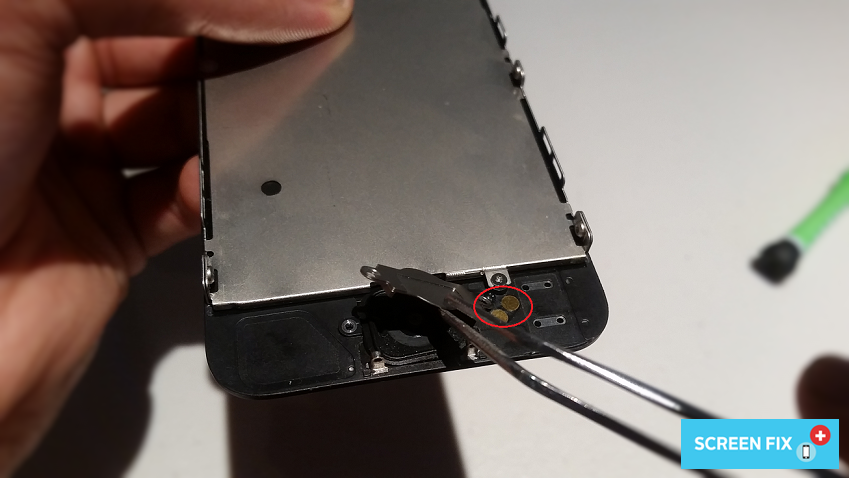
Above: Removing the home button and home button flex cable with bottom of the frame.
Step 10 – Remove Plastic LCD Protector
Take your new screen, place it face-down on your workbench and gently remove the LCD protector. (in this case red)
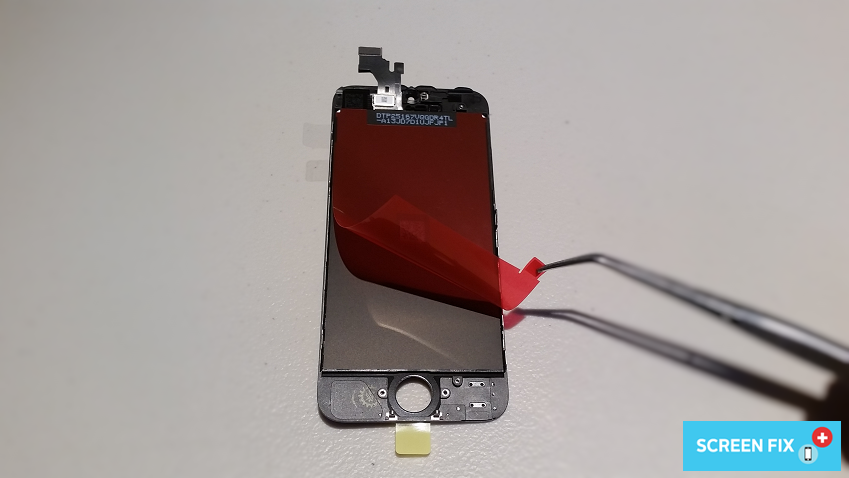
Above: Removing the plastic LCD protector off a new iPhone 5 screen.
Step 11 – Insert The Metal LCD Plate
Now that you have the LCD projector removed, you can go ahead and place the metal LCD plate over the LCD. Once in position, you can go ahead and insert the 6 screws. (Note: Make sure that there is no shards of glass under the plate, they tend stick around from the old screen to which it was originally attached)
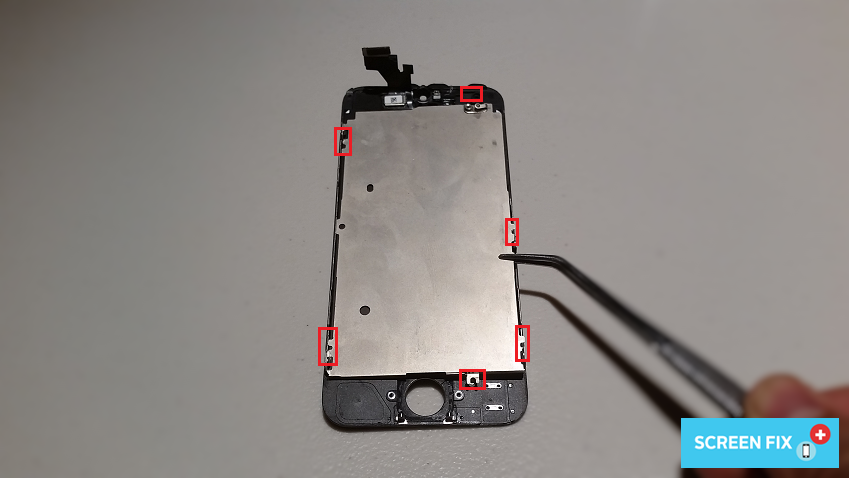
Above: Inserting the LCD plate in place.
Step 12– Insert The Light Sensor
Start by inserting your light sensor into the rubber hole. (Note: we need to make sure the plastic camera and proximity sensor holders are inserted into the new screen, there is a chance that you will need to transfer them from your old screen)
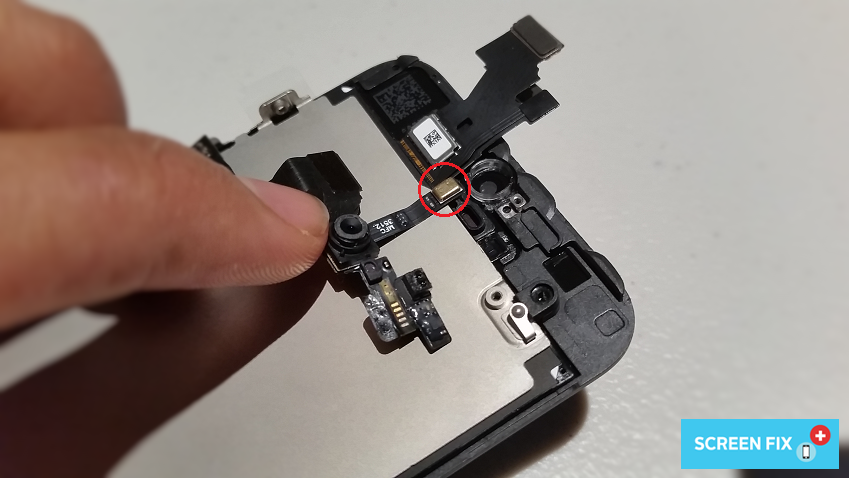
Above: inserting the ear speaker into its respective hole.
Step 13 – Insert Rear Camera And Proximity Sensor
Now that the earpiece is inserted into its respective slot, we can go ahead and place the camera and proximity sensor down in there plastic holders. (Note: The Proximity sensory will take a little moving around to get it to slot down into its hole. (It’s a very tight fit))
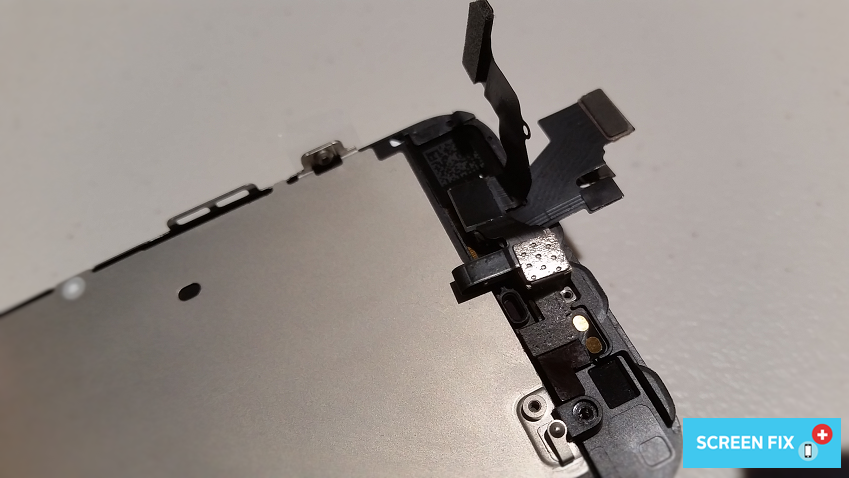
Above: inserting the camera and proximity sensor into the iPhone 5.
Step 14 – Place Ear Speaker In Position
Place your ear speaker in place. On the bottom of the speaker it will have 2 metal springs which need to line up with the contact points on the camera flex. This sits below the speaker unit.
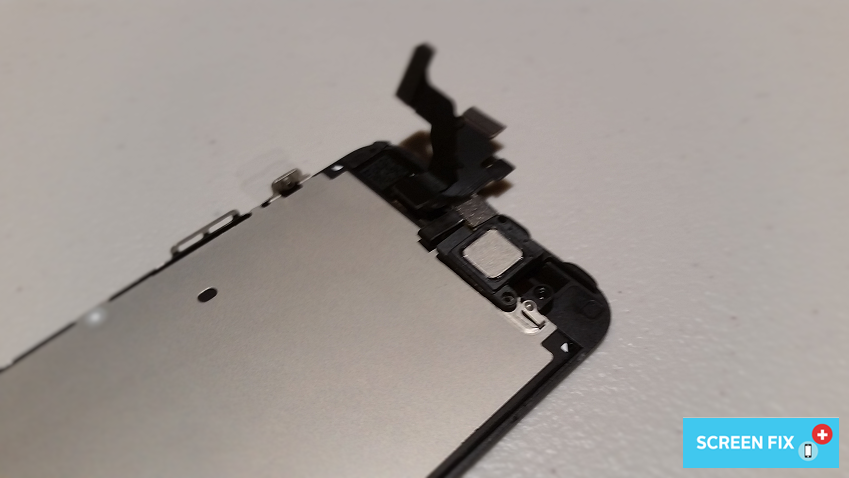
Above: Lining the speaker unit up ready to be secured by the metal plate.
Step 15 – Fasten Ear Speaker Plate
Now that we have the ear speaker in place you can go ahead and place the metal plate over top and secure it down with 2 screws. These screws must not be over-tightened. (Note: it’s important that the components underneath are in place correctly, if not the plate will not sit flat – As a result the screen may not go back into the iPhone.)
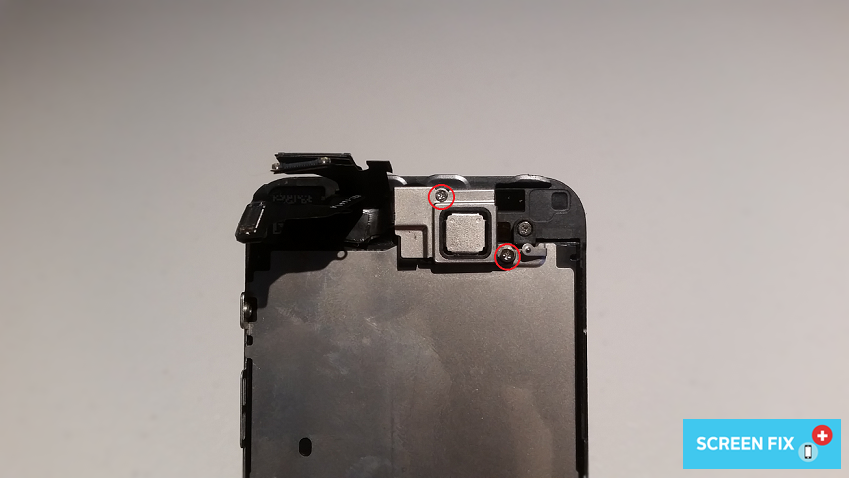
Above: Securing the iPhone 5’s camera and speaker components down with a metal plate.
Step 16 – Insert Home Button
Place home button in place, this needs to be placed in a symmetrical manner. If not it will spin around and feel loose.
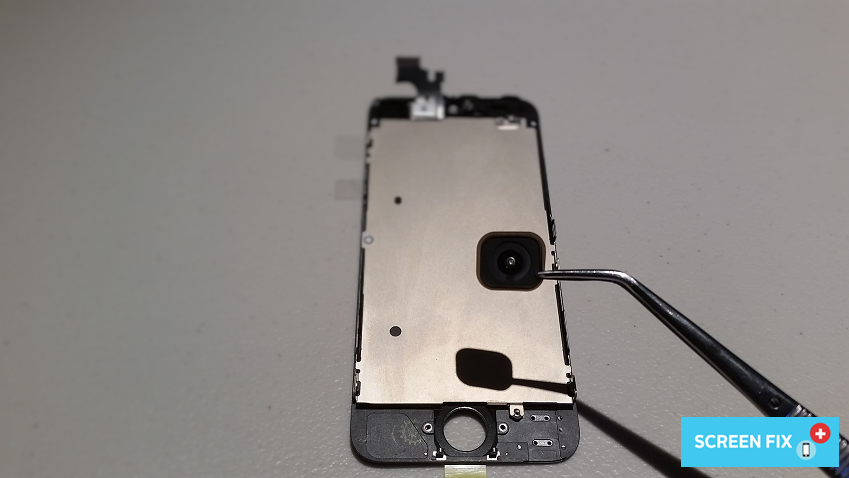
Above: Inserting the iPhone 5’s home button with tweezers.
Step 17 – Secure Home Button With Flex And Plate
Place the flex and plate over the button. When you have it in place you can push down on the contacts on the right so that they are in the correct position. Now you can go ahead and fasten the plate down with the screws. (Note: it’s always a good idea to test the buttons function before moving on to the next step.)

Above: Securing the iPhone’s home button.
Step 18 – Connect The Screen To The iPhone
Line the female connector up to the mail connection, when you think it’s lined up, gently press down on the connection until it snaps down into place like Lego. Repeat these steps on other two connections. (Note: You should hear/feel a “snap or click”. If they are not connected properly the screen will not function)
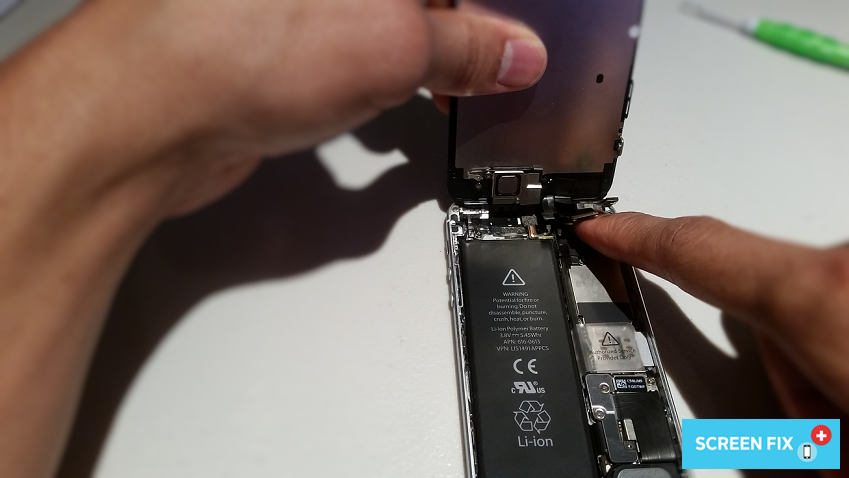
Above: Connecting the screen to the main board.
Step 19 – Fit The Screen To The Frame
With the connectors in place, gently bring the screen down into place, make sure the top of the screen is pushed firmly into the back of the frame. Now push the screen down and into the frame. (Note: you want to work your way from the top to the bottom)
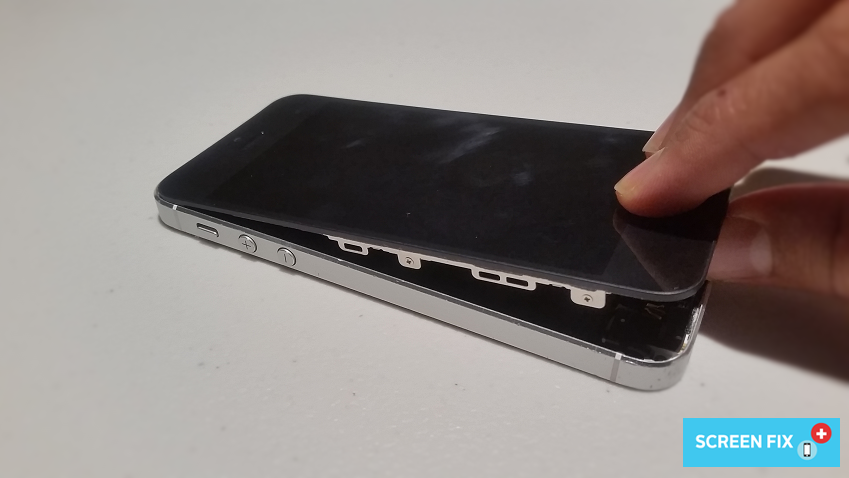
Above: Placing the iPhone 5 screen down into the frame.
Step 20 – Insert The Final Two Screws To Complete The iPhone 5 Screen Repair
Insert two screws into the holes, this will fasten the screen to the iPhone 5. .

Above: Inserting the two remaining screws in the bottom of the iPhone 5.



Leave a Reply