Replacing the motherboard of your Google Pixel 8 or 8 Pro can breathe new life into your device and resolve various hardware issues. The motherboard, often called the logic board, is a critical component responsible for coordinating the functions of different hardware components within your phone. With a new motherboard installed, your Google Pixel 8 or 8 Pro can deliver the smooth and reliable performance you expect.
Are you frustrated with your Google Pixel 8 or 8 Pro experiencing frequent glitches and performance issues? You may be facing underlying motherboard problems. But don’t worry, there’s a solution. Replacing the motherboard can resolve these issues and restore your Pixel’s performance to its optimal state. Say goodbye to frustrating lag and system instability. This blog post will discuss the step-by-step process of replacing the Google Pixel 8 and 8 Pro motherboards, the necessary tools and materials, and much more. If you want to learn about all these, let’s get started!
Tools and materials needed
Replacing the motherboard of a Google Pixel 8 or 8 Pro requires the right tools and materials to ensure a successful repair. These components are vital for disassembly, handling delicate parts, and reassembling the device correctly. Having the appropriate tools and materials makes the process smoother and minimizes the device’s damage risk.
Here are the tools and materials needed to replace the motherboard of a Google Pixel 8 or 8 Pro:
*Screwdriver Set
*Spudger or Plastic Opening Tool
*Tweezers
*Heat Gun or Hair Dryer
*Replacement Motherboard
*Anti-static mat or Wrist Strap
*Cleaning Cloth and Isopropyl Alcohol
*Adhesive Strips
*Magnifying Glass or Loupe
Safety Precautions
*Handle the motherboard and other internal components with care to prevent electrostatic discharge (ESD).
*Use an anti-static wristband and work in an ESD-safe environment to avoid damaging sensitive parts.
*Take your time and proceed cautiously throughout the replacement process. Rushing can lead to mistakes and potential damage to the device. Carefully follow each step and double-check your work before reassembling the device.
*Replacing the motherboard of Google Pixel 8 and 8 pro requires the removal of the battery of your smartphone. During this procedure, if the battery gets damaged, then replace it.
Step-by-step process to replace the Google Pixel 8 and 8 pro MotherBoard
If your Google Pixel 8 and 8 pro motherboard is out of function and you want to replace it, follow this step-by-step process.
Step 1: Prepare Your Pixel for Disassembly
*Power off your Google Pixel to prevent any potential damage during disassembly.
*A charged lithium-ion battery catches fire when set, so discharge it below 25%.
*Find a clean, well-lit workspace with enough room to lay out your tools and components.
*Gather all necessary tools for disassembly, including screwdrivers, opening picks, and tweezers.
![]()
Step 2: Remove the SIM Card Tray
*Locate the SIM card tray on your Google Pixel, usually on the device’s side or top.
*Insert the SIM ejection tool (included with your Pixel) or a paperclip into the small hole on the SIM tray.
*Apply gentle pressure to eject the SIM tray from the device.
*Carefully remove the SIM card from the tray and set it aside safely.
*Keep the SIM tray separate from other components to avoid misplacement.
*Ensure the SIM tray is entirely removed before proceeding to the next step.

Step 3: Mark Your Opening Picks
*Use a permanent marker to mark your opening picks for precise positioning during disassembly.
*Measure approximately 3 mm from the tip of the opening pick and make a visible mark.
*This marking will help you maintain consistency and control when separating components.
*Ensure the opening picks are clean and free from any debris or residue.
*Double-check the alignment of the marks before proceeding to the next step.
*Take your time to ensure accurate marking for efficient disassembly.
Step 4: Heat the Bottom Edge Adhesive
*Use a heat gun or hairdryer set to a low temperature to heat the bottom edge of your Pixel.
*Apply heat evenly along the edge to soften the adhesive securing the components.
*Hold the heat source safely to avoid overheating or damaging the device.
*Apply consistent heat for approximately 1-2 minutes until the adhesive becomes more pliable.
*Avoid touching the hot components directly when handling the heated device.

Step 5: Secure the Anti-Clamp
*Position the Anti-Clamp suction cup pliers firmly on the edge of the Google Pixel screen.
*Ensure the suction cup is securely attached to the device’s surface to prevent accidental detachment.
*Check the alignment of the Anti-Clamp to ensure it covers the necessary area for screen removal.
*Apply gentle pressure to the Anti-Clamp handles to create a secure seal between the suction cup and the screen.
*Double-check the placement of the Anti-Clamp to avoid any potential damage to the Pixel screen.
*Confirm that the Anti-Clamp is stable and ready for the next step in the disassembly process.
Step 6: Twist the Handle
*Grasp the twisted door handle firmly while supporting the door with your other hand.
*Rotate the handle clockwise, depending on the door’s configuration.
*Apply consistent pressure while twisting the handle to ensure smooth operation without any resistance.
*Maintain control over the door handle to prevent accidental damage or misalignment during the twisting process.
*Verify that the handle moves freely and securely engages with the door mechanism after twisting.
Step 7: Insert an Opening Pick
*Allow one minute for a gap between the screen and the frame.
*If the adhesive remains intact, turn the handle clockwise a quarter of a turn and wait an additional minute. Increase heat if the screen cools.
*Introduce an opening pick into the formed gap.
*Ensure the opening pick insertion does not exceed 3 mm to prevent harm to the spring contacts.
*Withdraw the blue handle to release the arms and detach the Anti-Clamp using pull tabs on the suction cups.
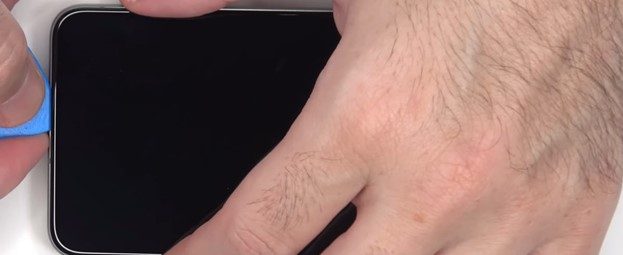
Step 8: Apply a Suction Cup
*Place the suction cup firmly on the screen, securely covering the damaged or targeted area.
*Press down on the center of the suction cup to create a strong vacuum seal with the Pixel screen.
*Apply steady and even pressure while pulling the suction cup upwards to separate the screen from the adhesive underneath.

Step 9: Insert an Opening Pick
*Pull on the suction cup and gently insert the opening pick between the frame and screen of your Google Pixel 8 and 8 Pro.
*If you have difficulty inserting the opening, pick the gap, heat it again, and then insert it.
*Slide the opening pick carefully along the seam, applying consistent but gentle pressure to loosen any adhesive or clips holding the components together gradually.
Step 10: Prevent Damage to Your Phone
*While separating the screen adhesive, ensure your pick doesn’t penetrate more than 3 mm to prevent phone damage. Pay attention to:
*The screen cable, positioned slightly below the midpoint of the left edge, requires careful handling to prevent cable tear.
*Exercise caution around the numerous spring contacts encircling the phone’s perimeter to prevent any bending of the contacts.
Step 11: Separate the Bottom Edge Adhesive
*Slide the opening pick along the lower edge to detach the adhesive holding it in place.
*Keep the pick positioned in the lower right corner to prevent the adhesive from sealing again.

Step 12: Heat the Right Edge Adhesive
*Warm the right edge of the screen with a heated iOpener for two minutes. Alternatively, cautiously use a hair dryer, heat gun, or hot plate to avoid screen or battery damage due to excessive heat.
*Place another opening pick beneath the bottom right corner of the screen.
*Glide the additional pick towards the top right corner to detach the adhesive securing the screen’s edge.
*Keep the pick positioned at the top right corner to prevent the adhesive from sealing again.
*Place an additional opening pick beneath the lower edge of the screen.
*Glide the inserted pick towards the lower left corner.
*Keep the pick stationed at the lower left corner to inhibit the adhesive from sealing again.

Step 13: Heat the Left Edge Adhesive
*Apply a heated iOpener or use alternative heating methods like a hairdryer, heat gun, or hot plate to the left edge of the screen for two minutes.
*Carefully insert a fourth opening pick under the screen’s bottom left corner.
*Slide the new pick to the top left corner to separate the adhesive securing the screen’s left edge.
*Leave the pick in the top left corner to prevent the adhesive from resealing.
*Monitor the temperature to avoid damaging the screen or battery.
*Proceed cautiously to prevent accidental damage to the screen during the separation process.

Step 14: Heat the Top Edge Adhesive
*Apply a heated iOpener or alternative heating methods to the top edge of the screen for two minutes.
*Insert a fifth opening pick under the top edge of the screen, near the left corner.
*Slide the opening pick to the top right corner to separate the adhesive securing the screen’s leading edge.
*Maintain consistent heat application and avoid overheating the screen or battery.
*Exercise patience and precision to ensure adequate separation without causing damage.
*Verify that the adhesive is sufficiently softened before attempting to separate the screen.

Step 15: Prop Up the Screen
*Place a small box or stack of books to the left of your phone to prop up the screen while disconnecting its cable.
*Swing up the right edge of the screen like the front cover of a book to access the cable.
*Use an opening pick to separate any remaining adhesive around the screen perimeter if encountering resistance.
*Ensure the screen is adequately supported to prevent strain on the cable during disconnection.
*Use caution when prying up the upper edge of the screen cable cover to avoid damage.
*Remove the cover carefully to access the screen cable for disconnection.

Step 16: Disconnect the Screen
*Insert the point of a spudger under the top right corner of the screen’s press connector.
*Gently pry up and disconnect the cable, ensuring even pressure distribution.
*Align the press connector over its socket and gently press down on each side to secure it without bending the pins.
*Remove the screen carefully to avoid damaging the cable or connector.
*During reassembly, check the replacement screen for protective liners and ensure proper alignment with the front-facing camera hole and sensor cutout.
*Test the phone’s functionality before sealing it up to address potential issues.

Step 17: Remove the Screen
*Carefully lift and remove the screen assembly from the device.
Check the replacement screen for protective liners and ensure proper alignment with the front-facing camera hole and sensor cutout.
*Remember to reinstall the screen cable cover securely.
*Before sealing the device, perform a test by temporarily connecting the screen, powering the phone, and ensuring its functionality.
*Follow the guide to replace the screen adhesive and install the screen correctly.
*If installing a new screen, calibrate the fingerprint sensor following instructions.

Step 18: Disconnect the 5G mmWave Antenna
*Locate the 5G mmWave antenna cable and prepare to disconnect it.
*Insert the tip of a spudger under the top edge of the 5G mmWave antenna’s press connector.
*Gently pry up and disconnect the cable, avoiding damage to surface-mounted components.
*Be cautious of the strong adhesive securing the antenna cable to the midframe.
*Soften the adhesive by applying heat using an iOpener or alternative methods to prevent damage to the battery.
*Ensure extreme care to avoid battery damage when using heat-generating tools.

Step 19: Separate the 5G mmWave Antenna Adhesive
*Insert the flat end of a spudger between the bottom of the 5G mmWave antenna cable and the midframe.
*Twist the spudger to separate the bottom of the cable from the midframe.
*Gently peel the 5G mmWave antenna cable from the midframe.
*Press the cable back into place on the midframe during reassembly using old adhesive.
*Use thin, double-sided tape for secure attachment if the cable does not adhere.

Step 20: Remove the Graphite Tape
*Locate the large graphite sheet connecting the upper part of the battery, midframe, and rear cameras.
*Use the point of a spudger to lift different parts of the graphite sheet until it can be gripped with fingers.
*Expect the graphite sheet between the rear cameras and the battery to tear; remove any torn sections.
*Peel up and remove the entire graphite sheet carefully.
*Please do not reuse the old graphite sheet during reassembly; follow the provided guide to replace it properly.

Step 21: Move the USB C Port Cover
*Gently lift the plastic shim at the top of the USB-C port cover using the tip of a spudger.
*Remove the shim and set it aside to access the USB-C port cover screws easily.
*During reassembly, ensure proper placement of the plastic shim along the bottom of the midframe and loudspeaker.
*Remove the giant rectangular liner from the shim and place it so the smaller foam piece aligns with the USB-C port cover bottom.
*Firmly press down along the entire shim using the flat end of a spudger to secure it in place.
*Keep track of each screw during the repair and ensure proper reinstallation.
*Use a T3 Torx screwdriver to remove the two 5 mm long 3IP Torx Plus screws securing the USB C port cover.
*Carefully remove the cover to access the components underneath.

Step 22: Remove the Midframe
*Utilize a T3 Torx screwdriver to eliminate the seven 5 mm long 3IP Torx Plus screws holding the midframe in place.
*Lift and remove the midframe assembly.
*During reassembly, inspect the thermal pad’s condition; replace it if damaged.
*Clean the area with high-concentration isopropyl alcohol and apply a new thermal pad as needed.

Step 23: Disconnect the Battery and Front Camera
*Pry up and disconnect the battery cable press connector using a spudger.
*Similarly, detach the front camera press connector with the point of a spudger.
*Carefully remove the front camera from its housing.

Step 24: Remove the Rear Camera Assembly
*D disconnect all three rear camera press connectors at the logic board’s top edge.
*Hold the 5G mmWave antenna cable out of the way while removing the screws securing the rear camera assembly.
*Use a T3 Torx screwdriver to remove the screws: one 3.5 mm long screw securing the top left corner and one 5 mm long screw securing the top right corner.
*Insert a spudger between the right edge of the rear camera assembly and the frame.
*Pry up the rear camera assembly and carefully remove it.

Step 25: Remove the 5G mmWave Antenna
*Utilize a T3 Torx screwdriver to extract the two 5 mm long 3IP Torx Plus screws securing the 5G mmWave antenna bracket.
*Insert the tip of a spudger into one of the 5G mmWave antenna bracket’s screw holes and pry up to dislodge the bracket.
*Carefully remove the bracket from its position.
*Insert the bracket at a downward angle during reassembly, ensuring proper contact with the 5G mmWave antenna. Press the bracket down to secure it.
*Gently lift the 5G mmWave antenna out of its recess, holding the cable securely.
*If the cable disconnects from the antenna, use your fingers to remove the antenna. Remember to reconnect the antenna cable during reassembly.

Step 26: Disconnect the Antenna Cable
*Insert one arm of angled tweezers under the metal neck of the black antenna cable coaxial connector on the logic board’s top left corner.
*Lift straight up to disconnect the cable gently.
*To reconnect the cable, hold it over its socket and press down with the flat end of a spudger, ensuring it snaps into place.
*Gently pull the white antenna cable out of its clip on the left side of your phone.

Step 27: Disconnect the Motherboard
*Use the point of a spudger to pry up and disconnect the interconnect and ultra-wideband press connectors from the top left corner of the logic board.

Step 28: Remove the Loudspeaker
*Use a T3 Torx screwdriver to remove the 5 mm long 3IP Torx Plus screw securing the loudspeaker.
*Insert the point of a spudger between the bottom right edge of the loudspeaker and frame.
*Pry the loudspeaker up to dislodge it from its recess.
*Carefully remove the loudspeaker.
*During reassembly, insert the edge of the loudspeaker with an orange gasket at a downward angle into its recess, then press it firmly into place.

Step 29: Heat the Battery Adhesive
*Carefully place your phone upside down on your workspace.
*Use a hairdryer or heat gun to warm the left side of the back cover, focusing on where the battery is located.
*Ensure the temperature is slightly too hot to touch, but avoid overheating to prevent damage to the battery.
*Take caution not to exceed the safe heating level for the battery.
Step 30: Apply Isopropyl Alcohol
*Flip your phone over and lay it flat on your workspace.
*Apply a few drops of highly concentrated isopropyl alcohol along the right edge of the battery.
*Tilt the phone to allow the alcohol to flow towards the adhesive on the top and bottom edges of the battery.
*Wait for one minute to allow the alcohol to dissolve the adhesive.
*Insert the flat side of an opening pick between the right edge of the battery and the frame.
Step 31: Remove the Battery
*Do not crease or bend the battery to prevent leaks or fire hazards.
*Apply constant pressure on the battery using an opening pick until it separates from the frame.
*If the battery doesn’t detach after two minutes, reapply heat and isopropyl alcohol.
*Lift the battery and use the opening pick to separate any remaining adhesive.
*If the battery is damaged, replace it with a new one during reassembly.

Step 32: Remove the Motherboard
*Use a T3 Torx screwdriver to remove the grounding bracket screw from the bottom right edge.
*Remove the grounding bracket carefully.
*Use the same screwdriver to remove the screw securing the logic board.
*Ensure the SIM card tray is removed before taking out the logic board.
*Lift the logic board from the top edge, ensuring no cables are snagged.
*During reassembly, ensure cables are transparent before inserting the logic board, and lay it down gently on a soft surface to prevent damage.

Step 33: Remove the Antenna Cable
*Insert one arm of a pair of angled tweezers under the metal neck of the white antenna cable coaxial connector on the bottom of the logic board.
*Gently lift straight up to disconnect the cable without applying excessive force.
*Carefully pull the white antenna cable from its clips on the logic board’s bottom.
*Remove the antenna cable from its position, ensuring no damage occurs.
*During reassembly, employ the point of a spudger to gently guide the cable back into its clips, ensuring a secure fit and proper connection.

Step 34: Install a new motherboard
*Screw in the standoffs to match the mounting holes on the motherboard.
*Place the I/O shield into the rear of the case, aligning it with the motherboard ports.
*Place the motherboard onto the standoffs, ensuring it aligns with the I/O shield and ports.
*Use screws to secure the motherboard to the standoffs, ensuring it is firmly in place.

Conclusion
Replacing the motherboard in your Google Pixel 8 or 8 Pro can be challenging but achievable. Following a systematic and step-by-step approach is critical. Begin by gently heating the back cover to loosen the adhesive securing the battery. Then, isopropyl alcohol is applied to dissolve the glue, and the battery is carefully removed. Next, use appropriate tools, like tweezers, to disconnect the antenna cable from the logic board, ensuring gentle handling. Finally, remove the logic board by unscrewing the necessary screws and gently lifting it out. After that, install a new motherboard on your Google Pixel 8 and 8 Pro. You can successfully replace the motherboard in your Google Pixel 8 or 8 Pro with proper care, ensuring your device functions optimally.
Admin


