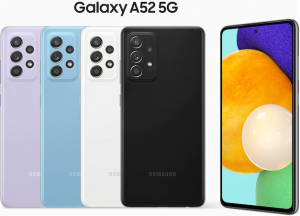
The Samsung Galaxy S24 Ultra is an amazing phone. It has all the great features you expect in 2024. However accidents happen. If the camera glass gets damaged don’t worry. You can replace it easily. This article will show you the Samsung Galaxy S24 Ultra Camera Glass Replacement. You can get your Samsung Galaxy S24 Ultra Camara back to being as new again. Let’s get started!
Gathering Tools For Samsung Galaxy S24 Ultra Camera Glass Replacement
Before you replace the camera glass you need to get ready. Make sure you have everything you need. This will help you do the job easily. Here is the list of items that you need.
*New camera glass
*A pointed blade
*Tweezers
*Heat resistance tape
*Isopropyl alcohol
*Soft cloth
*Heat gun or hairdryer
*Adhesive strips or glue
*Lint-free cloth
Prepare Right Area For Replacing Samsung Galaxy S24 Ultra Camera Glass
It is important to choose the right place to replace the Samsung Galaxy S24 Ultra camera glass. A good workspace helps you work safely and avoid mistakes. So here are the things you should consider.
*Make sure the table or desk is clean and dust-free.
*Also the area is well-lit so you can see small parts clearly.
*Pick a quiet place with no interruptions.
*Use a chair that supports you well.
*Make sure the room has good airflow especially if you use glue.
*Keep all your tools and parts within easy reach.
*It would be better if you had an electric socket near you. Otherwise arrange an extension wire to connect a heat gun or hair dryer.
Step #1. Remove 1st Broken Camara Glass
This is the time to remove the Samsung Galaxy S24 Ultra’s first broken camera glass. To do this you need to prepare a pointed blade which is also included in the kit.
*Usually this step starts with the heating for losing the adhesive. But if the camera glass is extremely broken insert the pointed blade into it.
*However the process is the same with heating or without heating. So you don’t need to worry when starting this first step.
*Be careful when inserting the blade to remove the camera glass.
*Also it should be between the camera glass and the double-sided tape attaching the glass to its place.
*Now pull it for taking the broken camera glass out.
*If some broken particles start to come out separately, remove them first and then continue with the process.
*When you can see clearly the double-sided tape you need to pick a pointer tweezer and pull the tape with its help.
*Now the first camera glass has been removed.
*Push or flip the phone and tap with your hand to clear the tiny particles of the broken camera glass.
Step #2. Apply the Heat Resistance Tape
Now we will move to remove the second broken camera glass of the Samsung Galaxy S24 Ultra.
*Here we are going to use the heat gun to melt the adhesive. You can also see the difference between removing the camera glass with heating and without heating.
*First of all please apply the heat resistance tape. It will secure the other glass’s adhesive.
*So you must apply it to the first camera whose glass has been removed.
*Also cover all the camera glasses except the one you are working on.
Step #3. Heat Second Back Camera Glass
*Prepare your heat gun and apply it to the back camera glass.
*Give heat to the back camera glass for 35 seconds.
*Keep the heat gun to the lowest ℉ as 750℉.
*Expose heat to the second back camera glass from every side.
Step #4. Insert the Blade
*Now use the same pointed blade or you can use a round-head blade to remove the camera glass.
*Insert it from the broken hole of the glass.
*Here you will feel how much easier it is to remove the back camera glass from the double-sided tape.
*Double-sided tape and broken glass particles will come out with very little force.
*Also it will look much cleaner and with any scratches.
Step #5. Give Heat to the Third Camera Glass
*Before moving to remove the third broken camera glass remember to apply heat resistance tape to the second camera glass and remove the tape from the one you want to work with.
*It will protect the other cameras from the extreme heating dose.
*Now you can start heating the next broken camera glass for removal.
*Here you will give heat for a very short time such as 15 to 18 seconds at 750℉.
Step #6. Remove the Next Small Camera Glass
*Here is the time to remove the small back camera glass.
*Again you need to cover the open cameras with resistance tape except the one from which you need to remove broken glass.
*Now give heat to the small camera glass.
*Apply heat only for 16 to 17 seconds at the lowest of 750℉.
*After heating take the same blade and insert it into the back camera glass.
*Pull it under light pressure and then this camera glass will come out with double-sided adhesive tape.
*It will come out very fast and easily.
*Clean the device so that any broken glass particles cannot remain inside.
Step #7. Test All The Cameras
Before proceeding Samsung Galaxy S24 Ultra Camera Glass Replacement must test all the cameras. This will make sure that all the cameras are working correctly and showing the perfect result. Well everything will look normal in the camera because there are no camera lenses.
Step #8. Push Air
Another very important thing is to increase the air pressure on every camera so that no dust or glass particles can remain on the top of the camera lenses.
Step #9. Apply New Camera Lenses
*To understand the camera lenses you can notice that the first two are the same and the third one has a slight difference.
*And the small camera lens can easily be deducted by its size.
*Now use a tweezer and with its help remove the blue plastic protecting the double-sided tape layer.
*Just align the camera lens on any of the first two camera lenses.
*Now press it with little pressure so that the adhesive sticks around.
*Now apply the second back camera glass/lens to the camera ring.
*Press it with your thumb and apply very light pressure.
*If you need to adjust the position of the camera glass, you can settle with the same tweezers before applying pressure.
*The camera lens is a small one. Take it from the protecting blue sheet.
*Apply it to the small camera.
*Make sure everything is aligned.
*Adjust it and apply pressure with your thumb.
*Now every camera glass that has been installed is broken.
Step #10. Clean With Lint Free Cloth Piece
*Clean all the camera lenses with the lint-free cloth piece.
*Make sure there is no finder print and any dirt on the camera.
Step #11. Test The Camera
*At this stage everything is done with all the success. But it is very important to check your Samsung Galaxy S24 Ultra’s Camera.
*Make sure that everything is working perfectly as it was before. Also, make sure that all the cameras are functioning, especially those camera lenses which have been changed.
*In the end to secure camera lenses from scratches you can cover them with a protection sheet.
Conclusion
Congratulations on your successful Samsung Galaxy S24 Ultra Camera Glass Replacement. We hope that everything went perfectly with your Samsung Galaxy S24 Ultra back camera lenses changing and you find this guide very helpful through the entire process.
However we have illustrated every step, and the pictures are also greatly helpful. We wish you the best of luck with your flagship Samsung Galaxy S24 Ultra. See you in the next guide and then enjoy its stunning photos and video capture again.


