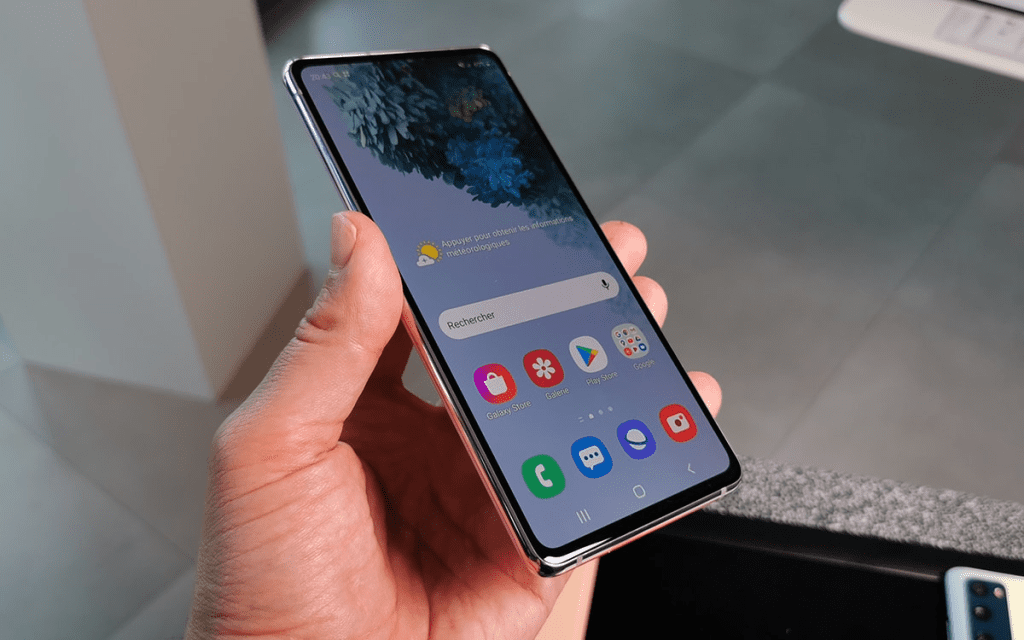
If you want a Samsung Galaxy S20 Battery Replacement this comprehensive guide can help you. We know how frustrating it can be to have a swollen battery or battery malfunction in your flagship Samsung Galaxy S20. Smartphone battery-related issues need quick fixes which is why we bring this essential guide.
However we will show you visuals and guide you through the Samsung Galaxy S20 battery replacement. We will discuss all the necessary precautions and guidance for the required tools. So without wasting any time let’s move toward Samsung Galaxy S20 battery replacement.
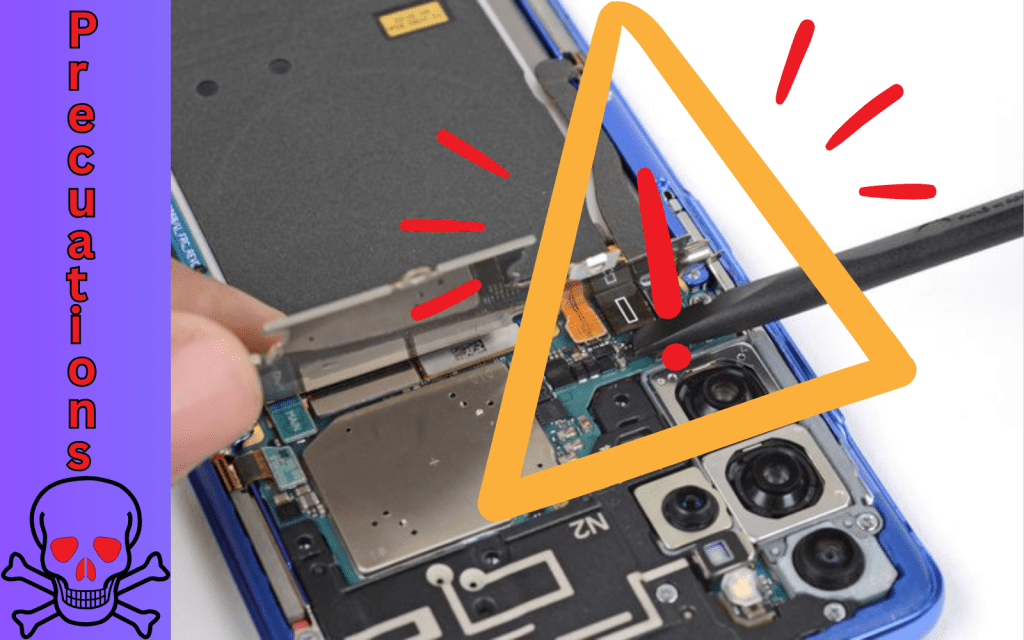
Precautions For Samsung Galaxy S20 Battery Replacement
Although the battery replacement of Samsung Galaxy S20 is not typical. But if you forget to deal with it with care and are left on precaution, this replacement can give you a hard time. So here we will mention some important tips/preparation points for Samsung Galaxy S20 Battery replacement that will keep you away from dangerous damage or savour losses. Here we go!
*Samsung Galaxy S20’s adhesive is too strong and its battery removal can make it hard. For this you have to use a high concentration (over 90%) of isopropyl alcohol. It will help you to remove and release the adhesive.
*Be very careful when dealing with a swollen Samsung Galaxy S20 battery.
*Never give heat to the swollen battery.
*Take appropriate actions to remove the battery.
*It is for safety if you drain the Samsung Galaxy S20 Battery by less than 25%. This action can save you from the potential risk of thermal events if you accidentally damage the battery.
Tools For Samsung Galaxy S20 Battery Replacement
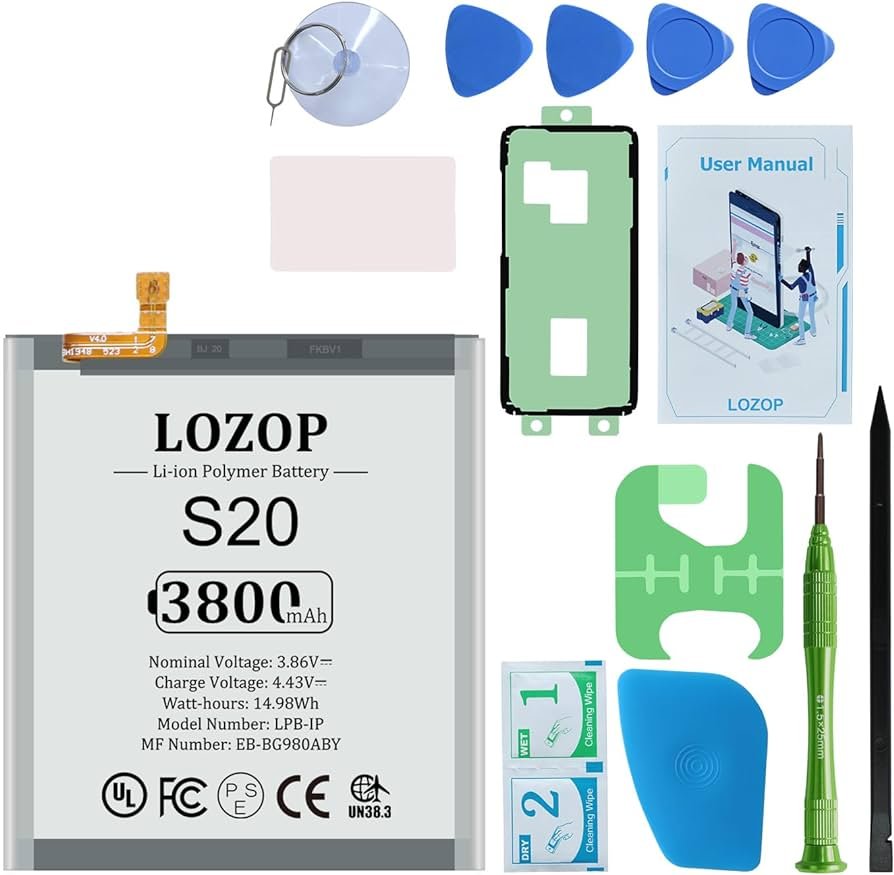
However it’s essential to prepare everything for Samsung Galaxy S20 Battery Replacement. First of all we have to prepare a proper place for replacement action. Choose an area where you feel comfortable and have appropriate air to breathe. Please avoid choosing a windy area. Then collect all the necessary tools. Finding the tool during the replacement procedure is disturbing. Here we list the essential tools for Samsung Galaxy S20 Battery Replacement.
*Plastic Spudger
*Suction Tool
*Tweezers
*4 to 5 Opening Picks
*Phillips #00 screwdriver
*A small cup for securing unfasten screws.
*Heating Tool (Heat Gun, Hot Plate, Straightener, Hair Drier, etc.)
*A lint-free cloth
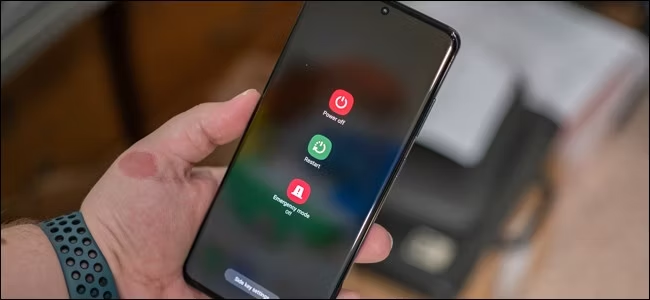
Step #1. Switch Off the Samsung Galaxy S20
*Hold down the Side key and the volume down button to switch off your Samsung Galaxy S20 Ultra 5G.
*A menu will appear on your screen; select “Power off.”
*Your device will shut down completely.
*This method helps conserve battery and ensures your phone is safely turned off.
However turning off the phone before replacing the Samsung Galaxy S20 battery is essential. Otherwise your Smartphone may suffer further complications.
Step #2. Heat the Bottom Edge Of The Samsung Galaxy S20
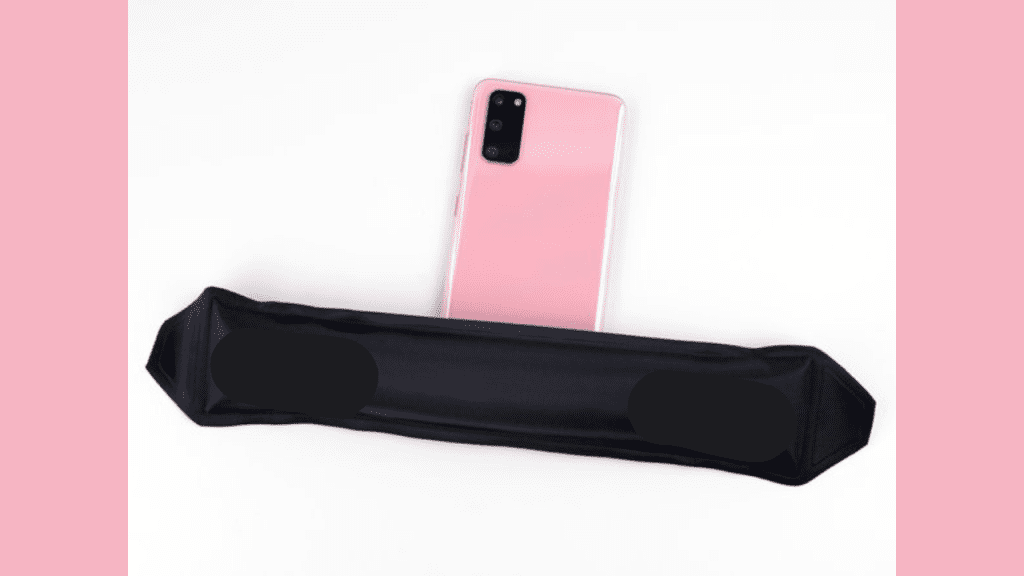
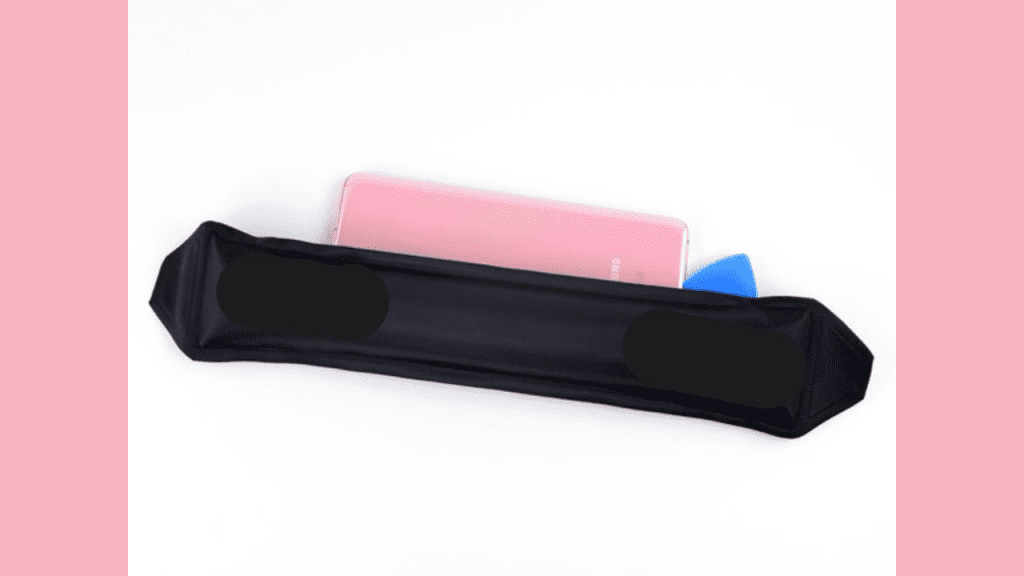
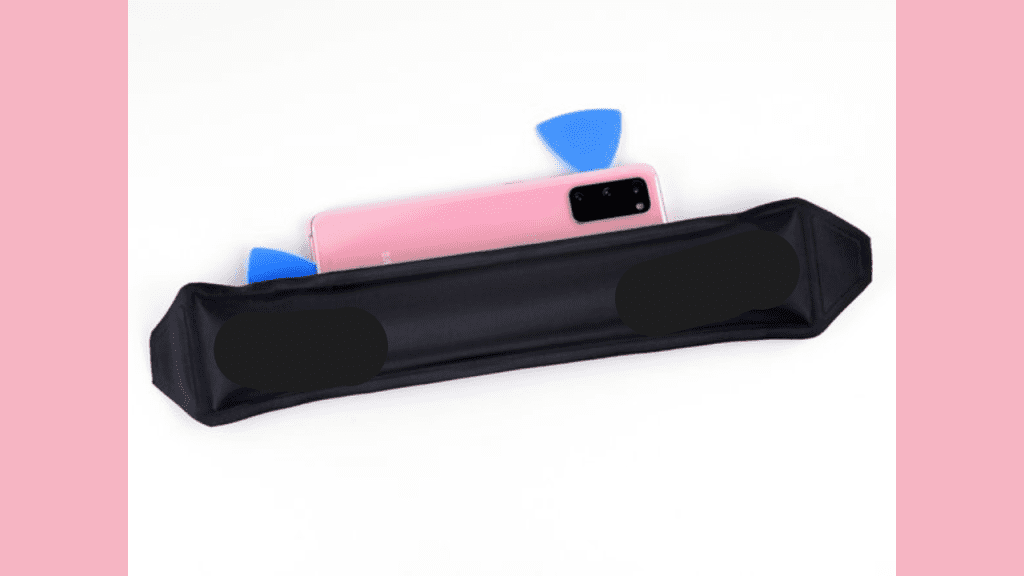
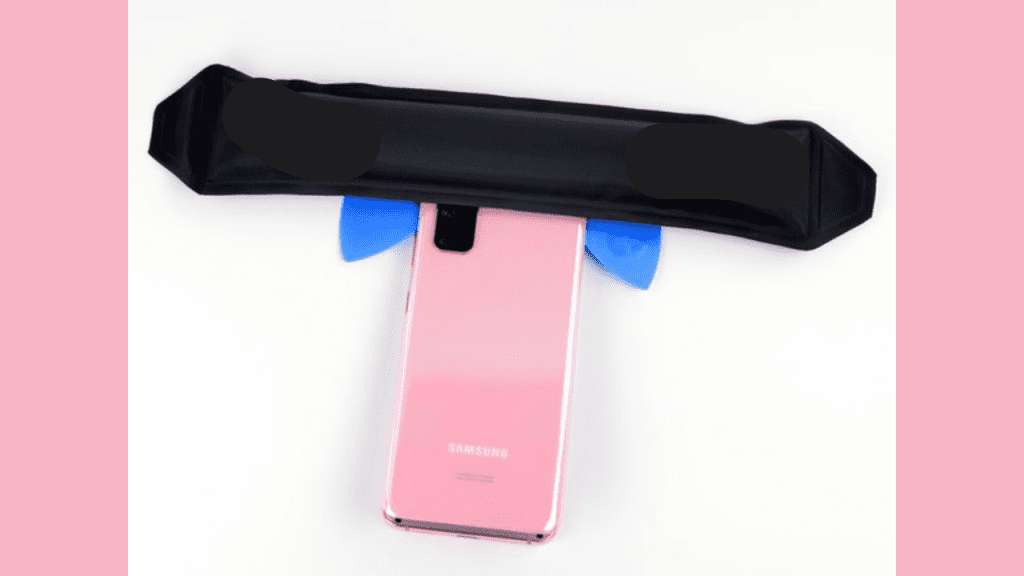
It’s time to give heat to the Bottom edge of the Samsung Galaxy S20 For battery replacement. Thus place your heat gun’s mouth or heating tool at the back bottom of the phone. Apply heat only for two minutes and then remove it from the phone.
*You can use a hair dryer, hair straightener, or hot plate, but don’t make your phone too hot.
*The screen and battery can get damaged if it gets too hot so be careful.
*Keep an eye on the temperature to make sure it doesn’t get too high.
*Just be gentle with your phone to keep it safe from heat damage.
Step #3. Place the Suction Tool And Separate the Adhesive
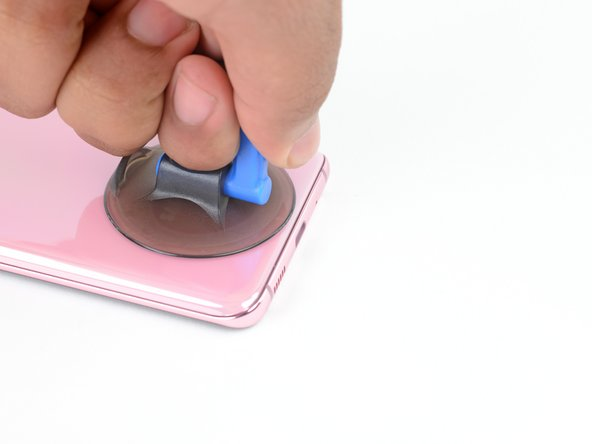
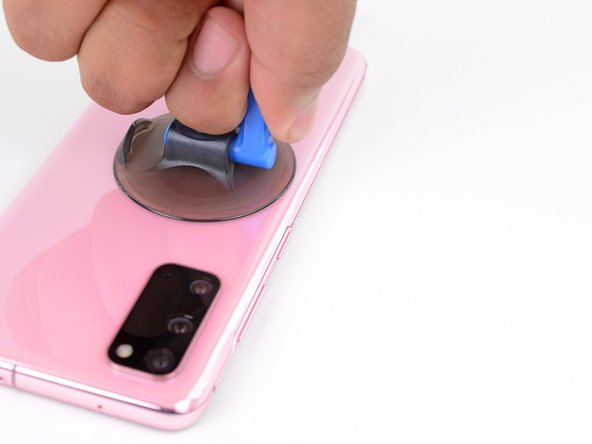
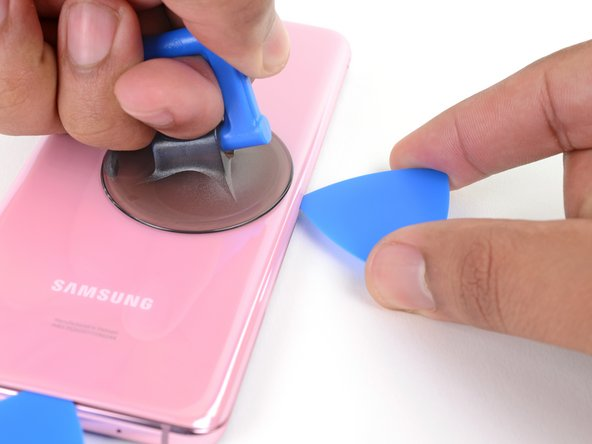
*Apply a suction cup to the back of your phone aiming for the centre of the bottom edge.
*Cover your screen with clear packing tape so the suction cup sticks better if it is cracked.
*Or you can use strong tape instead of the suction cup if needed.
*As a last resort you can even use super glue to attach the suction cup to the broken screen.
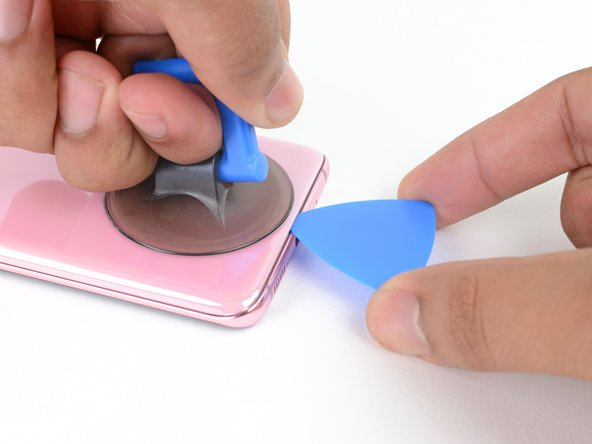
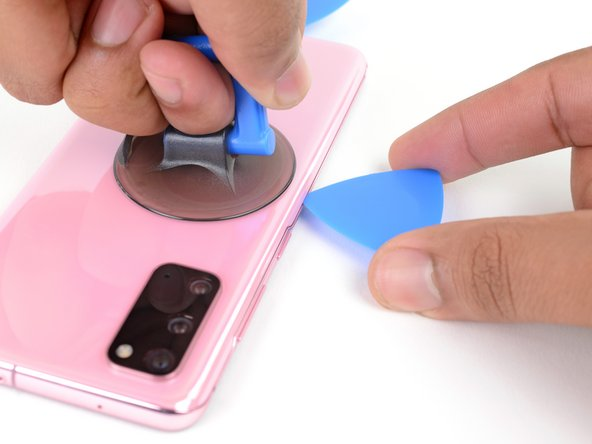
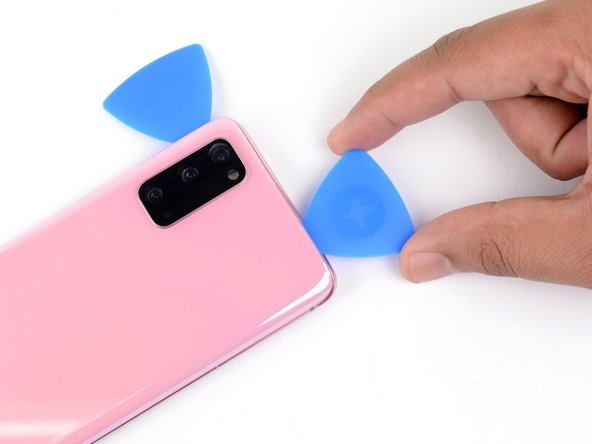
*Pull the suction cup firmly to create a gap between the back cover and the frame.
Step #4. Slide The Opening Pick Along The Bottom
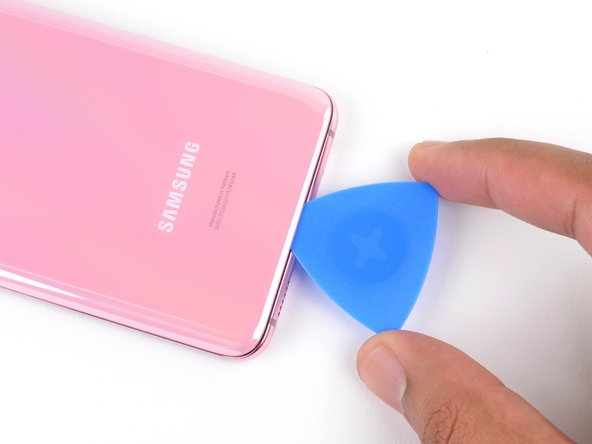
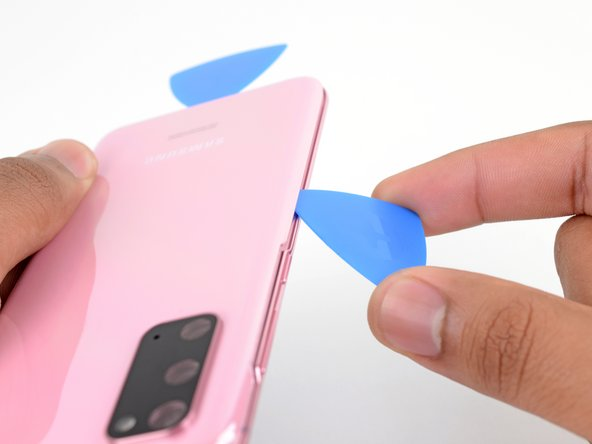
*Slide an opening pick into the gap you made for the Samsung Galaxy S20 Battery Replacement.
*Sometimes you must heat and use the suction cup a few times before the gap is big enough.
*If creating a gap is hard heat up the edge more and try again.
*Be gentle when using the opening pick
*Too much force could crack the back cover glass.
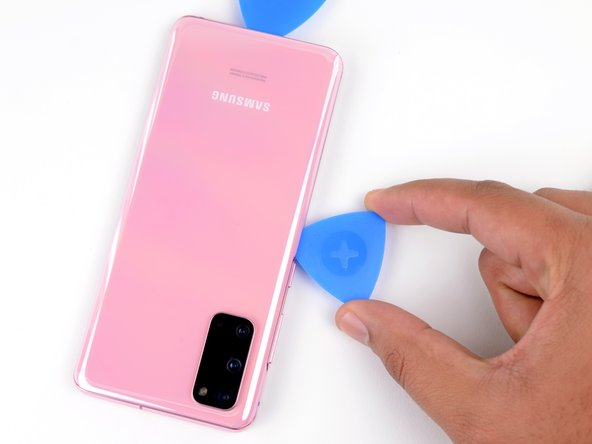
*Move the opening pick back and forth along the bottom edge to separate the adhesive.
*Avoid cutting the adhesive near the curved corners of the Samsung Galaxy S20 to avoid cracking the glass.
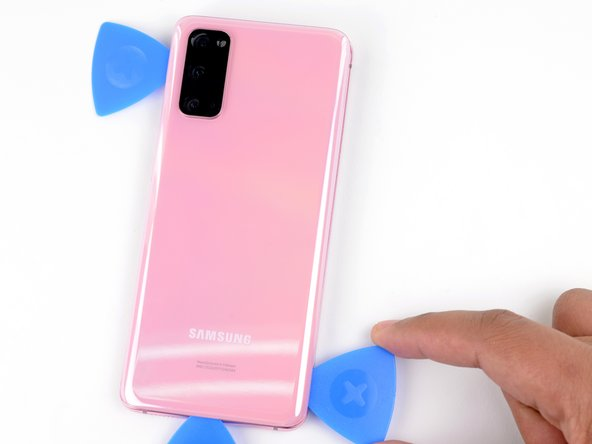
*Leave the opening pick here to prevent the adhesive from sticking again.
Step #5. Give Heat To The Left Edge For Samsung Galaxy S20 Battery Replacement
Now apply a heating tool at the back side left edge of the Samsung Galaxy S20. Do not apply heat for more than two minutes.
Step #6. Place the Suction Tool To Create a Gap
*Stick a suction cup to the back of the phone
*Place this auction tool in the middle of the Left edge.
*Use firm and steady pressure to pull the suction cup and make a gap between the back cover and the frame.
Step #7. Insert Another Opening Pick And Separate the Adhesive
*Gently slide the tip of an opening pick into the gap you created.
*Because the edge of the Samsung Galaxy S20 glass is curved you won’t need to push the opening pick in very far. Just make sure the pointed tip is under the edge of the S20 glass. Keep it going.
*It might take a few tries to get it right because the fit is tight.
*If you’re having trouble making a gap, give heat again to the edge and try again.
*You can also put a few drops of strong-concentration alcohol (over 90%isopropyl alcohol) into the joint to help loosen the adhesive.
*Be careful not to use too much force with the opening pick to avoid cracking the back cover glass.
Step #8. Slide The Opening Pick Along The Left Edge
*Once the pick is under the edge of the glass. Angle it downwards and push it in more to completely loosen the adhesive holding the back cover.
*Then gently slide the opening pick along the left edge.
*Be very careful when sliding over the raised area near the volume and power buttons—it might crack more quickly due to the gap in the glass.
*Keep the pick under the left edge of the glass near the top left corner to stop the adhesive from sticking again.
Step #9. Give Heat To The Right Edge Of The Samsung Galaxy S20 To Replace Battery
*Use a heating tool on the right edge of the back cover for about two minutes.
*You can use a hair dryer, heat gun, or hot plate, but make sure not to make the phone too hot—too much heat could damage the screen and battery.
Step #10. Separate The Right Edge Adhesive
*Put the suction cup on the back of the phone. Make sure to place it close to the middle of the right edge.
*Pull on the suction cup firmly to make a space between the back cover and the frame.
*Slide the tip of the opening pick into the space.
*Move the opening pick downwards to get it fully under the back cover. Do it just like before!
Step #11. Slides The Pick Along The Right Edge
*Slide the pick along the entire right edge of the Samsung Galaxy S20 to separate the adhesive holding the back cover.
*Keep the pick under the right edge of the glass near the top of the device to stop the adhesive from sticking again.
*While doing this the back cover might release one or both of the other picks. And it is causing them to fall off. If that happens put the pick or picks aside because the bottom edge won’t stick again from now on.
Step #12. Heat The Top Edge Of The Samsung Galaxy S20
It’s time to give heat to the top edge of the Samsung Galaxy S20. Apply a heating tool at the top edge only for two minutes.
Step #13. Separate the Top-edge Adhesive
*Be careful with the curved glass near the corners of the back cover to avoid cracking it. Take it slow to protect your back cover from damage.
*Slowly move the pick from the right edge of the Samsung Galaxy S20 around the top right corner.
*Keep slicing along the top edge until you reach the top left corner to loosen the adhesive holding the back cover completely.
*If separating becomes tough at any point stop and heat the area again then continue For Samsung Galaxy S20 battery replacement.
Step #14. Remove The Back Cover
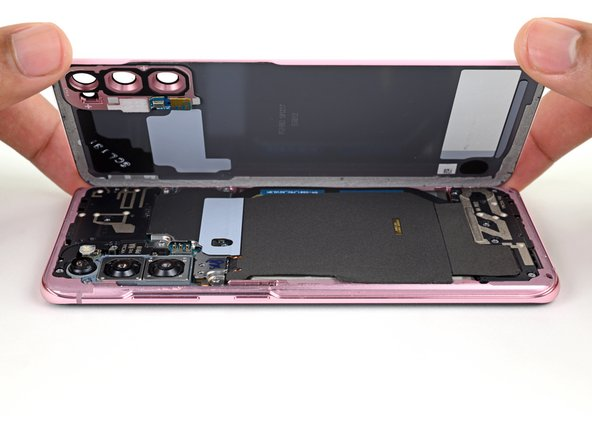
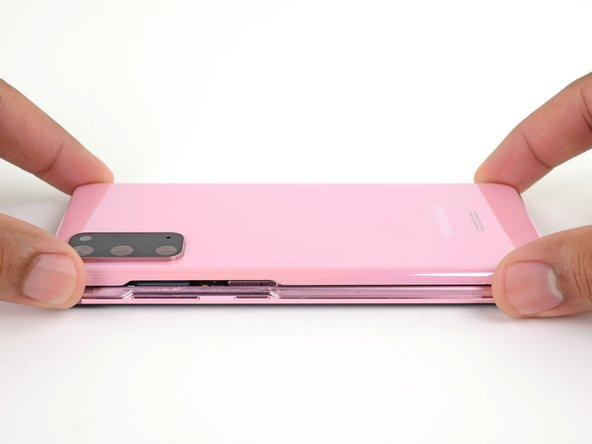
*Now you can easily lift up the back cover.
*Use an opening pick to slice the remaining adhesive if facing any trouble when lifting the back cover.
*Be gentle when removing the back cover
*Keep the back cover aside safely.
Step #15. Unfasten The Bracket Screws Of The Motherboard
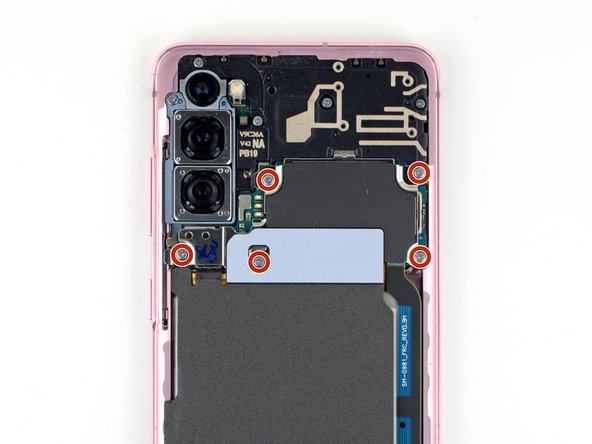
Pick a Phillips #00 screwdriver to open the 4 mm screws. The Motherboard of the Samsung Galaxy S20 is secure with these screws. However it’s crucial to keep these screws safely in place so that you can put them in their place.
Step #16. Unclipping Motherboard Bracket
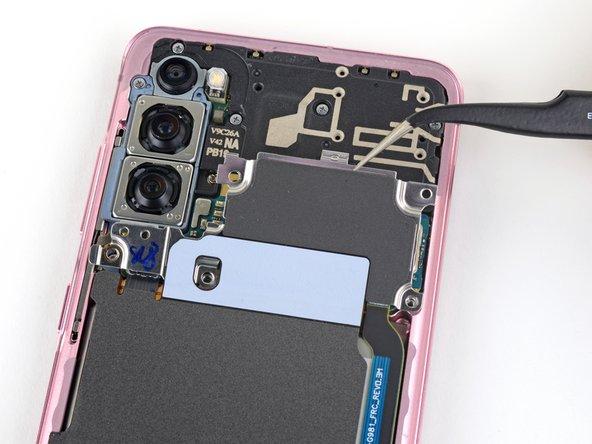
*It’s time to unclip the Motherboard bracket. You need to be more careful to avoid any damage.
*Gently pull up the motherboard bracket and separate it from the plastic midframe.
*Do it with care. Because at this time the bracket can not be entirely removed due to its attachment to the wireless charging foil.
Step #17. Wireless Charging Coil Removal
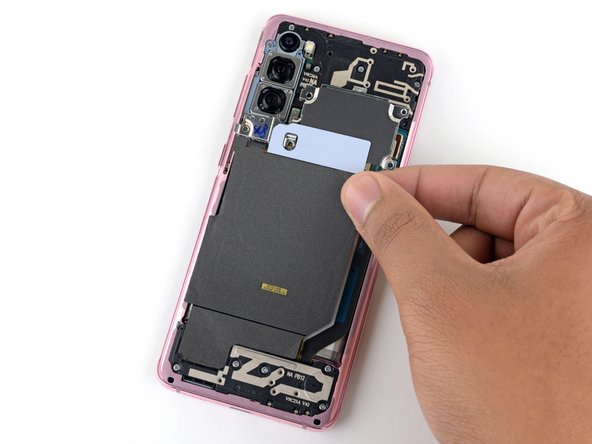
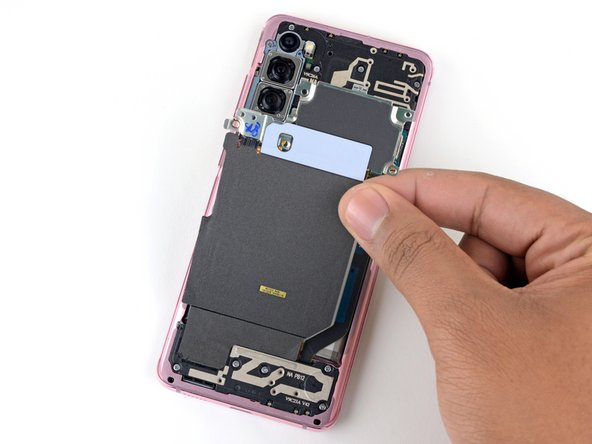
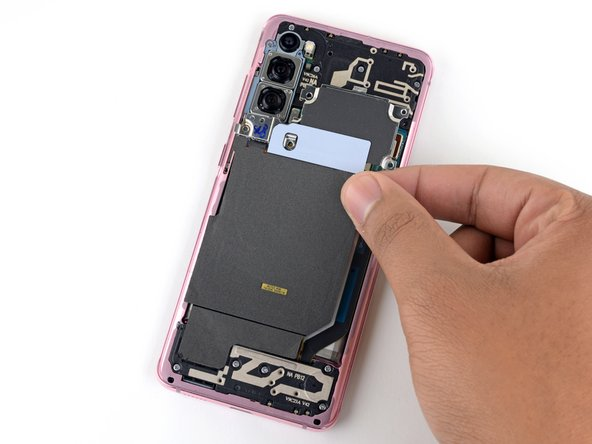
*Gently peel off the wireless charging coil from the Samsung Galaxy S20.
*Remove the wireless charging coil from the Samsung Galaxy S20.
*The coil connects to the rest of the Samsung Galaxy S20 through spring contacts, so you don’t need to disconnect any plugs.
Step #18. Disconnect The Battery Cable
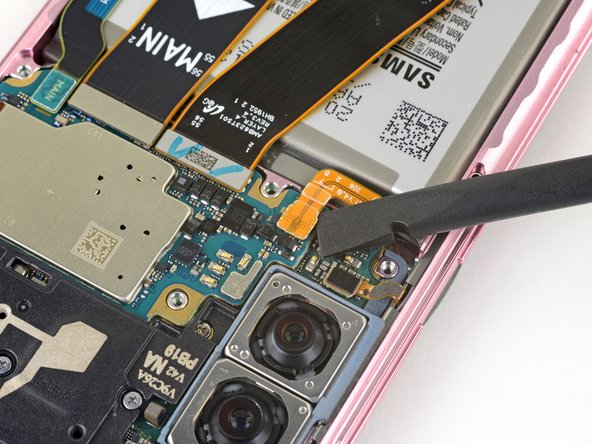
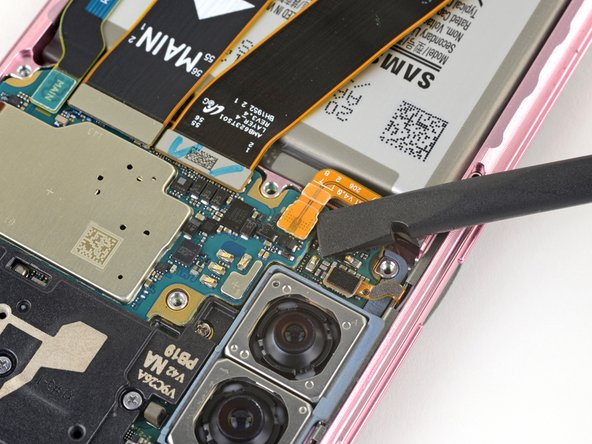
*Now carefully disconnect the battery cable.
*Here you will need a spudger to pry up the cable connection.
Step #19. Unfasten The Lower Midframe
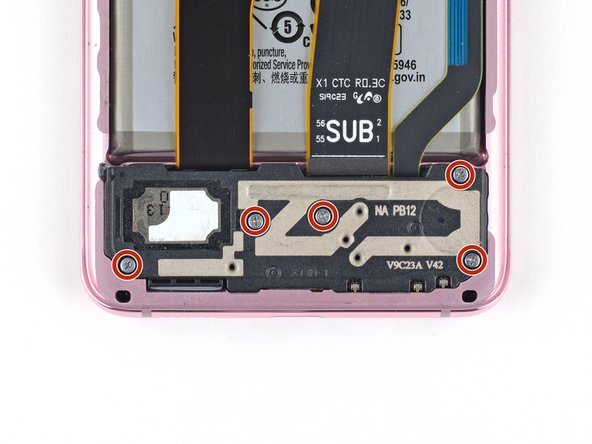
You’ll need a Phillips #00 screwdriver to unscrew the five four mm-long screws that keep the loudspeaker and lower midframe in place.
Step #20. Remove The Loudspeaker
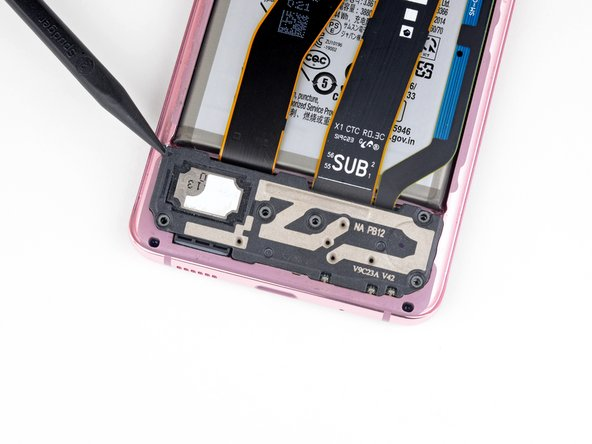
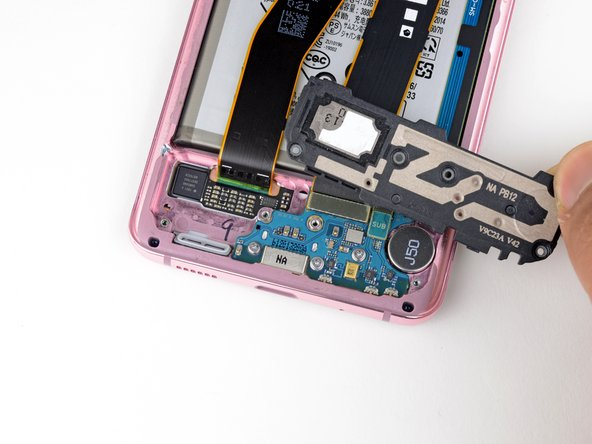
*Now you can use a spudger or tweezers into the notch at the top left corner of the midframe. Here you will gently pry up Loudspeaker. But first you have to release the clips carefully.
*Then remove the loudspeaker and lower midframe.
Step #21. Disconnect Cable From Daughterboard
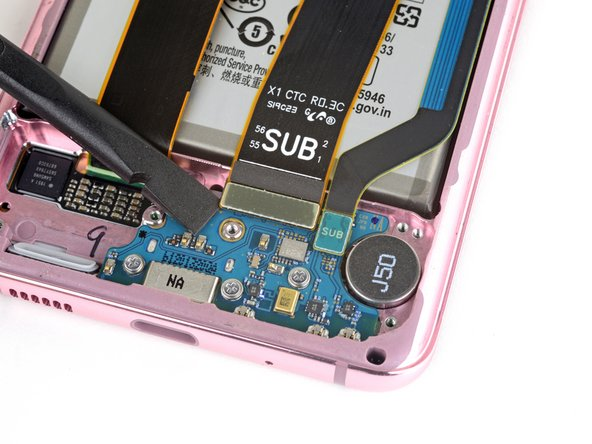
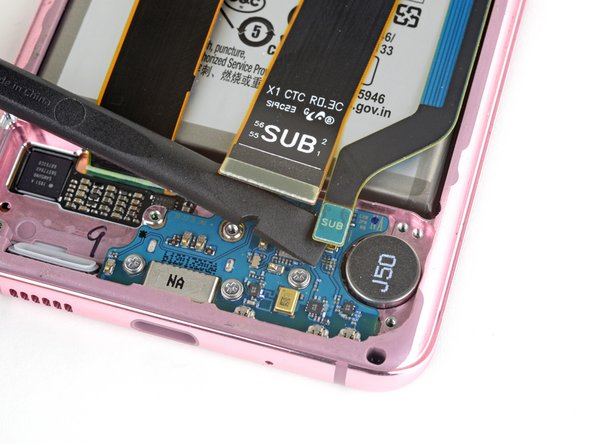
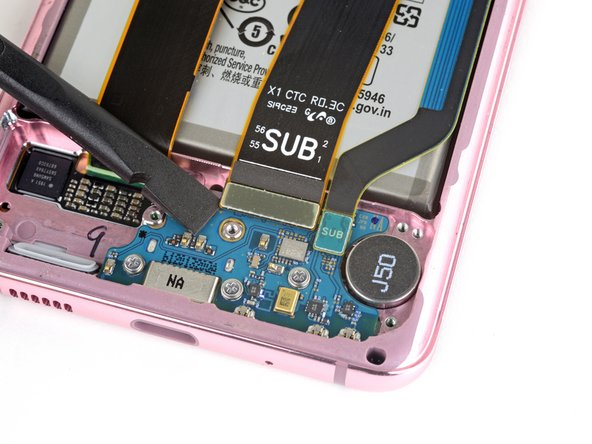
*Use a spudger to gently pry up the main and auxiliary flex cables from the daughterboard near the bottom of the Samsung Galaxy S20.
*Disconnect the cables to separate them from the daughterboard.
Step #22. Disconnect The Main Flex Cables
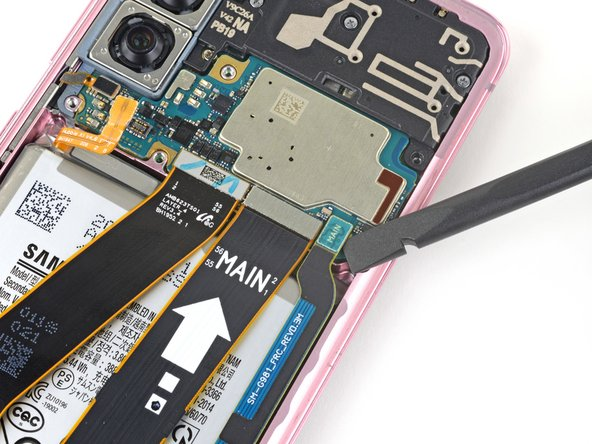
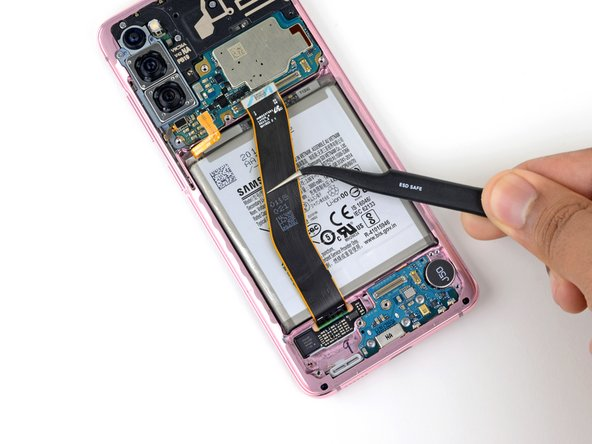
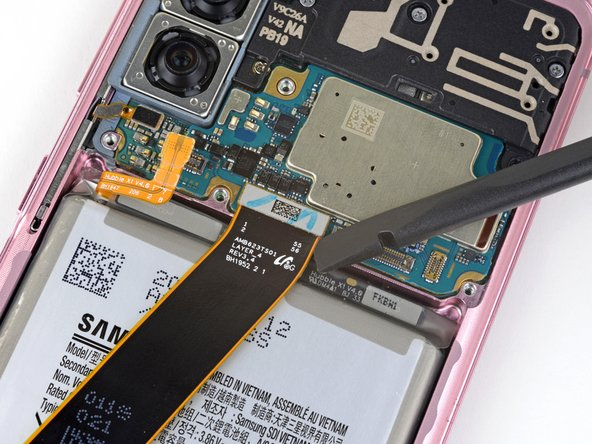
*Use a spudger to gently pry up the main and auxiliary flex cables from the motherboard of the Samsung Galaxy S20.
*Disconnect the cables to separate them from the motherboard.
Step #23. Remove The Main Flex Cables
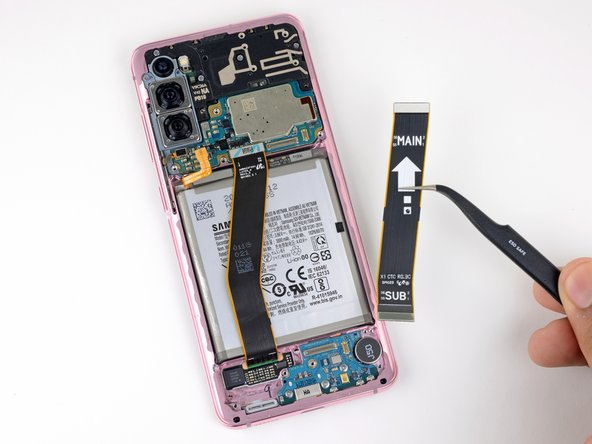
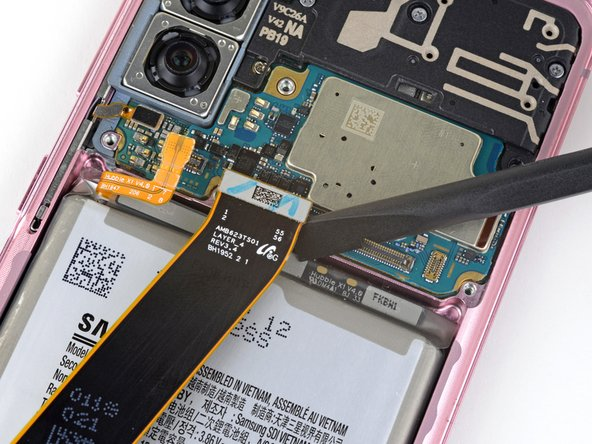
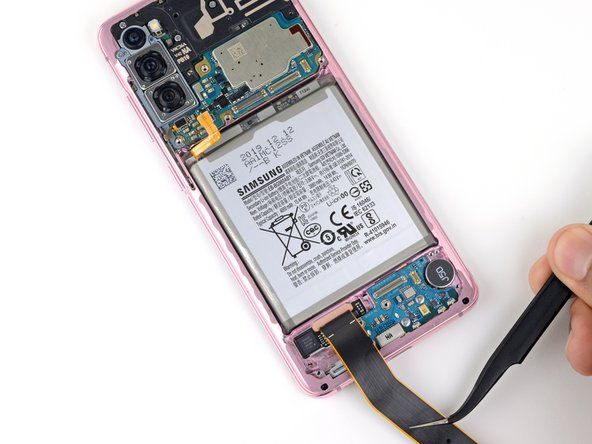
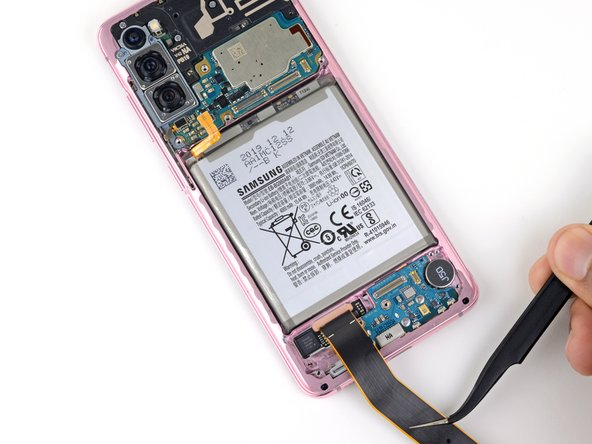
Carefully lift and take out the main and auxiliary flex cables. To remove the auxiliary flex cable you’ll need to use tweezers.
Step #24. Disconnect The Main Display Cable
*With a spudger, gently lift and detach the main display flex cable from the motherboard of the Samsung Galaxy S20 For Battery Replacement.
*Use caution to ensure a careful disconnection of the cable from the motherboard.
Step #25. Gently Out Up Mian Display Cable
*Carefully lift and gently bend the display flex cable to move it away from the motherboard and battery of the Samsung Galaxy S20.
*Ensure the cable is out of the path of the motherboard and battery to prevent any damage.
Step #26. Apply 90% Isopropyl Alcohol
*Place two drops of strong isopropyl alcohol (concentration over 90%) on the upper edge of the battery.
*Wait for about a minute to let the isopropyl alcohol loosen the adhesive.
*This will help make it easier to remove the battery from the Galaxy S20.
Step #27. Place The Suction Tool On The Battery
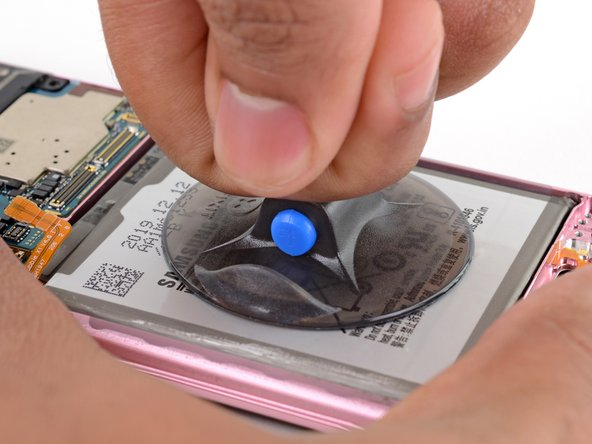
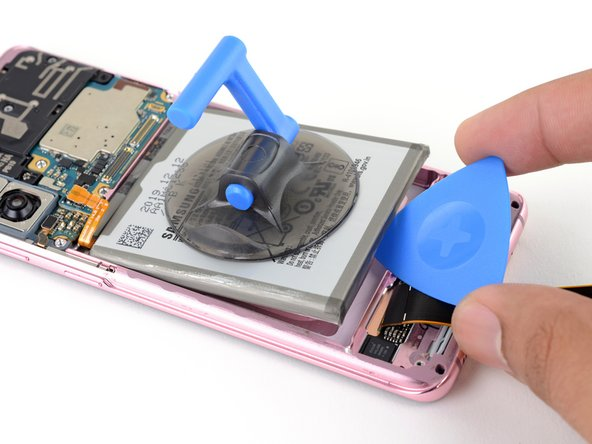
*Attach a suction handle to the centre of the battery.
*Use one hand to support the top and bottom of the phone against your work surface.
*With your other hand pull up firmly on the suction handle.
*The adhesive needs time and repeated pulls. Make sure not to give strong force to loosen the adhesive under the battery.
*Pull on the suction cup evenly for about 15 seconds at a time.
*If the battery remains stuck it means there is a need to apply 1-2 drops of isopropyl alcohol along the top, left, and right edges. Now wait a minute and try pulling again.
*Once the battery starts to lift from the S20 you are very close to Samsung Galaxy S20 Battery Replacement.
Step #28. Lift The Battery From Its Adhesive
*Don’t continue until the battery has lifted enough for you to easily slide an opening pick underneath. If it’s still stuck pushing and pulling it could be dangerous.
*Once the battery lifts up don’t use any isopropyl alcohol because it might damage the fingerprint sensor and screen.
*Now it’s time to insert an opening pick under the bottom of the battery and twist gently to loosen it from the glue.
Step #29. Remove The Battery
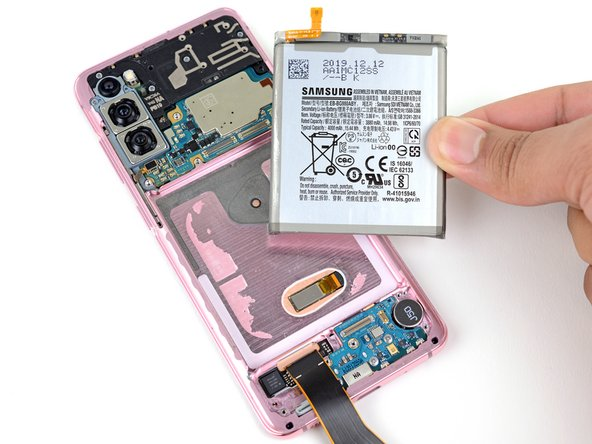
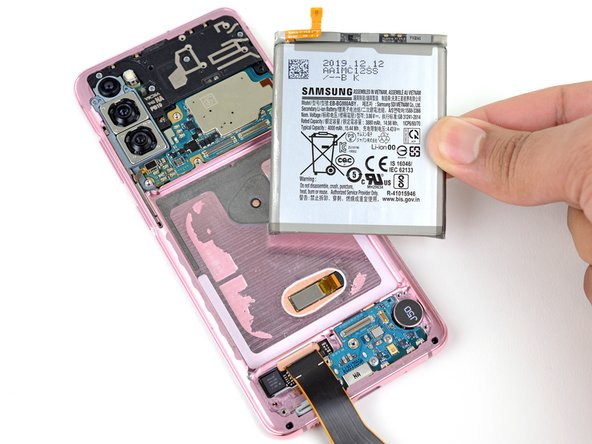
Now you can easily remove the battery by pulling it up your thumb and finger. Never pull or push with hard hands.
Step #30. Remove The Remaining Adhesive
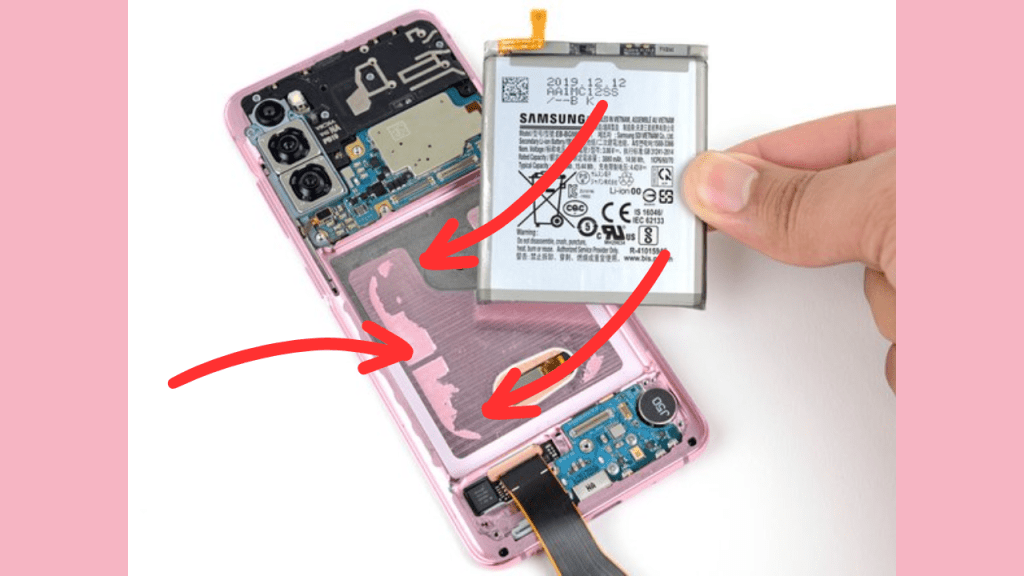
*Remove any leftover battery adhesive by peeling or scraping it off.
*Clean the surface where the battery was attached using isopropyl alcohol and a cloth that won’t leave lint behind.
*Reusing the battery once it’s been taken out is unsafe so don’t try to use it again.
*Instead replace it with a new battery to avoid any potential safety risks.
Step #31. Apply Adhesive
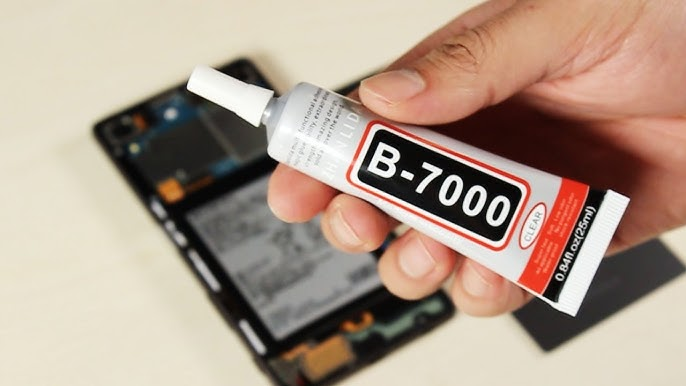
*Let’s start putting everything back together. If your new battery doesn’t have adhesive you can add some adhesive to the battery.
*You have to wait a minute to set the adhesive.
*Never apply extra adhesive cause it harms the screen and fingerprint sensor.
Step #32. Replace the New Battery Of The Samsung Galaxy S20
*Align the new battery correctly in the battery well.
*Apply firm pressure to secure the battery into position.
Step #33. Gently Place The Main Display Cable
Now carefully set the main flex cable on its place toward the motherboard.
Don’t pull the cable to prevent damaging the connection.
Step #34. Connect It to the Motherboard
Now you can easily connect the main display flex cable from the motherboard.
Step #35. Place The Main Flex Cable and Connect it
Gently connect the main and auxiliary flex cables.
Step #36. Connect Cables To The Dauterboard
*When reattaching press connectors, make sure to align them carefully.
*Press down on one side until it clicks, then repeat on the other side. Avoid pressing down in the middle to prevent damage to the pins. If the connector is misaligned, it can cause permanent damage by bending the pins.
Step #37. Place the Loudspeaker and Bottom Midframe
*Put the loudspeaker back in its place and make sure it’s secure.
*Once the loudspeaker is installed, place the midframe back and tighten the screws just like they were before.
Step #38. Connect the Battery Connector
*Find the battery connector on the motherboard.
*Line up the connector with the matching port on the motherboard.
*Gently push the connector into the port until it clicks in place.
*Make sure the connector is snug to create a secure connection.
*Be careful not to push too hard to avoid any damage.
*Additionally after connecting check to make sure it’s firmly attached.
Step #39. Reinstall Charging Coil
*Align the charging coil correctly in its designated spot,
*Then firmly press down the remaining part of the coil to stick it in place securely.
Step #40. Align the Motherboard Bracket and Fasten The Screws
*Tighten the screws on the motherboard bracket securely.
*Make sure each screw is fastened correctly to ensure the motherboard is held in place securely.
Step #41. Check The Samsung Galaxy S20
It’s a good idea to check the Samsung Galaxy S20 after replacing the battery before putting everything back together. This makes sure that everything is working correctly and there are no issues to address before completing the reassembly process. Here’s what to do.
Check the battery connection
Make sure the battery connector is securely attached to the motherboard to guarantee proper power supply to the S20.
Test the functionality
Power on the Samsung Galaxy S20 and check if it boots up correctly. Make sure all buttons, touchscreen, and other functions are responsive.
Verify charging
Furthermore connect the phone to a charger and confirm that it is charging correctly. Check if the charging indicator appears on the screen.
Step #42. Place The Cover
However once you have verified that everything is working correctly it’s time to place the cover back onto the Samsung Galaxy S20.
Conclusion
Congratulations! Your Samsung Galaxy S20 battery replacement is successfully completed. We hope that this guide helps you at every stage. This step-by-step guide has everything that can prepare you for the Samsung Galaxy S20 battery replacement. We also mentioned all the precautions and tips to avoid the potential risk of damage.
See you in the next guide. Till then enjoy your Samsung Galaxy S20 with battery perfection!
