Are you worried because your iPhone 12 audio is not working? Don’t worry! In rare cases iPhone users face this type of issue. That’s why we bring a complete guide for your iPhone 12 Audio Problems to give you peace of mind with your expensive phone.
We can imagine how it could be to face iPhone 12 audio problems. Audio issues may be related to loudspeakers calling speakers microphones or the phone’s internal board. In this blog post we will explore iPhone 12 audio problems and provide a simple step-by-step guide to help you fix them.
However the iPhone 12 audio plays a vital role in our phone experience. Of course it can enable us to make clear calls enjoy music and watch videos without issues. However, it’s not uncommon to encounter audio-related problems that disrupt these activities.
So if you’re hearing distorted sound experiencing no audio or facing low volume it’s essential to understand the causes of these problems. Please follow our troubleshooting steps and using the suggested solutions you can restore the audio quality and functionality of your iPhone 12.
Then why wait? Let’s dive into troubleshooting and repairing iPhone 12 audio issues. And enjoy the smooth sound experience you love on your iPhone.
Understanding iPhone 12 Audio Issue
Regarding iPhone 12 audio issues it’s essential to identify the specific area causing the problem. Cases of audio problems with the iPhone 12 iPhone 12 Pro iPhone 12 Pro Max or iPhone 12 Mini are rare. But it’s crucial to be aware of potential issues that may arise. Let’s understand the components responsible for iPhone 12 audio output and input and the symptoms you should watch out for.
Identify iPhone 12 Loudspeaker, Calling Speaker, Microphone or Board Issues
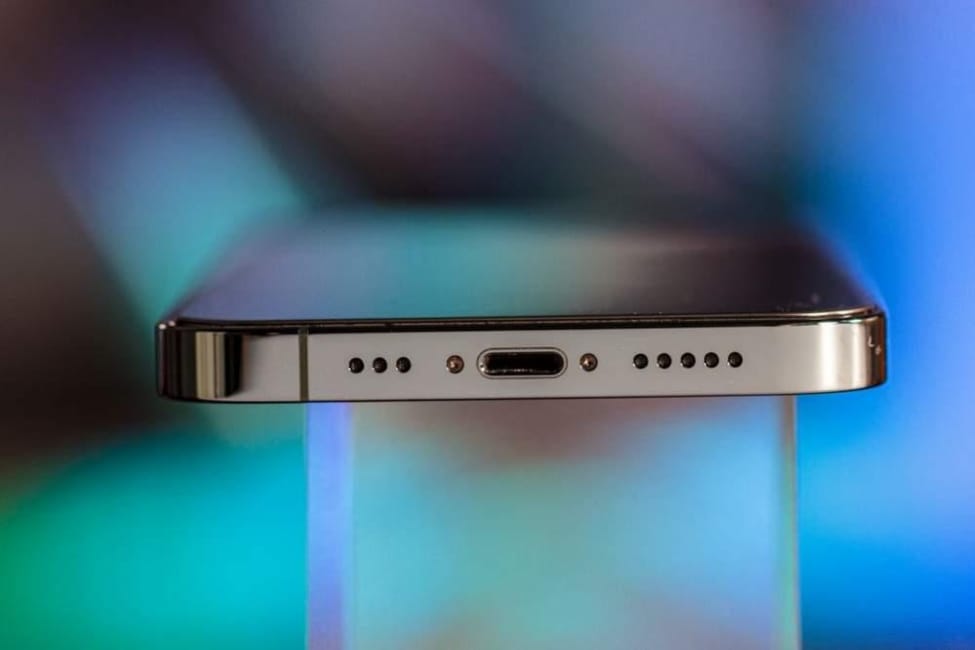
Firstly let’s explore the different components involved. There is a loudspeaker calling speaker microphone and the internal board of your iPhone 12. The loudspeaker produces audio during media playback while the calling speaker makes a clear sound during phone calls. In iPhone 12 the calling speaker also turns into a 2nd loudspeaker while playing media. The microphone captures your voice during calls or recordings. Lastly the internal board controls the overall audio functionality of your phone.
Symptoms to Watch Out For Distorted Sound No Sound or Low Volume in iPhone 12
Let’s focus on the symptoms that may indicate iPhone 12 audio issues. Keep an ear out for distorted sound where the audio may sound fuzzy crackling or unclear. It’s also important to identify if you’re experiencing no sound where there’s a complete absence of audio output through the speaker or during phone calls. Additionally pay attention to significantly lower volume levels than expected during media playback or calls.
Causes of iPhone 12 Audio Problems
Understanding the causes of iPhone 12 audio issues is crucial after identifying the problem. One common cause of iPhone 12 audio problems is software glitches. These glitches can happen because of outdated software incompatible apps or system errors. Another factor is physical damage. It can significantly impact the iPhone 12 audio functionality. However dropping your iPhone can damage your iPhone 12 audio quality. Additionally hardware malfunctions such as faulty components or loose connections can result in audio issues.
Similarly knowing the root cause will make you more confident about taking correct actions regarding resolving iPhone 12 sound issues.
Troubleshooting iPhone 12 Audio Problems
Software Troubleshooting for iPhone 12 Audio Problems
● Restart the iPhone
Sometimes all sound issues you are experiencing can be resolved by restarting your phone. Restarting can work wonders in resolving minor software issues that might be causing iPhone 12 audio glitches. It’s like giving your iPhone a fresh start!
You can follow these steps
Step 1
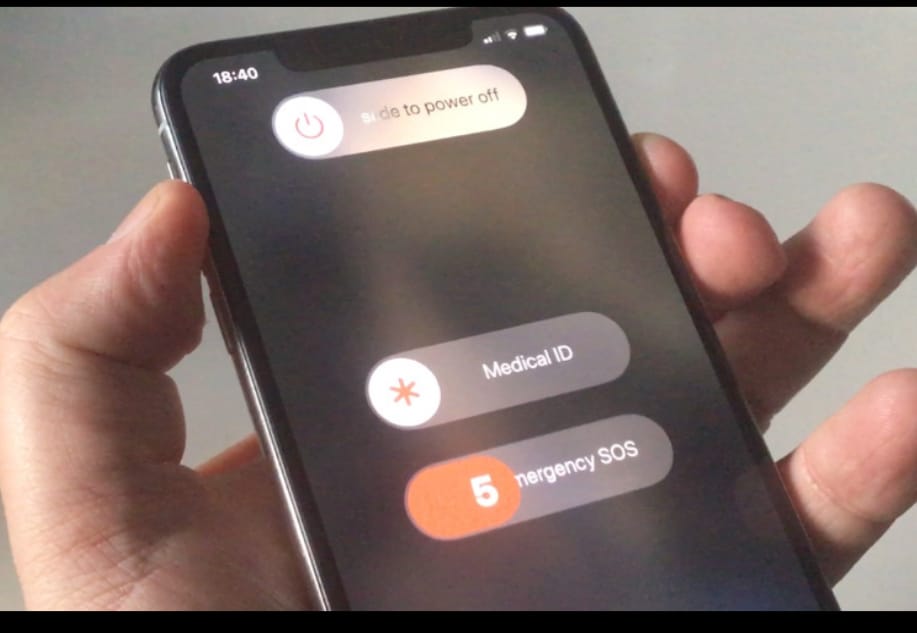
Press and hold the power button (located on the right or top edge of your phone) until the “slide to power off” slider appears.
Step 2
Slide the slider to power off your iPhone 12.
Step 3
Once the iPhone is off wait for a few seconds and then press and hold the power button again until the Apple logo appears on the screen.
When you restart your iPhone it closes all running processes and clears any temporary problem that might have affected the audio performance. It’s a quick and simple fix!
Note A complete restart is important. It ensures a clean reboot of your phone’s software. And also provide a better chance of resolving audio-related issues. So give it a try before moving on to other troubleshooting steps.
Let’s now explore more solutions to get your iPhone 12 audio back!
● Check for iPhone 12 Updates
To ensure your iPhone 12 is running at its best staying up-to-date with the latest iOS updates is important. These updates also often fix bugs and improvements that can address audio-related issues. So let’s guide you through checking for updates.
1. Connect to Wi-Fi Before checking for updates ensure your iPhone 12 is connected to a stable Wi-Fi network to avoid using your cellular data.
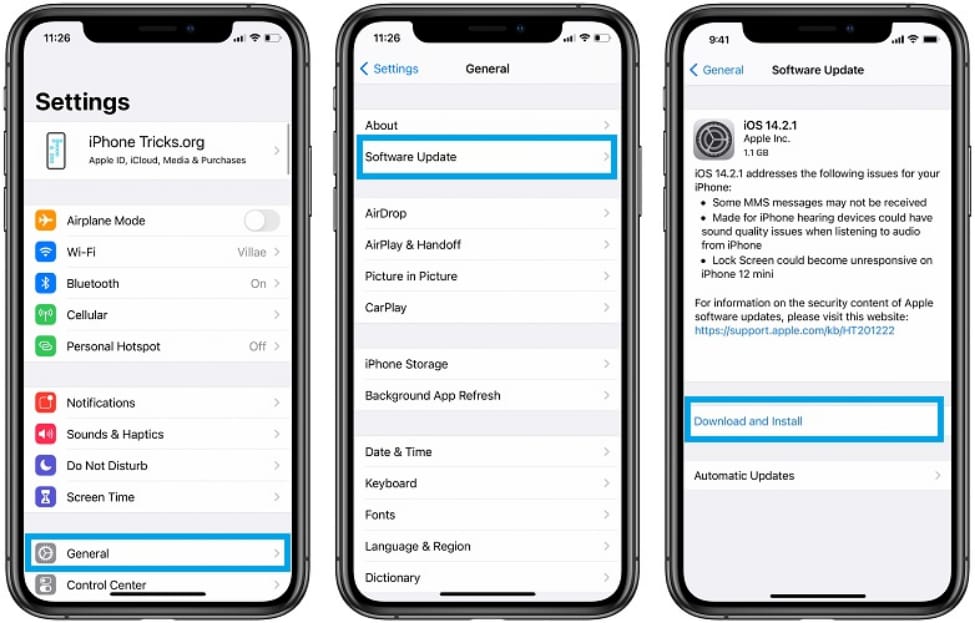
2. Go to Settings From your home screen tap on “Settings” which is represented by the gear icon.
3. Select General In the settings menu tap “General.”
4. Software Update Under the General section “Software Update.” Tap on it to check for any available updates.
5. Install Update If an update is available follow the on-screen instructions to download and install it. Make sure your phone is charged or connected to a power source during the update process.
● Disable Bluetooth of iPhone 12 to Resolve Audio Issues
Did you know that Bluetooth interference can sometimes be the reason behind audio performance issues on your iPhone 12? Bluetooth connections can occasionally cause disruptions in audio playback or calls. And the result is distorted sound or no sound at all. Luckily there’s a straightforward solution. You can disable Bluetooth for a short time to see if it resolves the issue. Follow these simple steps
Step 1
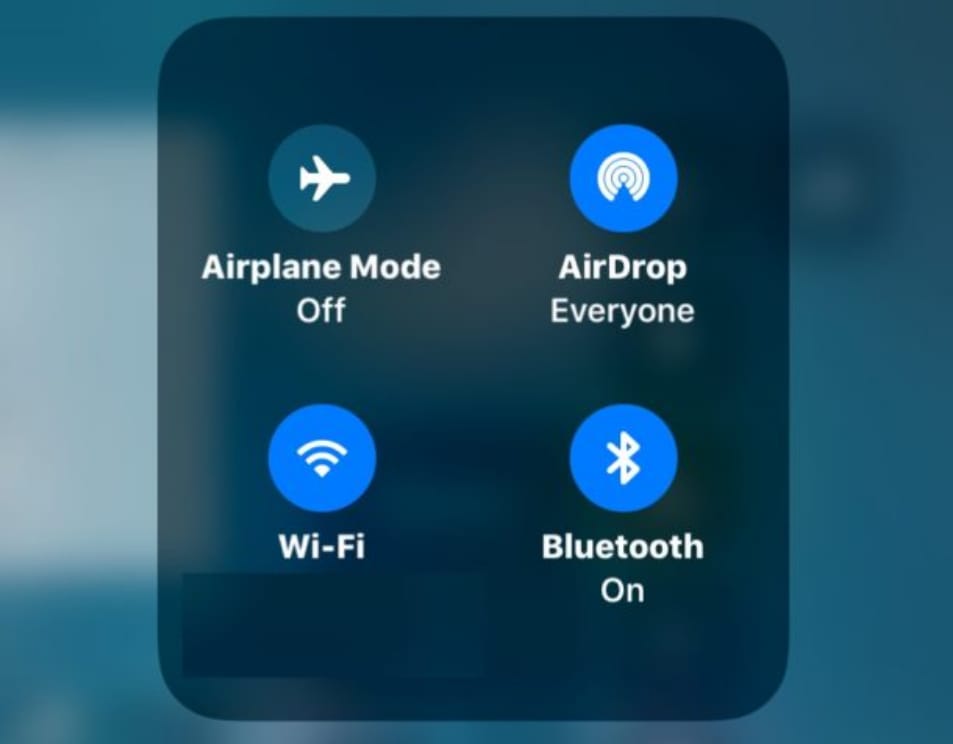
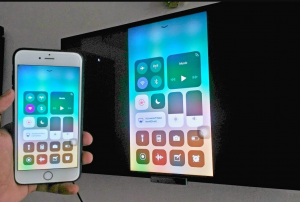
Swipe down from the top right corner of your iPhone 12 screen to access the Control Center.
Step 2
Locate the Bluetooth icon and tap on it to turn it off. The icon should no longer be highlighted.
By disabling Bluetooth temporarily you can check if it is the reason for the sound issues. If the problem persists you can rule it out as the cause and move on to the next troubleshooting steps. However if the audio issue is resolved you may need to investigate further into your Bluetooth settings or connected devices.
Hardware Troubleshooting for Your iPhone 12 Sound Issues
● Cleaning the Speaker and Microphone of iPhone 12
When it comes to audio problems on your iPhone 12 sometimes the solution can be as simple as keeping your phone clean. The speaker and microphone are crucial for clear sound during calls and media playback. Dust dirt or debris can accumulate over time blocking the audio performance. Let’s explore the importance of maintaining a clean speaker and microphone.
● Importance of Keeping the Speaker and Microphone Clean for iPhone 12 Audio Problems
Regularly cleaning your iPhone 12 speaker and microphone openings is essential for good audio quality. Dust and debris can block the sound pathways leading to muffled or distorted sound output. Moreover a dirty microphone can affect the clarity of your voice during calls causing communication problems with your contacts.
● Gentle Cleaning Guide for iPhone 12 Audio Issues
To clean the speaker and microphone openings follow these easy steps
1. Power Off Before cleaning power off your iPhone 12 to avoid accidental interactions.
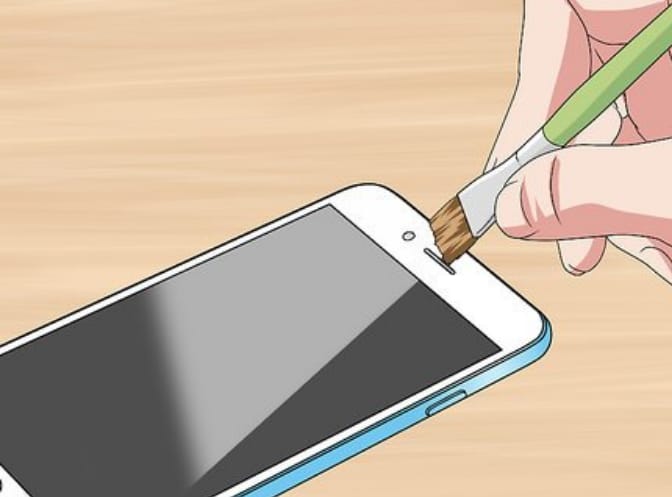
2. Use a Soft Dry Brush Take a soft dry brush (such as a clean unused toothbrush) and gently brush away any visible dirt or dust from the speaker and microphone areas. Be cautious not to apply too much pressure (it can cause damage to the delicate components).
3. Compressed Air If there’s stubborn debris stuck in the openings you can use compressed air to blow it away gently. Hold the iPhone at an angle to prevent debris from getting further into the phone.
4. Avoid Liquids Never use water or liquid to clean the speaker and microphone openings.
Clean your iPhone 12 speaker and microphone regularly to prevent audio issues and enjoy a clear sound in calls and media playback. This simple maintenance routine also extends your device’s longevity. Let’s proceed with more hardware troubleshooting to optimize your iPhone 12 audio!
● Adjusting Volume and Audio Settings to Resolve iPhone 12 Sound Problems
Pay attention to the significance of checking your volume and audio settings. Sometimes a simple adjustment can make a difference in restoring the perfect sound quality you crave. Let’s guide you through the steps to ensure your volume and audio settings are correctly configured.
● Checking Volume Level iPhone 12
Start by checking the volume level on your iPhone 12. To do this
Step 1
Press the volume-up button located on the left side of your phone.
Step 2
Observe the volume indicator on your screen to make sure it’s at an appropriate level.
● Audio Settings Configuration to Resolve iPhone 12 Audio Issues
Next verify your audio settings to ensure they are correctly configured
Step 1
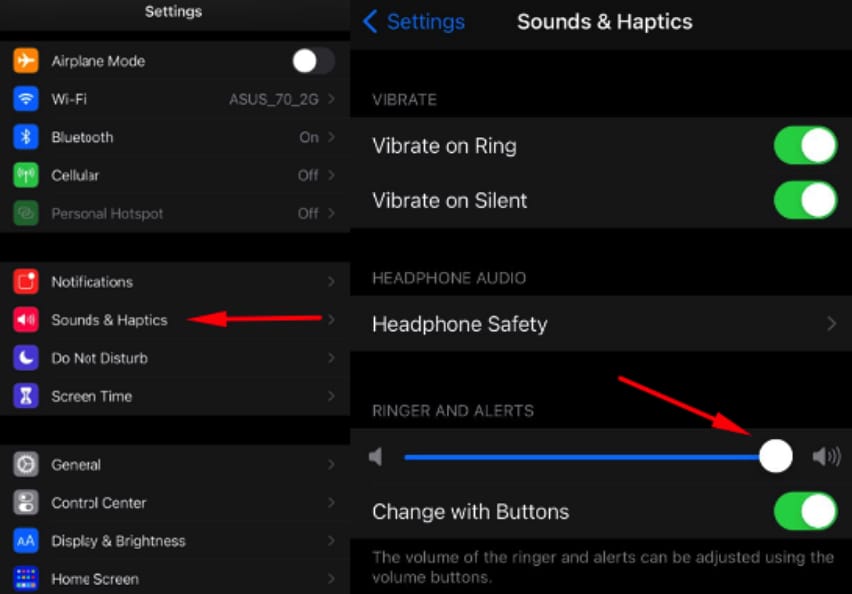
Go to “Settings” on your iPhone 12.
Step 2
Tap on “Sounds & Haptics” to access audio settings.
Step 3
Adjust the sound preferences such as ringtone volume media volume and call volume to your desired levels.
By making these adjustments you can rule out any accidental volume settings that may have been causing the iPhone 12 audio problem. Now let’s move on to an exciting step that involves testing your audio with various sources!
Test iPhone 12 with Different Audio Sources
To get to the root of the iPhone 12 audio issues explore different audio sources. Testing with various sources such as phone calls music or videos can help identify the specific problem area.
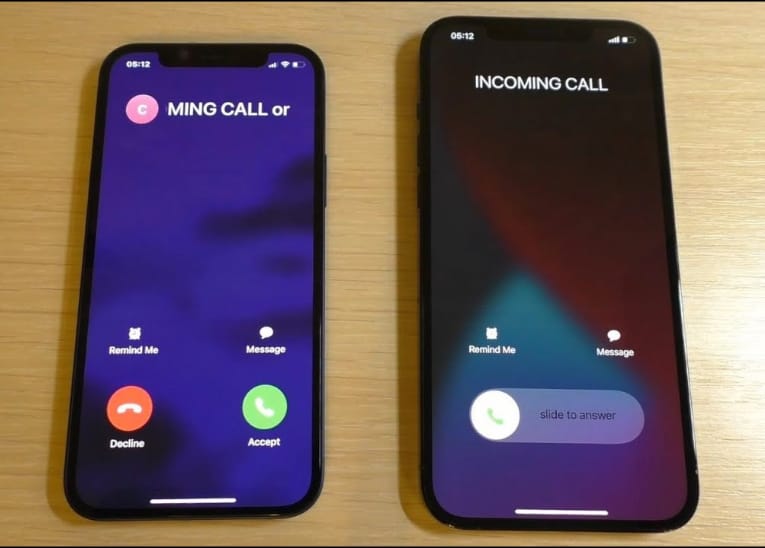
● Phone Calls to Check iPhone 12 Calling Speaker Issues
Step 1
Place a test call to a friend or family member.
Step 2
Pay close attention to the call quality clarity and volume levels during the conversation. Identify if the calling speaker of iPhone 12 is properly working or not.
Music and Videos Play to Check iPhone12 Loudspeaker
Step 1
Play songs or videos from various apps on your iPhone 12.
Step 2
Listen carefully for any distortions abnormalities or issues with audio output.
Step 3
Record videos with your front and back camera with your voice. It will make sure that your iPhone 12 microphone is working or not.
These tests will narrow down the audio problem to a specific area. However it’s related to phone calls media playback or both. You’ll be better equipped to find the issue effectively. Now let’s move to fixing iPhone 12 audio problems!
Fixing iPhone 12 Audio Problems
After learning about possible iPhone 12 audio problems we will learn about fixing those audio issues. Firstly we will sort out the loudspeaker issue.
iPhone 12 Loudspeaker Issue
● Check for Obstructions
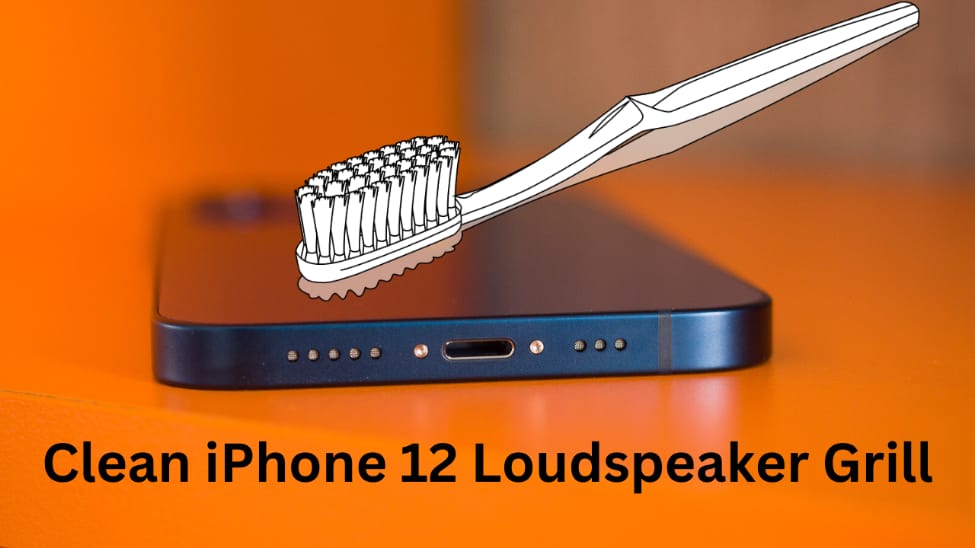
The first step is to examine the loudspeaker grille for any obstruction or blockage. Dust dirt or debris can accumulate over time and block the sound pathways. And it really badly affects the audio output quality. The following process of inspecting and removing any obstructions will help you.
Step 1
Examine the Loudspeaker Grille
Locate the loudspeaker grille on your iPhone 12. It is situated at the bottom edge of the phone next to the charging port.
Step 2
Use a Soft Dry Brush
Take a soft dry brush (such as a clean unused toothbrush) and gently brush the loudspeaker grille. This will help remove any visible dust or dirt blocking the sound.
Step 3
Compressed Air (Optional)
If the obstruction seems stubborn you can use compressed air to blow away the debris gently.
Step 4
Test the Audio
After cleaning the loudspeaker grille test the audio by playing music. Observe if the audio quality has improved. Remember that it is just the main loudspeaker of the iPhone 12. Otherwise the iPhone 12 has another loudspeaker which is its calling speaker. It turns into a loudspeaker when playing media. Further in this post we will learn about fixing this calling speaker which is also the 2nd loudspeaker of iPhone 12.
You can address potential audio problems caused by dust or debris by checking for obstructions and cleaning the loudspeaker grille. However if the issue persists other factors might be at play. Let’s move on to the next steps and explore more solutions to fix audio problems on your iPhone 12!
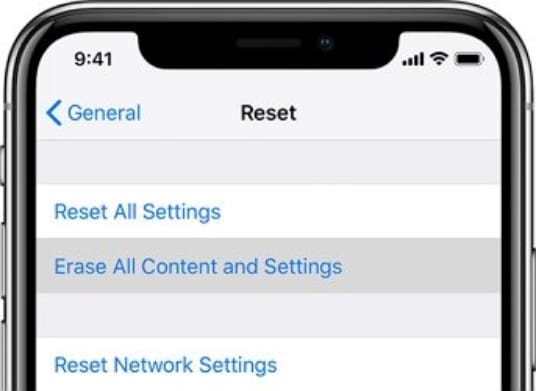
● Reset All Settings to Resolve iPhone 12 Audio Issues
If you’re still experiencing loudspeaker issues with your iPhone 12 a software-related problem might continue. In such cases performing a “Reset All Settings” can significantly resolve these issues. This action will reset all settings to their default state. And it can potentially eliminate any misconfigurations or clashes that may have been affecting the loudspeaker.
However before proceeding with this step it’s crucial to back up your data. Resetting all settings will not delete your data but it’s always better to be safe. Backing up ensures that you won’t lose any valuable information in the process.
iPhone 12 Calling Speaker Issue
Is your iPhone 12 calling speaker giving you trouble or not working? Don’t worry; we’ve effective solutions to resolve this problem. In the series of iPhone 12 the dysfunction of calling speakers is mainly reported. But dont worry! we can resolve this issue. So let’s explore how you can regain your functioning iPhone 12 calling speaker.
● Check for iPhone 12 Software Updates
Before diving into complex troubleshooting start with the basics – check for software updates. Ensuring your iPhone 12 runs on the latest iOS version can significantly resolve calling speaker issues.
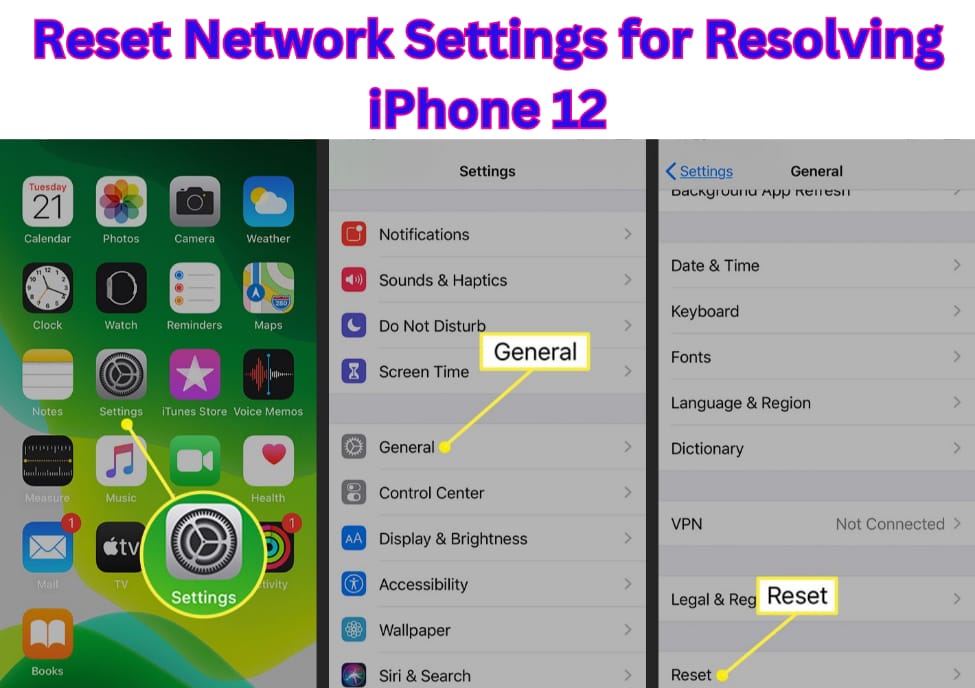
● Reset Network Settings for Resolving iPhone 12 Audio Problems
If your calling speaker problem persists network configuration issues might be the reason. Resetting network settings can help resolve these problems and bring back clear sound during phone calls. This step will reset your Wi-Fi cellular and VPN settings to default. Dont worry! It won’t affect your data.
To reset network settings follow these steps
Step 1
Go to “Settings” on your iPhone 12.
Step 2
Tap on “General.”
Step 3
Scroll down and select “Reset.”
Step 4
Choose “Reset Network Settings” and confirm your choice.
Your iPhone 12 will restart and the network settings will be reset to default. Afterwards check if the calling speaker issue has been resolved.
If the problem is still there you must get your calling speaker repaired. There is the possibility that your calling speaker has got damaged from the inside. Let me tell you why your iPhone 12 calling speaker can break down.
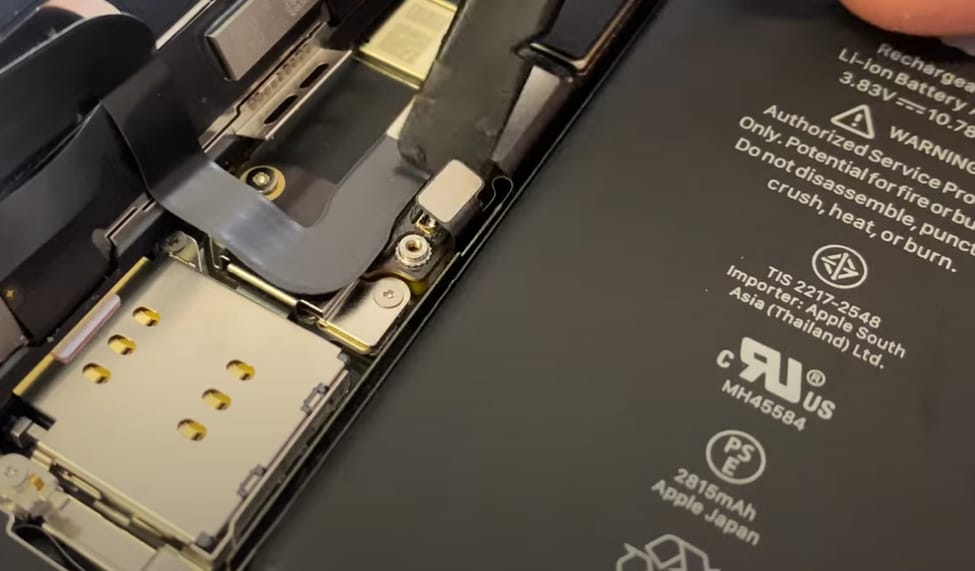
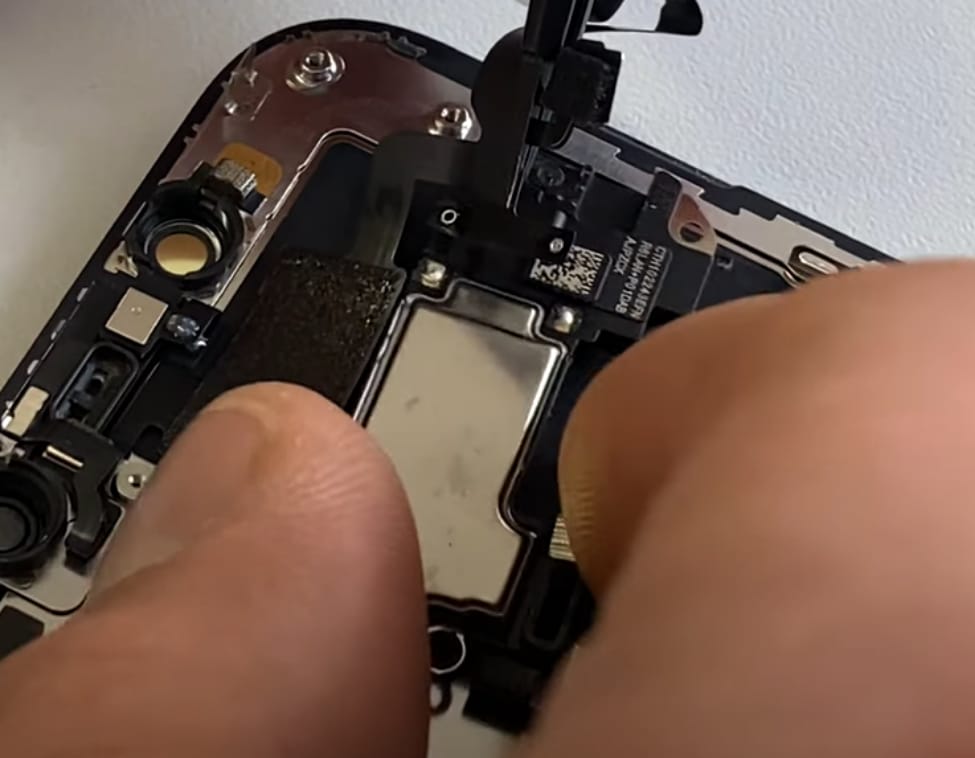
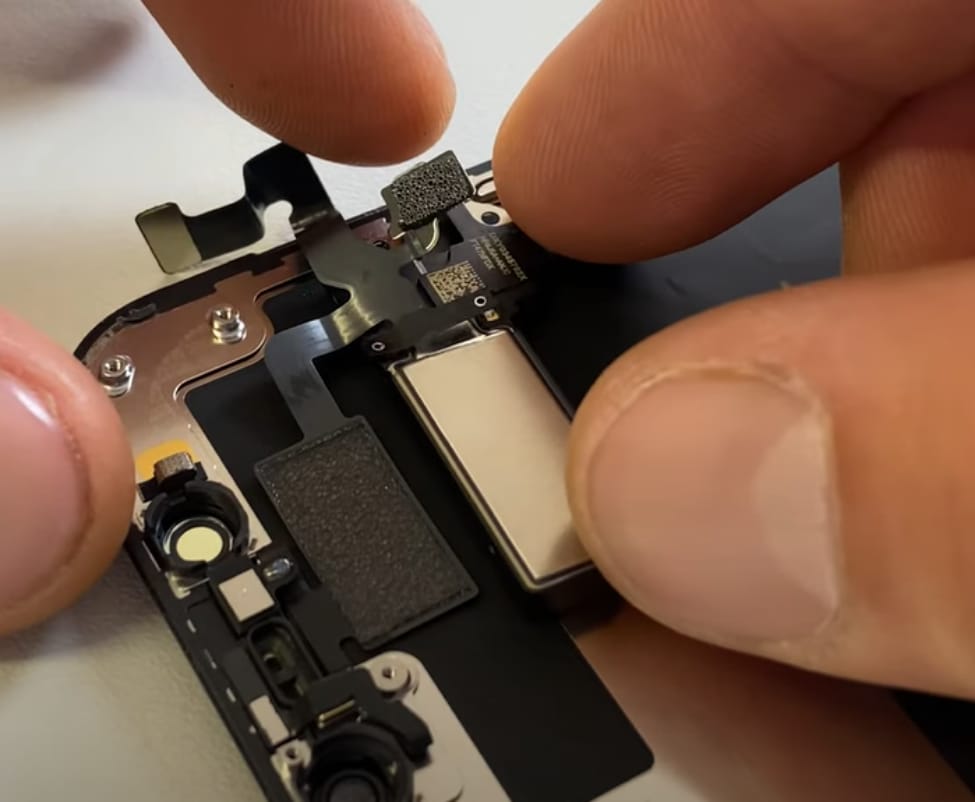
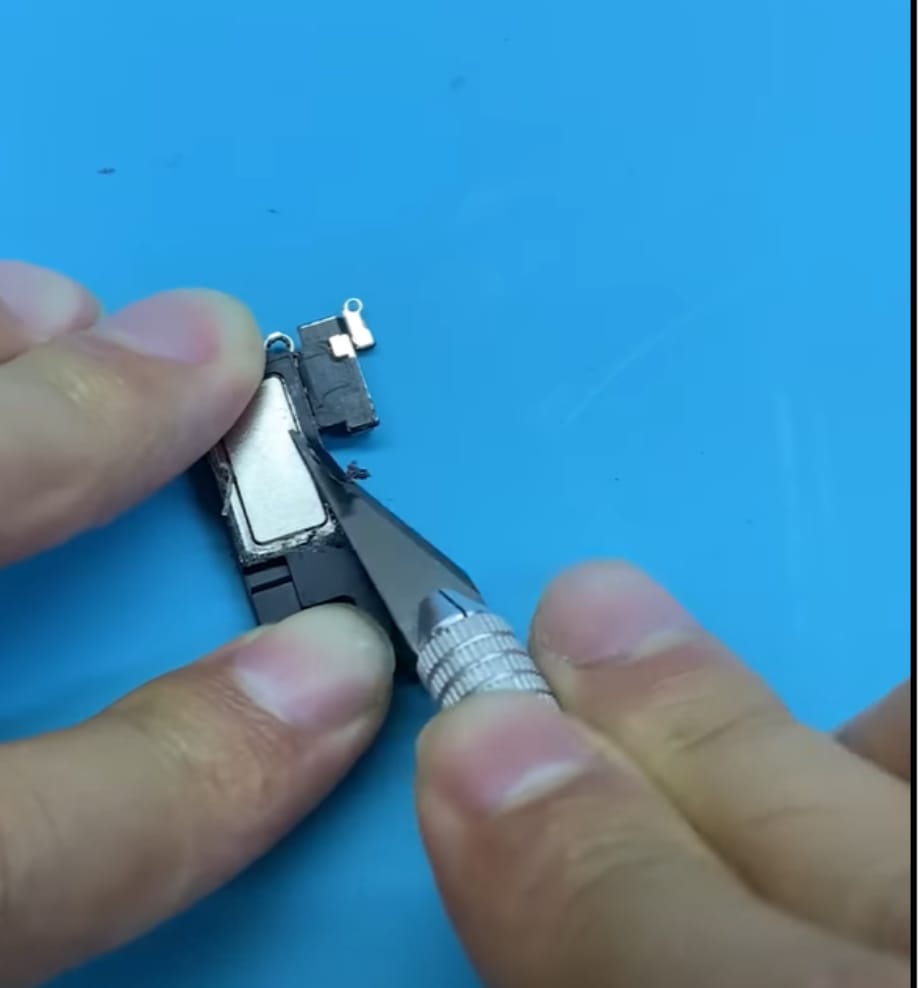
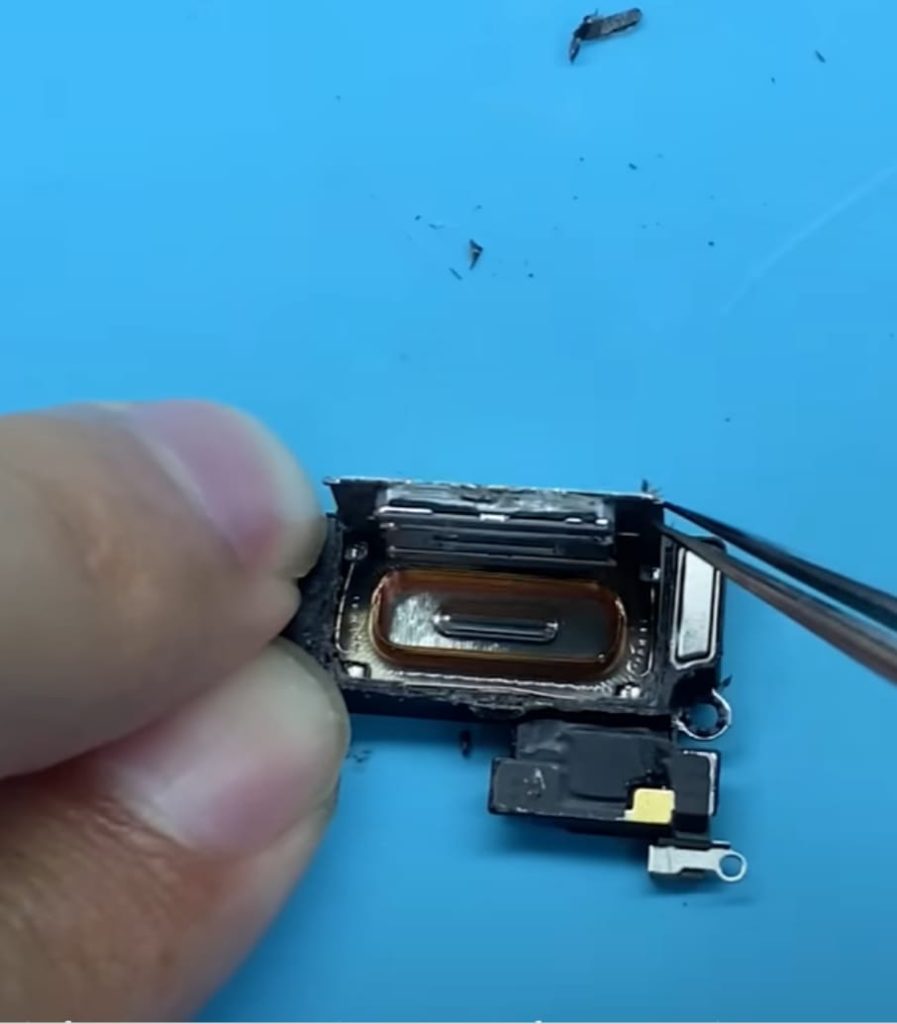
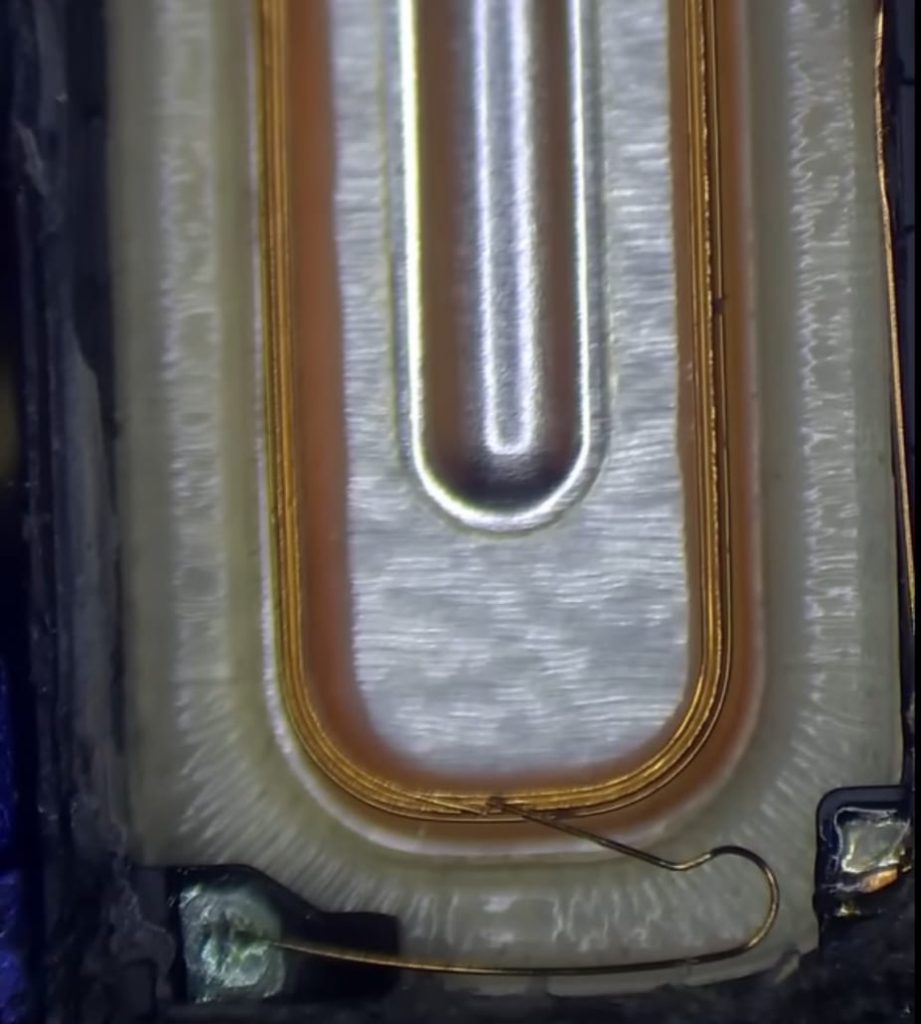
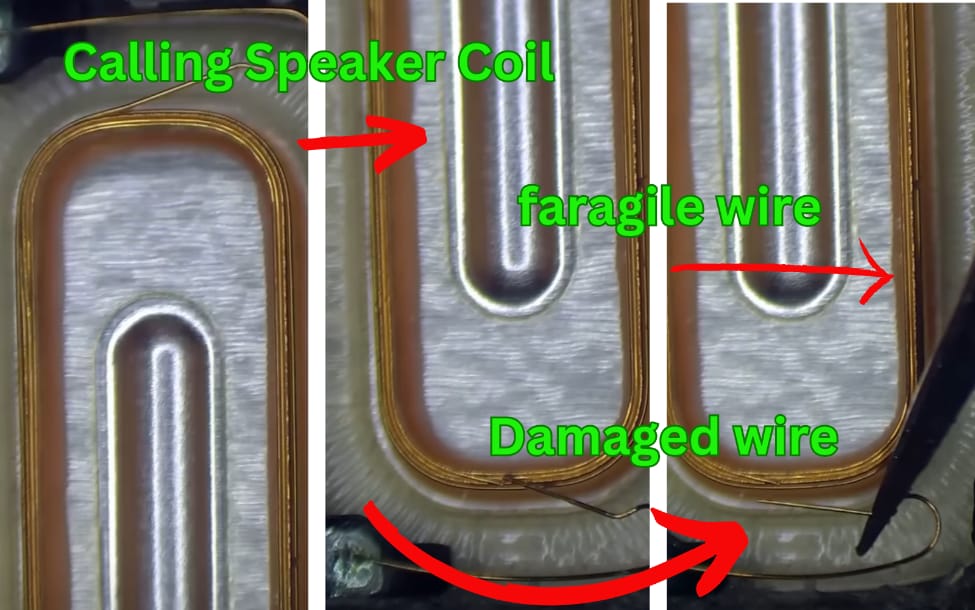
As you know the calling speaker of the iPhone 12 also functions as a loudspeaker when playing songs or media. Due to excessive vibration the tiny wire inside the calling speaker coil can break. You have two options you can either replace the calling speaker of the iPhone 12 or repair it.
● Replacing iPhone 12 Calling Speaker
Here is the step-by-step guide to help you replace the iPhone 12 calling speaker.
Step 1
Power off the iPhone 12 for secure replacement.
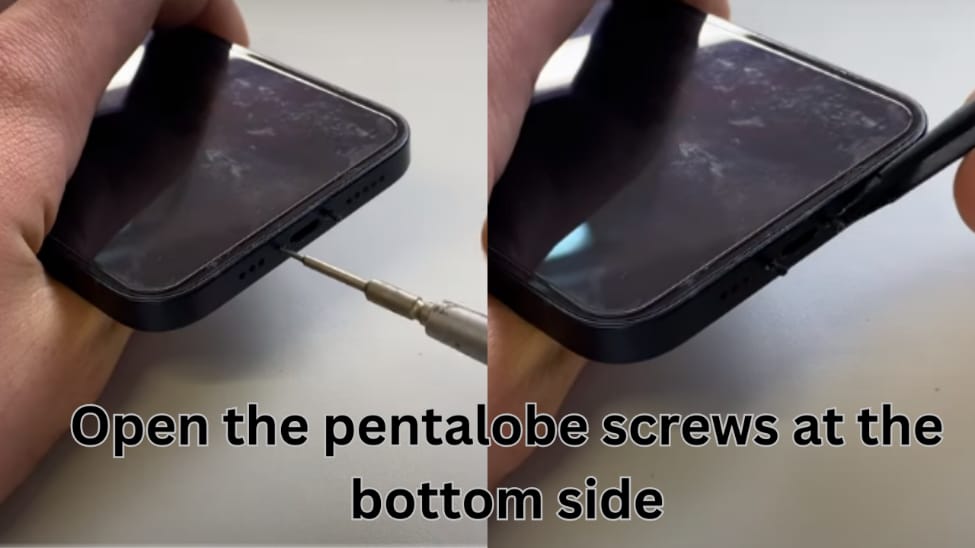
Step 2
Give heat to the front side of the iPhone. And open the pentalobe screws at the bottom side of the iPhone 12.
Step 3
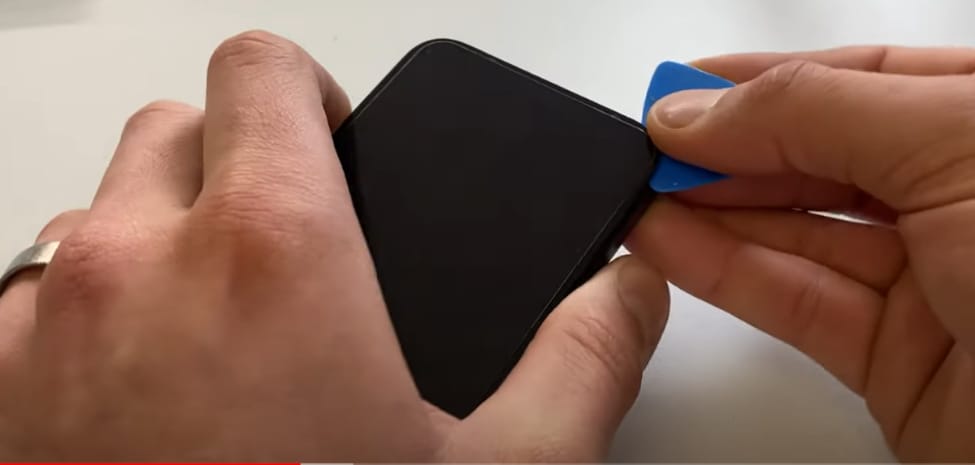
Insert an opening pick into the screen of the iPhone 12 and move it around the phone to open the phone for calling speaker replacement.
Note: The left edge of the iPhone 12 has delicate cables. So don’t insert the opening tool there to avoid damage.
Step 3
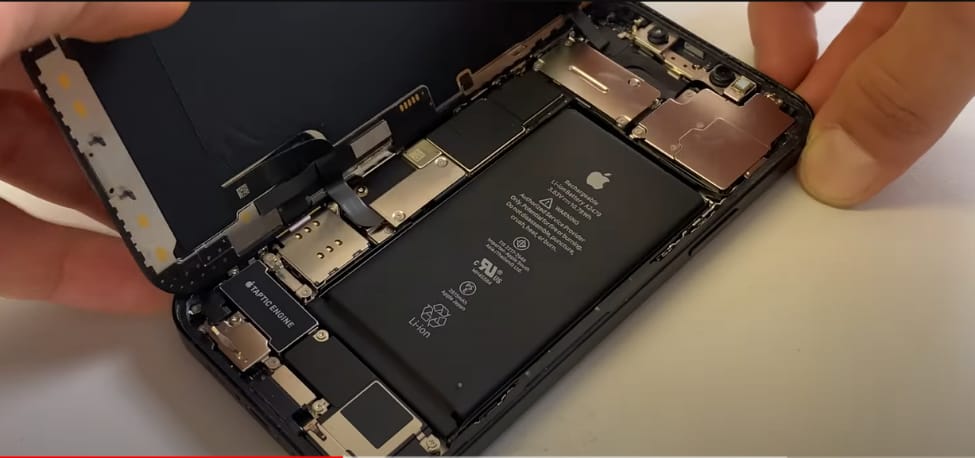
From the right edge of the iPhone you can open up the display. Don’t try to separate the entire display. There are several fragile ribbon cables still connected.
Step 4
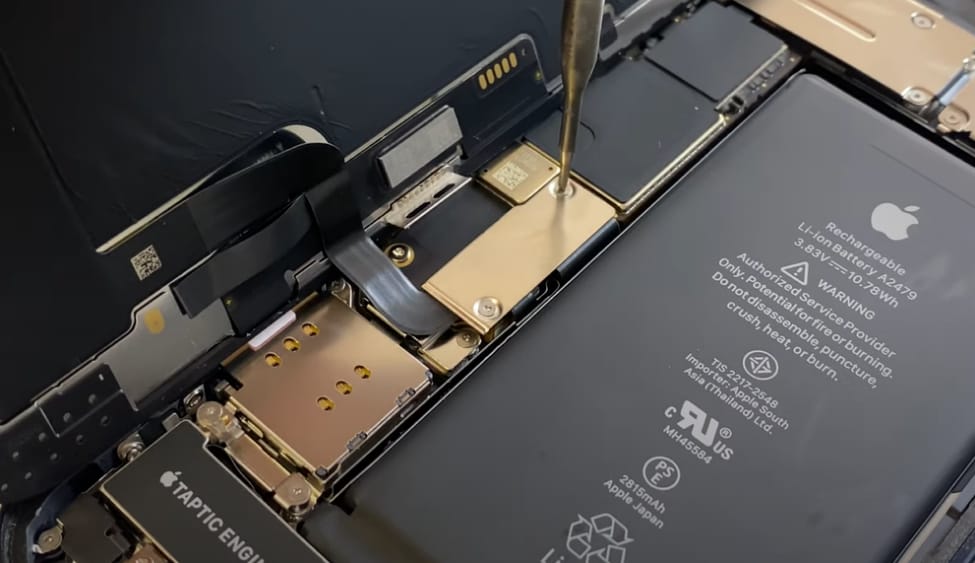
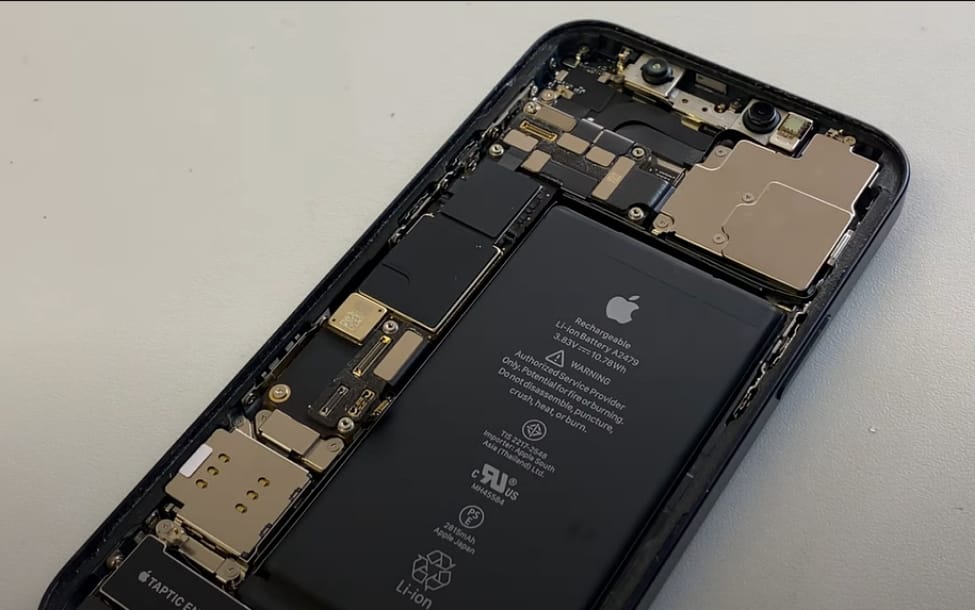
Now open the screws of the cover that secure the display and battery connectors.
Step 5
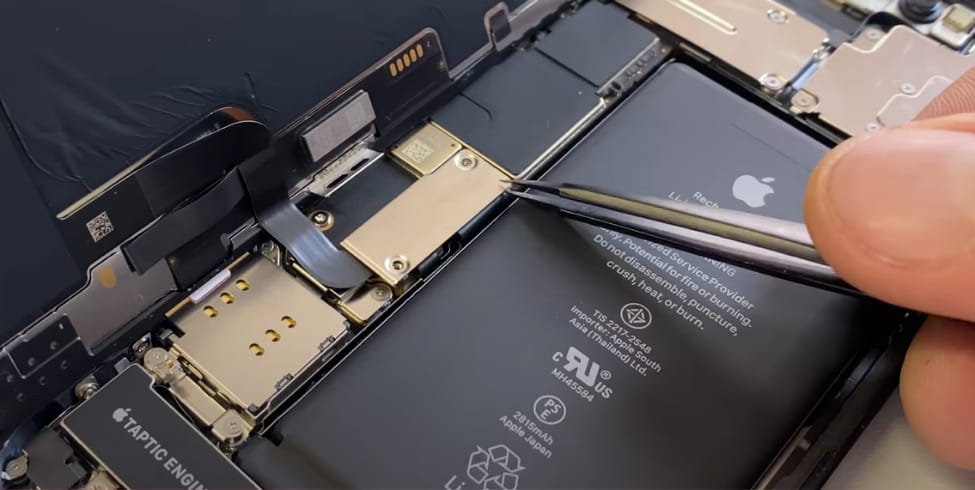
After removing the cover it’s time to disconnect the battery and display connectors.
Step 6
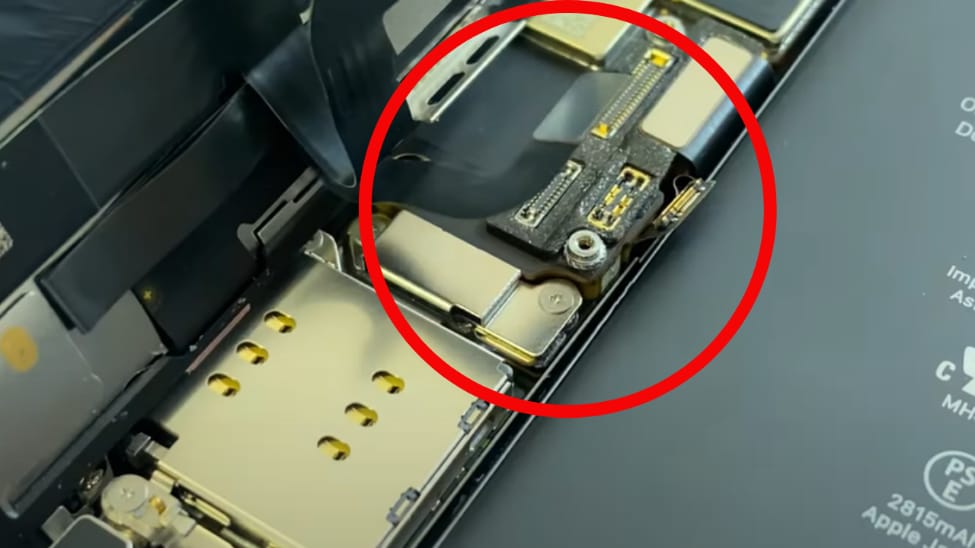
Now remove the screws of the sensor’s connector’s cover and then remove it.
Step 7
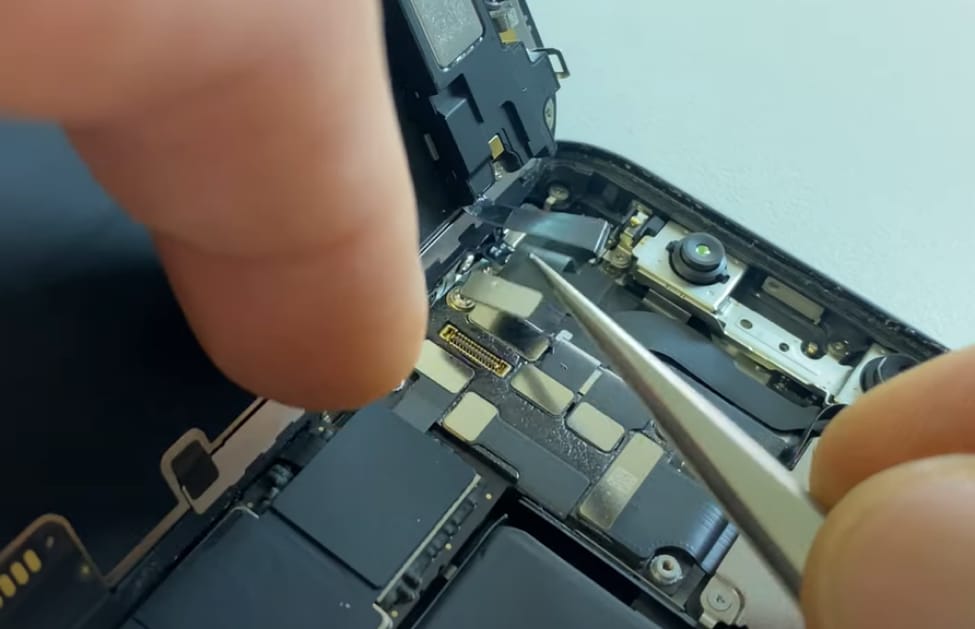
It’s time to remove the front sensor assembly cable connector. This action will allow you to separate the display assembly of the iPhone 12.
Step 8
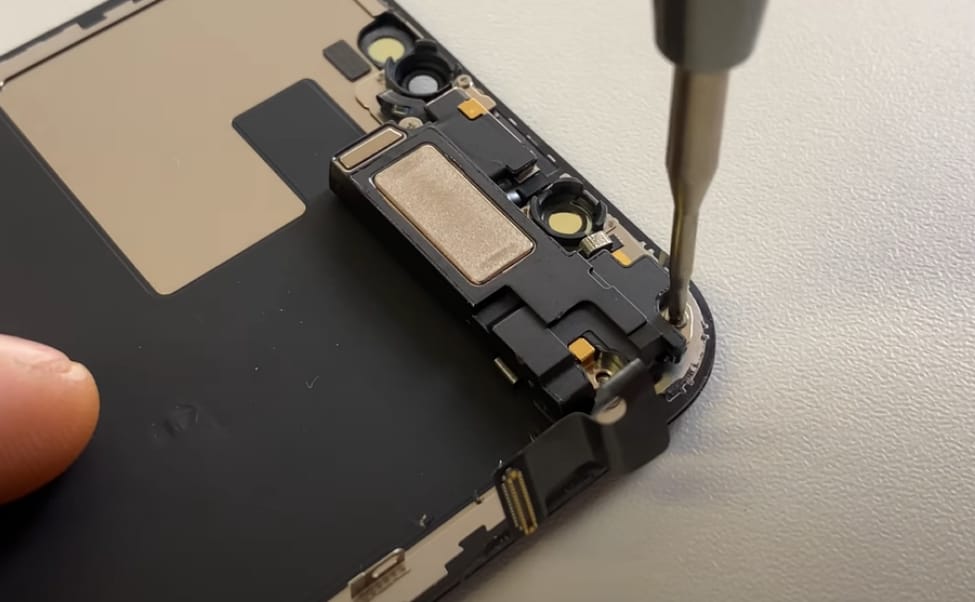
Remove 4 screws located at the top right corner of the iPhone 12 display assembly.
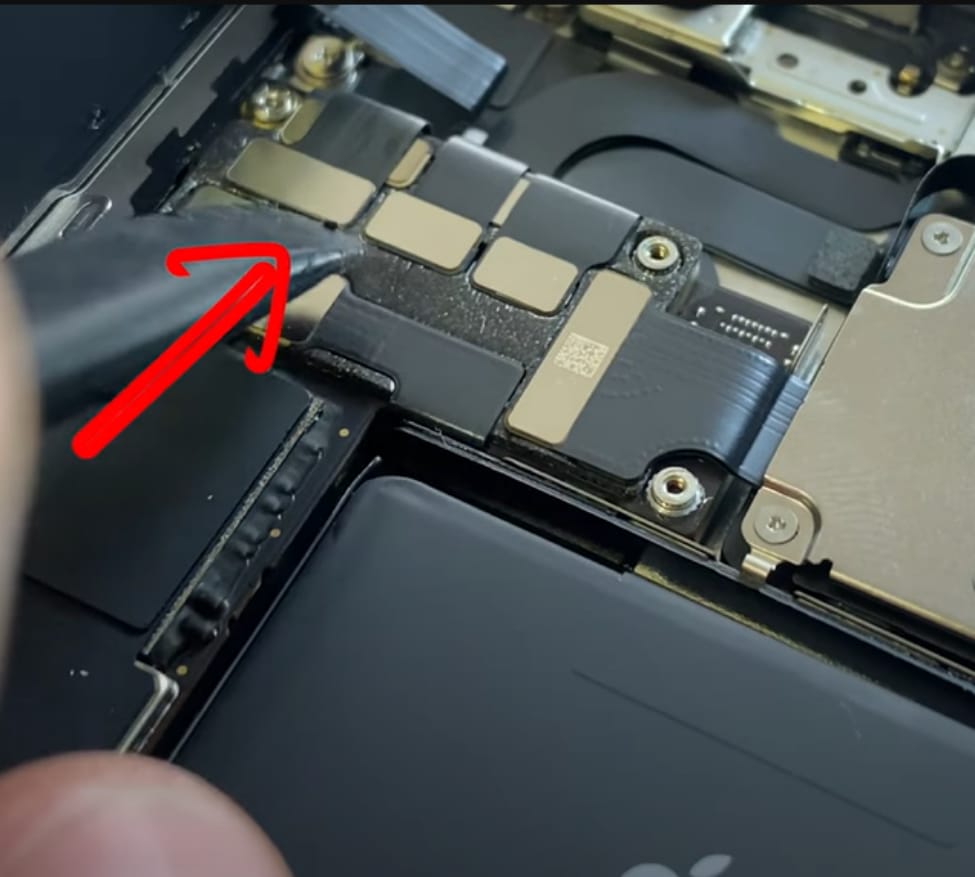
The calling speaker is slightly adhering to its place. You can give it heat to pry up.
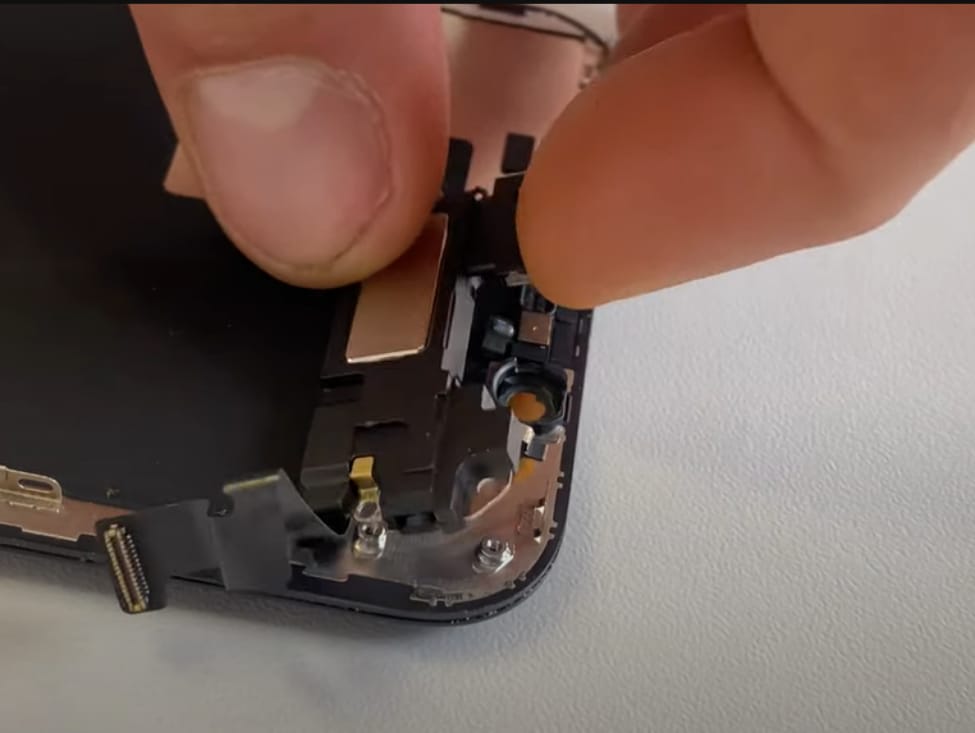
Gently use a spudger to lift the top edge of the speaker.
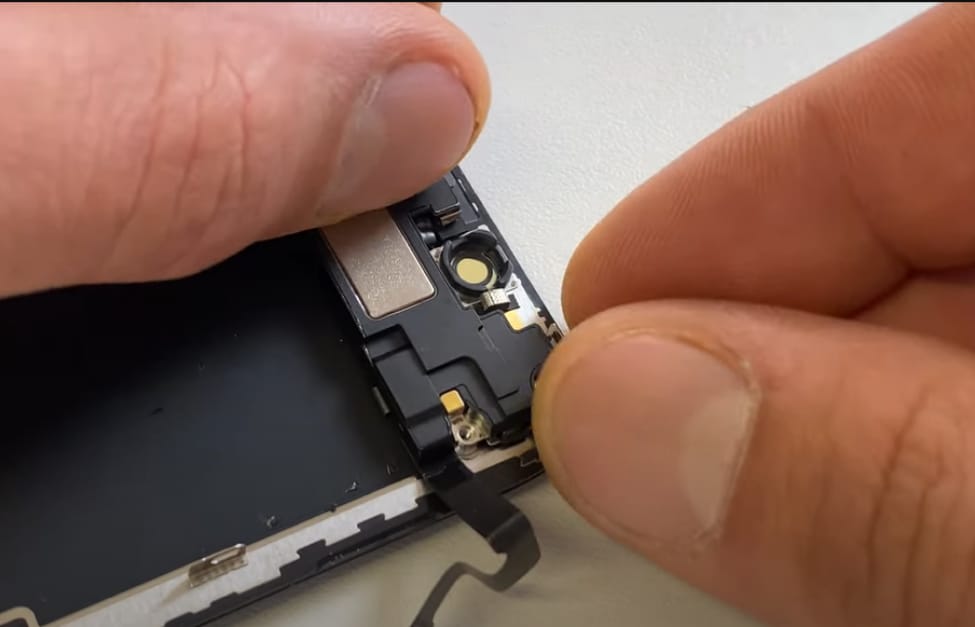
Flip the speaker assembly downwards and away from the top edge of the display.
Avoid putting too much pressure on the fragile ribbon cable that keeps the speaker attached to the phone.
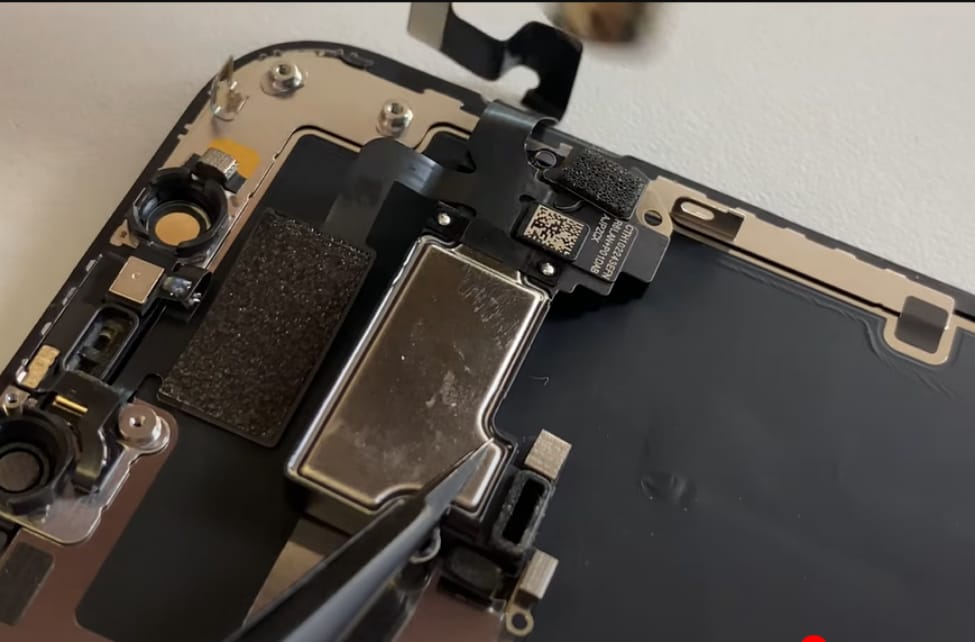
Step 9
Take out the earpiece speaker and front sensor assembly.
● Installing New Original iPhone 12 Calling Speaker
Step 10
Install a new Calling speaker. Carefully adjust it in its place and securely joint the connection.
Step 11
When reassembling the parts double-check the position of the black plastic module containing these parts.
Step12
Rejoint the ribbon cable connector and put back their cover by properly tightening the screws.
Step 13
Switch on the phone after assembling all the components and switch on the iPhone 12. now check the new calling speaker.
● How to Repair iPhone 12 Calling Speaker
If you want to repair a faulty calling speaker these steps can help you. Follow these steps.
Step 1
Inspect for Damage
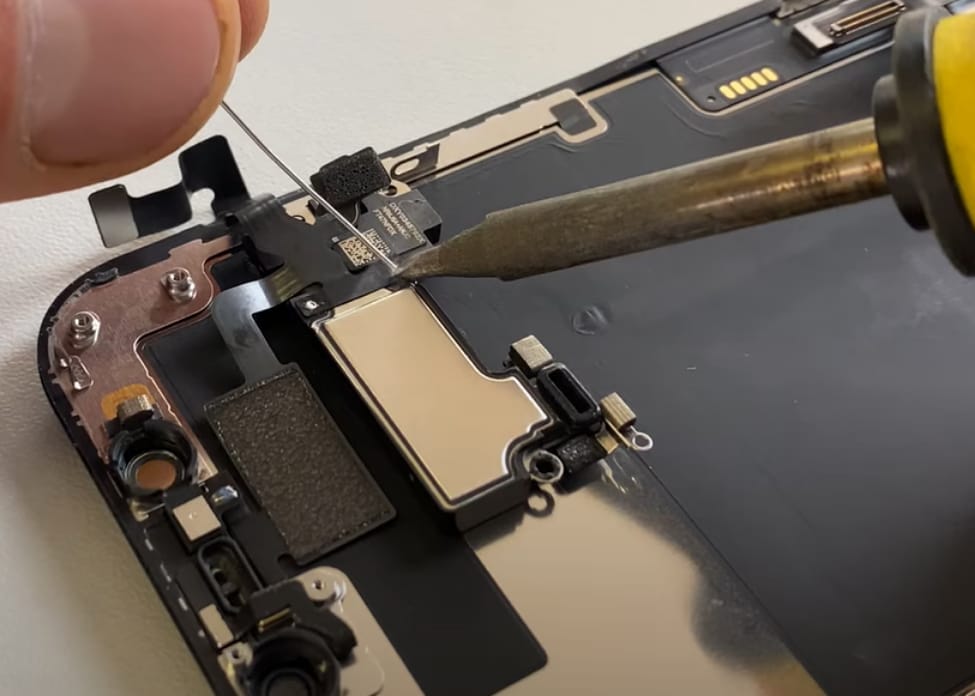
Examine the calling speaker through the microscope and surrounding area for any visible damage or loose connections. Sometimes a tiny wire under the speaker coil may be broken or damaged leading to the iPhone 12 audio issue.
Step 2
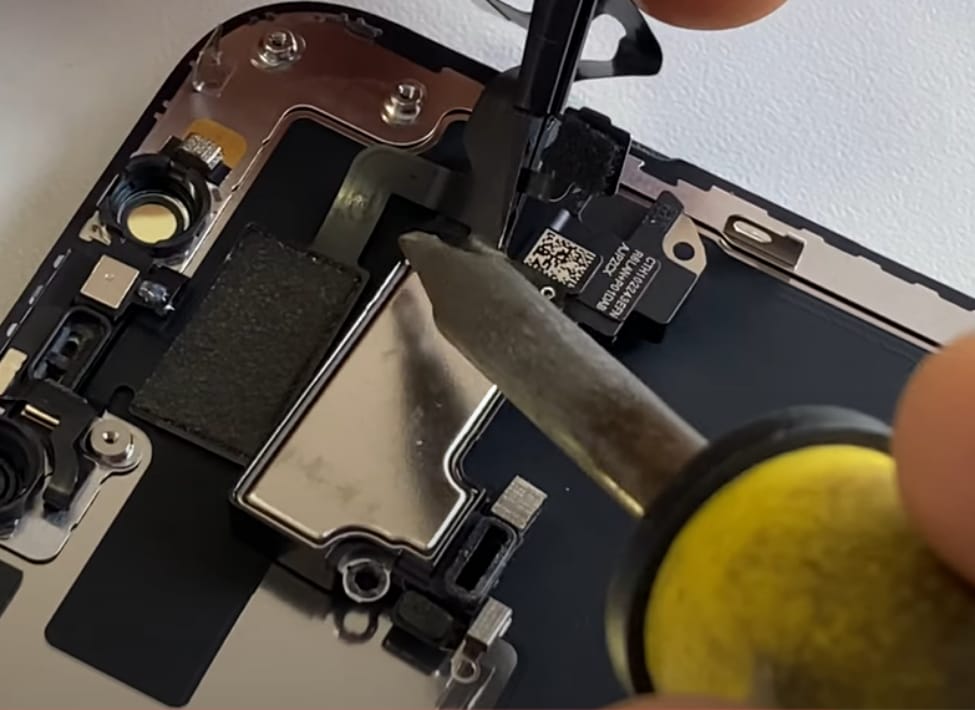
Repair the Tiny Wire
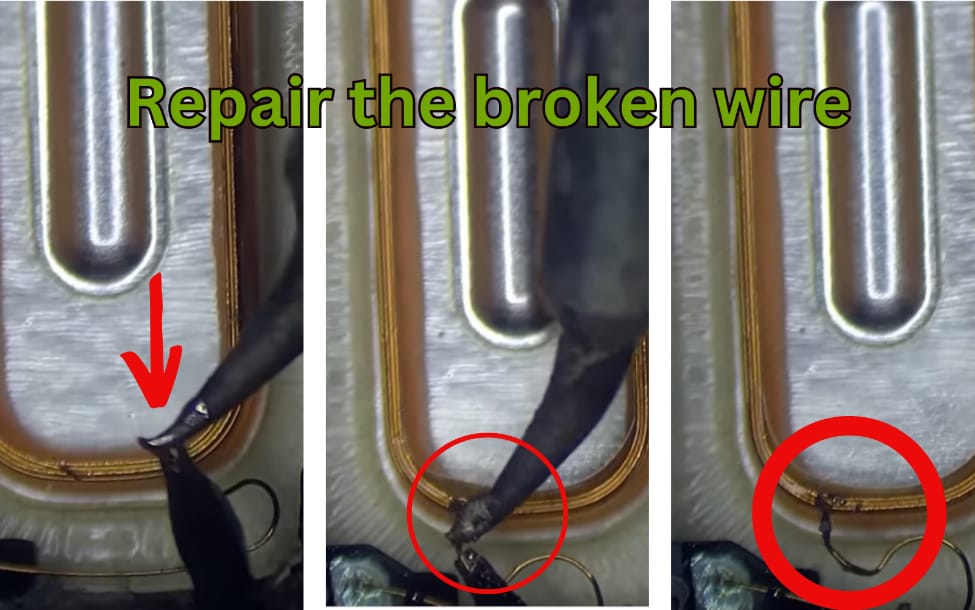
If you find a broken wire carefully use the tweezers to reattach it.
Inspect the wire to identify where it is broken and gently solder it back into place to restore the connection.
Step 3
Reassemble and Test
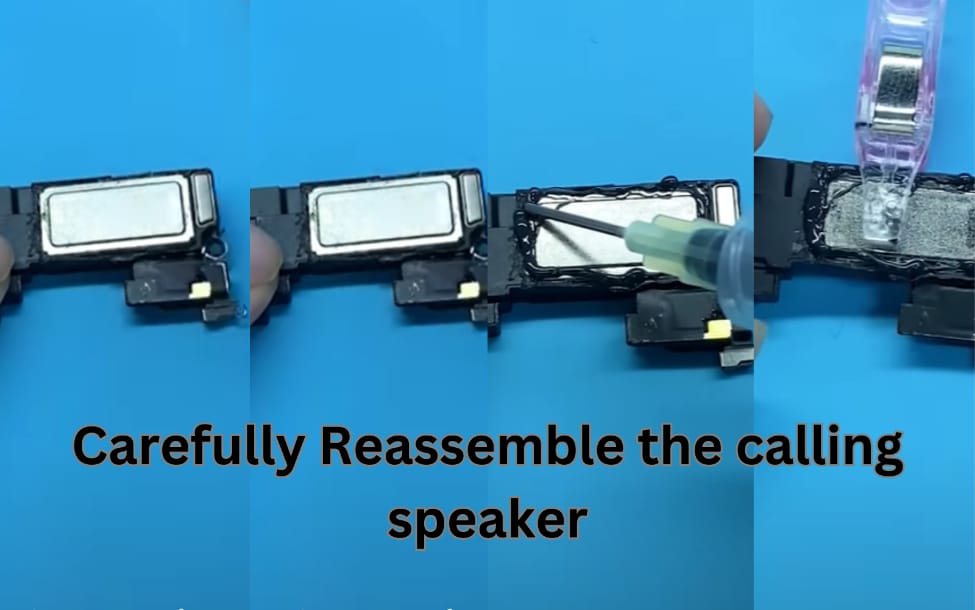
Once the repair is complete reassemble your iPhone 12 in reverse order. Ensure all screws are tightly secured and the display fits snugly. Power on your phone and make a test call to check if the calling speaker is functioning correctly.
Note: If you’re uncomfortable with soldering or handling delicate components it’s best to seek professional help from an authorized repair service like Screenfixed or an Apple Store. Attempting complex repairs without the right expertise can lead to further damage.
iPhone 12 Microphone Issue
If the microphone on your iPhone 12 causes communication problems then worry not! We have two effective solutions to restore your microphone to its clear and crisp functionality. Let’s explore it.
● Clean the Microphone Opening for Settling iPhone 12 Microphone Problem
● Turn off your iPhone 12.
● Use a soft dry brush to remove debris from the microphone area gently.
● Avoid liquids or compressed air to prevent microphone damage.
● Test the microphone after cleaning to check for improved sound clarity.
● Check for App Permissions
If the iPhone12 microphone issue persists then the issue might be related to app permissions. Some apps require access to your iPhone 12 microphone to function correctly. If these permissions are not enable. And it can cause iPhone 12 microphone problems with specific apps.
To check app permissions follow these steps.
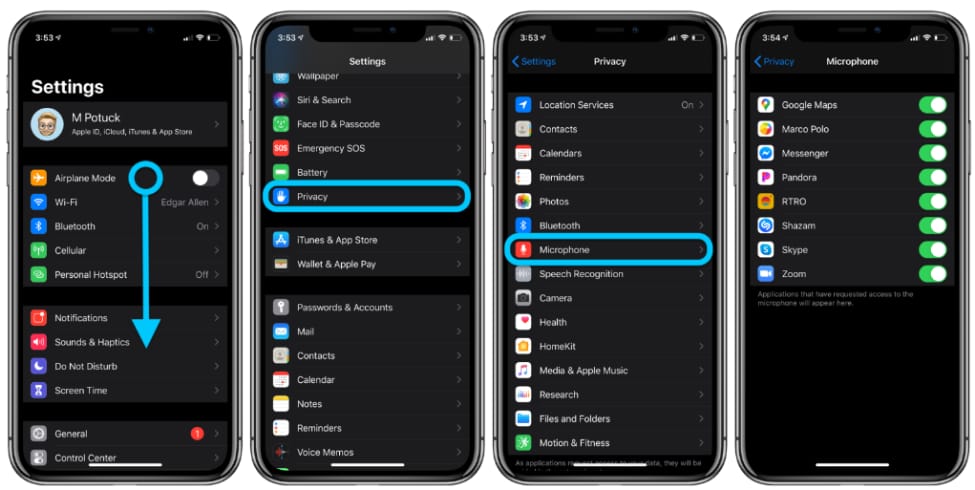
Step 1
Go to “Settings” on your iPhone 12.
Step 2
Scroll down and tap on “Privacy.”
Step 3
Select “Microphone.”
Step 4
Review the list of apps and ensure the toggle switch is enabled for apps that require microphone access.
Following these simple yet powerful steps to clean the microphone opening and check app permissions you can pave the way for flawless audio recordings and clear phone calls on your iPhone 12.
Fixing of iPhone 12 Board Issue
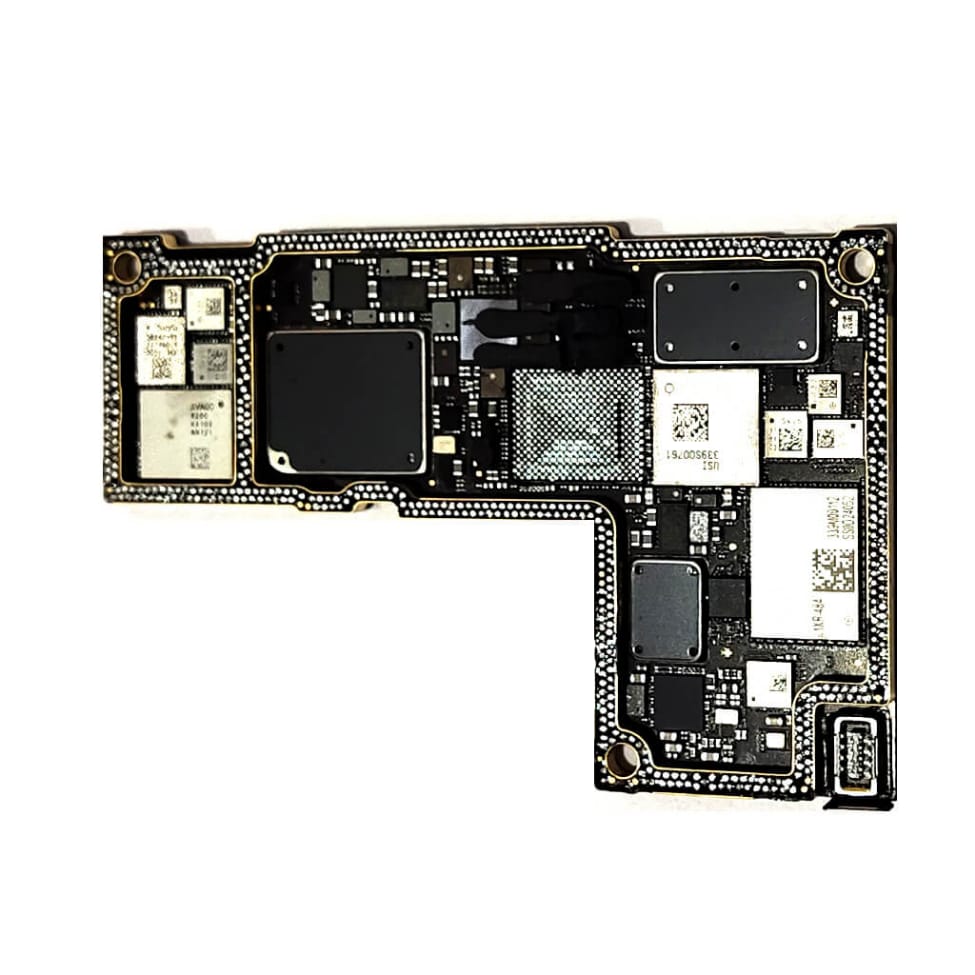
If you’ve tried all the troubleshooting steps and the audio problem on your iPhone 12 persists it might indicate a board-related issue. In such cases seeking assistance from Apple Support is the wisest course of action. Let’s explore why contacting Apple Support is essential and what you can expect when facing a board issue.
● Contact Apple Support
Apple Support is your gateway to professional assistance for iPhone 12 issues especially those related to the internal board. By contacting their expert team you can receive personalized guidance and solutions tailored to your specific problem.
When you contact Apple Support be prepared to provide detailed information about the audio problem you’re experiencing. They might ask you to perform specific diagnostics or tests to assess the extent of the board issue.
● Professional Repairs
1. If the board issue requires complex repairs they will direct you to authorized service providers. Such as screen fixed
2. Under warranty Apple might replace the phone for free if it’s a manufacturing defect.
3. Avoid attempting board-related fixes without the expertise to prevent further damage.
4. Rely on Apple Support and authorized service providers like SceenFixed for the best outcome.
Conclusion
We’ve provided practical solutions to fix iPhone 12 audio issues. The covering of loudspeaker microphone and calling speaker problems make this guide helpful.
Remember to maintain your phone correctly and seek professional help for complex board-related issues. With our step-by-step guide you can bring back smooth audio performance.
Your iPhone 12 is a powerful phone and most audio problems can be resolved with the right approach. Take up the journey of troubleshooting and fixing. Because you know that enjoyable sound experiences await you with a well-maintained phone!
